¶ Overview
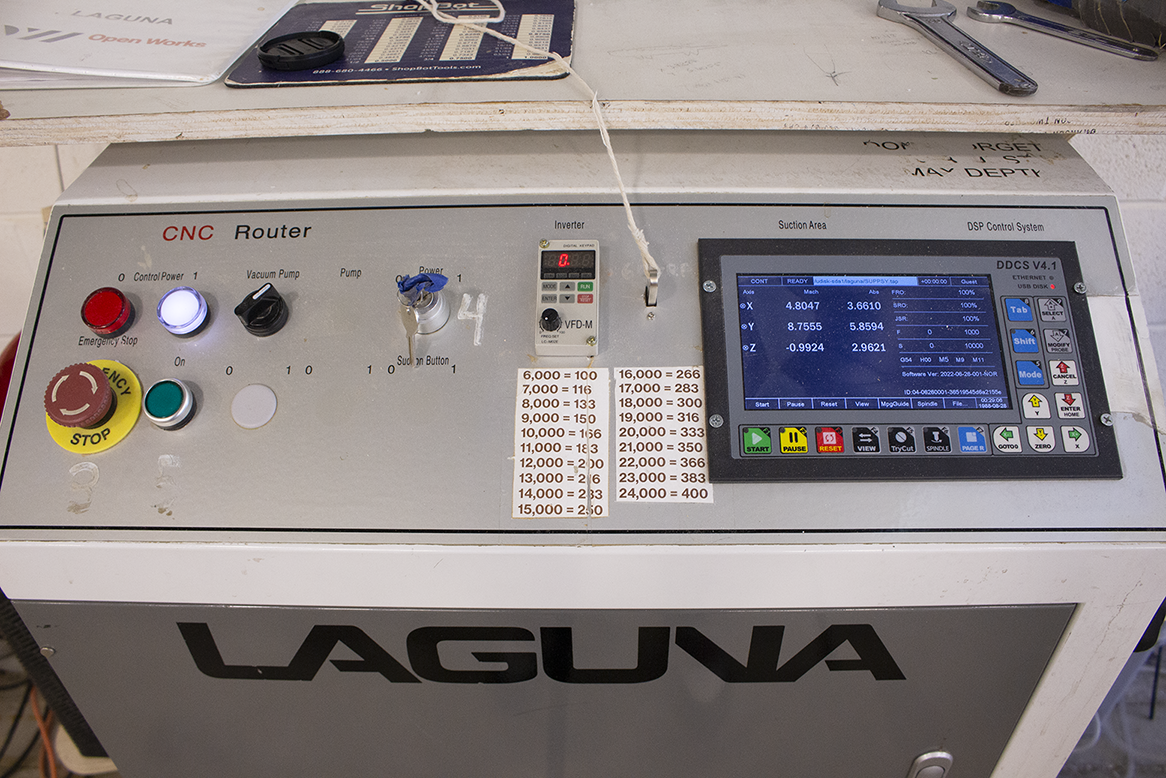
Instructions to use the controller for the Laguna CNC Router.
¶ Skills/Class Required
A membership or day pass is required to access Digital Fabrication. The following Shop Safety Class is required to access the Laguna Swift Series CNC Router:
¶ Machine Reservations
You can make machine reservations in the following ways:
Click to expand
- In person at the front desk.
- Reserve a machine any time through our Mind Body Portal.
- Call the front desk during business hours at (410) 862-0424.
- Email us at frontdesk@openworksbmore.com. Please include your name, the machine you'd like to reserve, and the date(s) and times of the reservation(s).
¶ Before You Start
Personal Protective Equipment (PPE):
Sturdy, close-toed shoes must be worn at all times.
Long hair, jewelry, and loose clothing must be tied back.
Safety glasses and earmuffs must be worn while machines are running.
A dust mask or a NIOSH certified respirator is recommended.
For more information on shop safety visit Digital Fabrication under "Safety."
¶ Time to complete
- Variable.
¶ Tools Required
- Laguna Swift Series CNC Router.
- Flash drive.
¶ Materials Required
- Workpiece.
- Visit Laguna to view materials compatible with the Laguna Swift Series CNC Router.
¶ Step-by-Step Guides
¶ Previous Steps
¶ The Controller
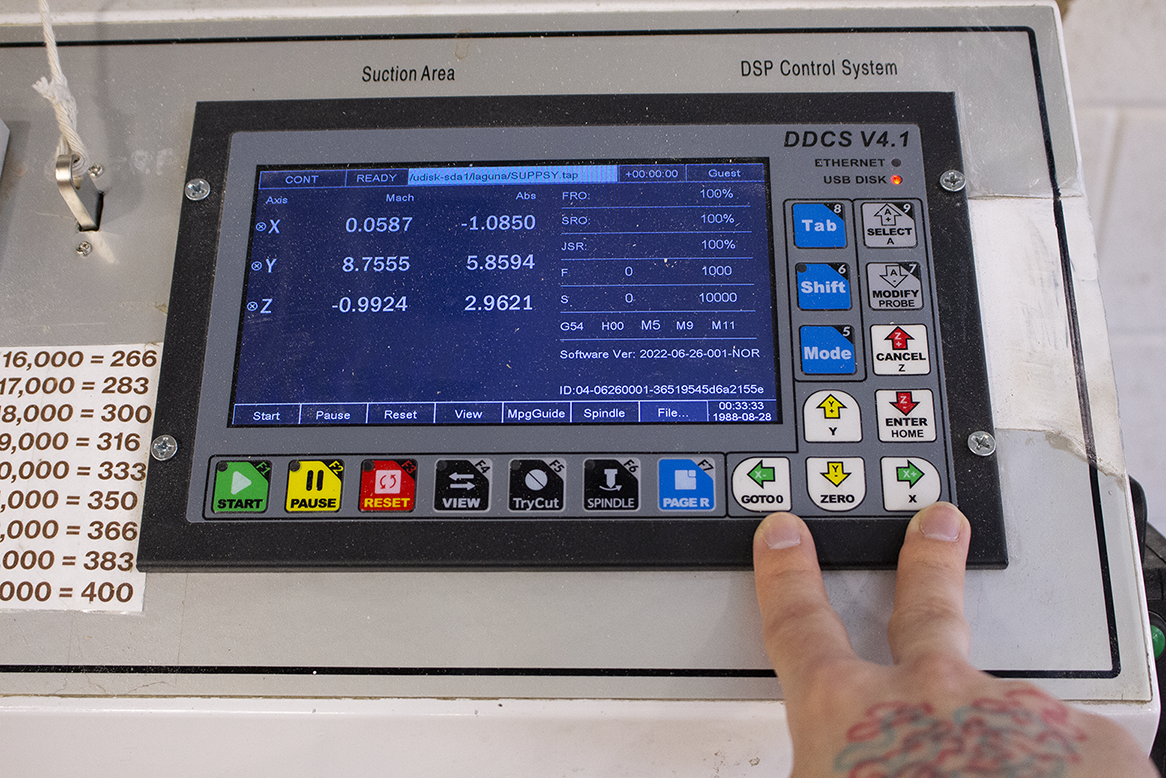
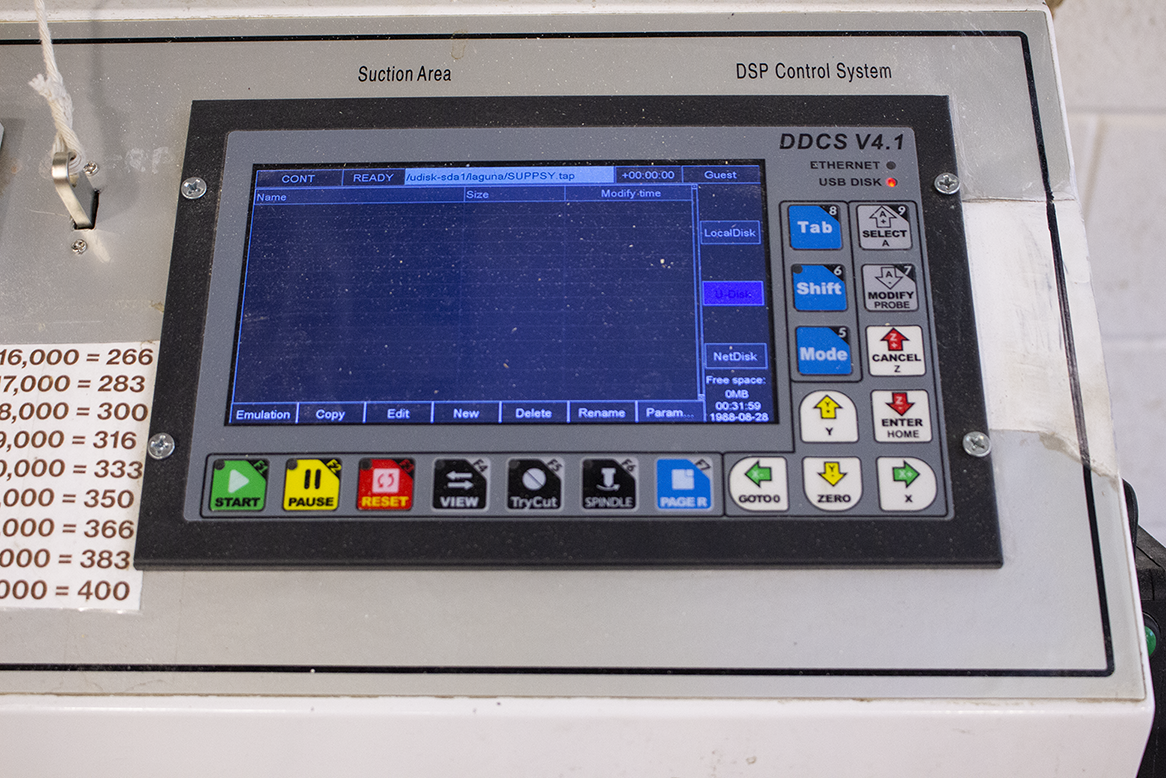
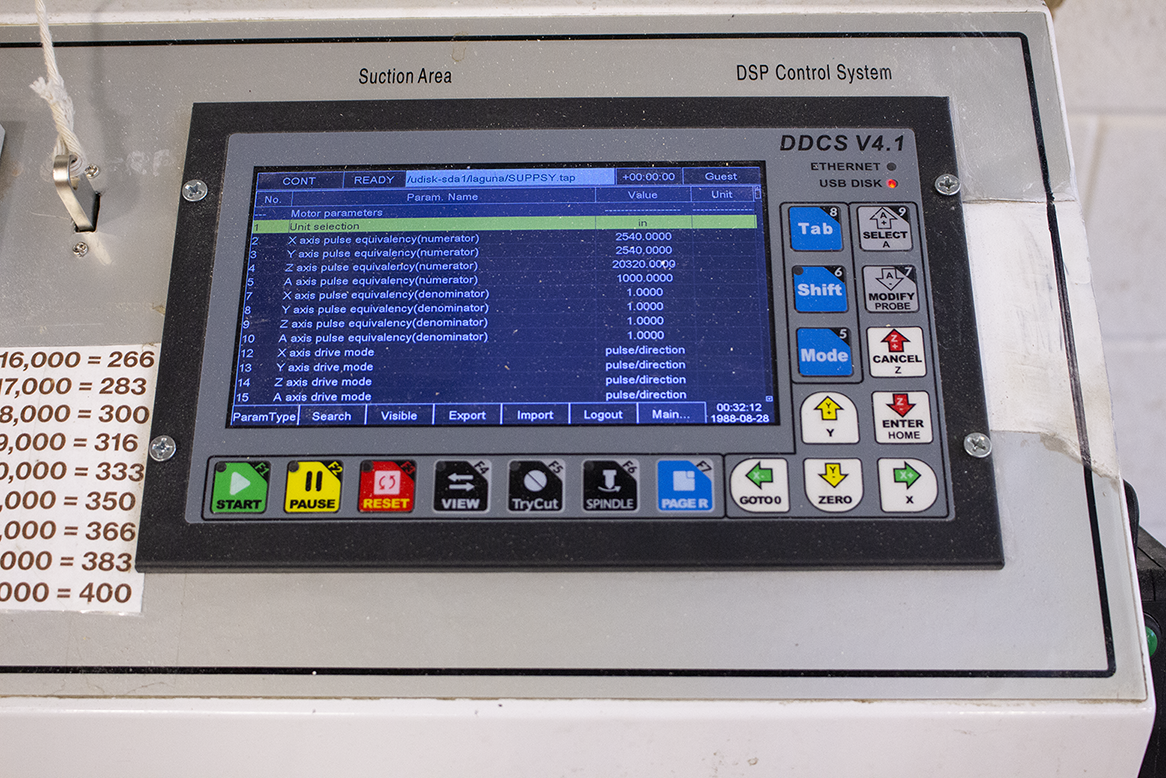
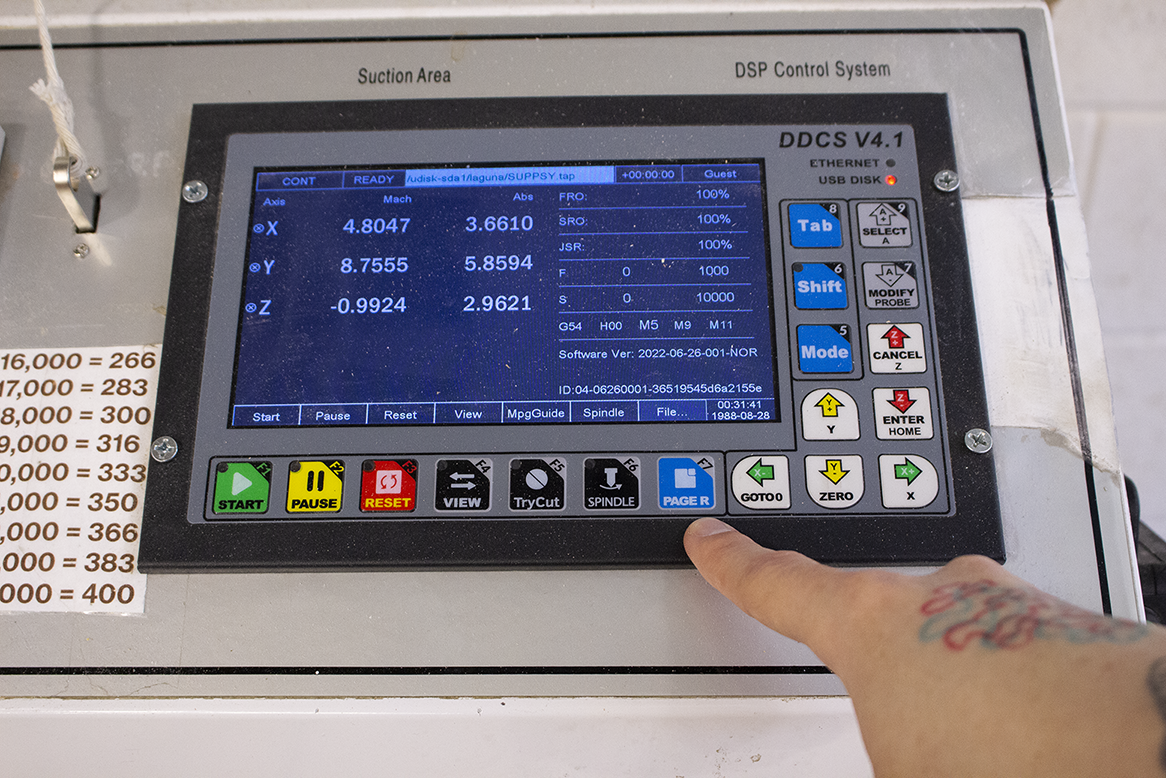
The controller is a button controlled system. It has three pages.
| "Main" | "Files" | "Parameters" |
|---|---|---|
 |
 |
 |
-
You can switch between these pages by pressing the blue “Page R” button.
-
For normal operation, you will only need "Main" and "Files."
Familiarize yourself with all the buttons on the controller, they’re referenced frequently in the rest of this guide.
-
From the main page, with the machine ready, the green, yellow, and red arrows allow you to quickly move the gantry without using the pendant.

-
Within a menu, the arrows allow you to navigate up, down, left, and right. They also provide a "Cancel" and "Enter" button.
Some buttons on the controller will have secondary functions, such as entering numbers or renaming a file. These functions appear directly above the buttons when they are available.
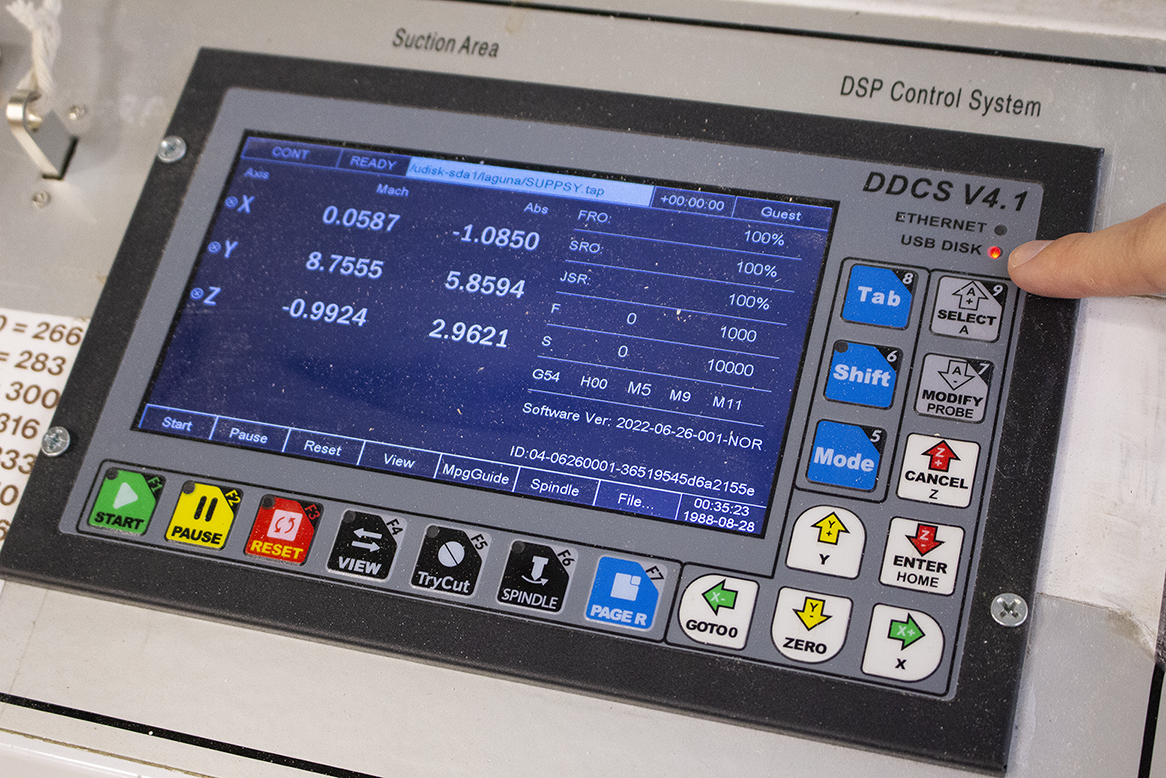
- There are two status lights at the top right of the controller.
- When the "USB DISK" light is illuminated red your disk is inserted properly and ready to read.
¶ The Pendant
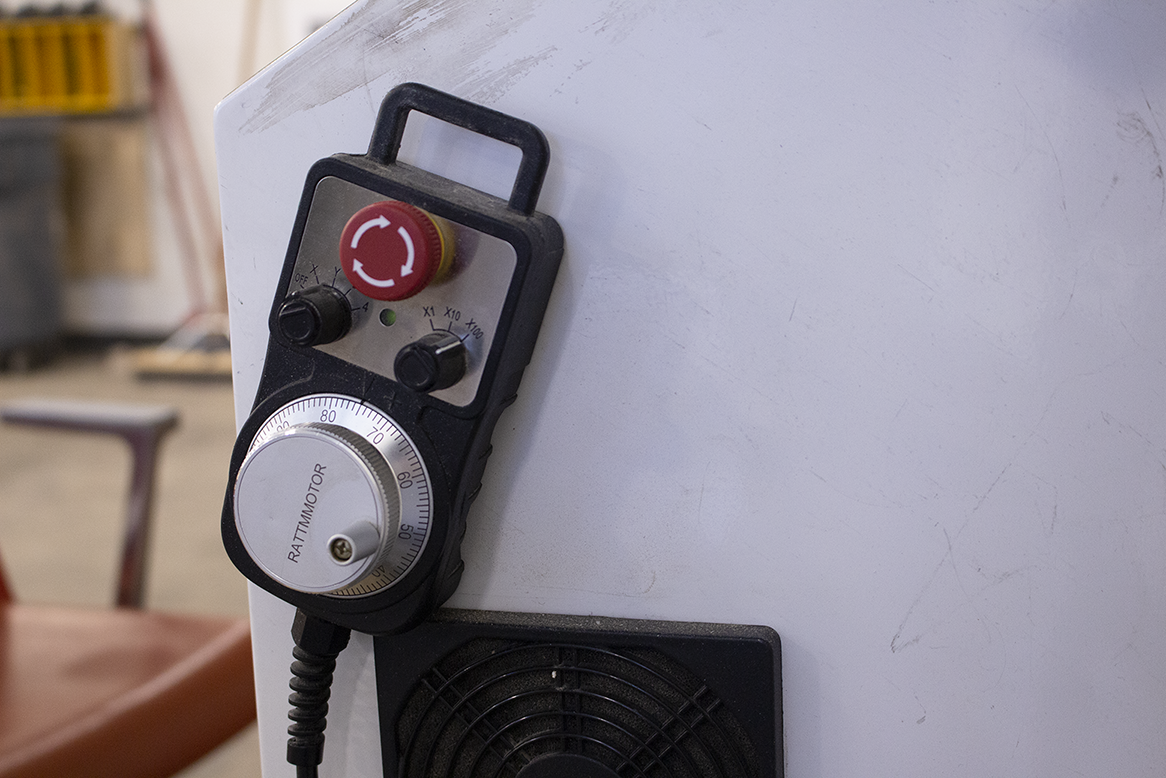
The pendant (also known as an MPG or a handwheel) is used to quickly and precisely move the machine around under the control of the user.
You’ll find the pendant hanging to the right of the control cabinet (or magnetically stuck to it).
¶ Parts of the pendant:
Click to expand
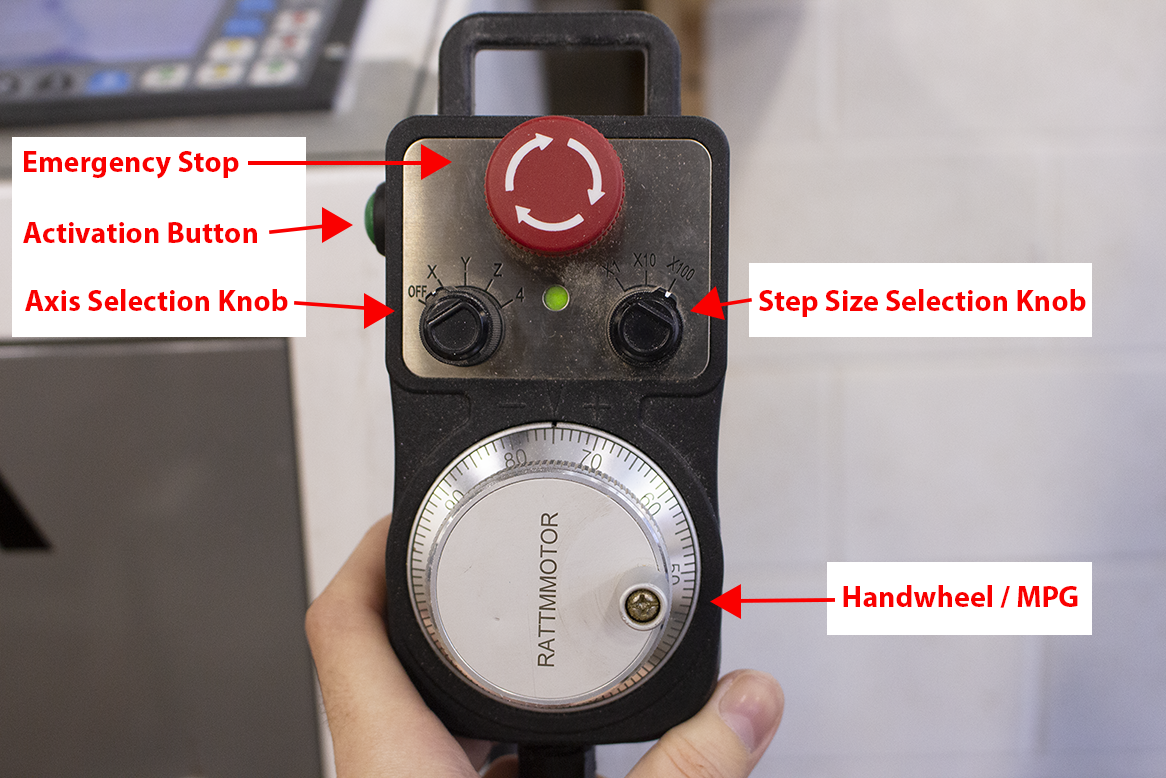
Emergency stop: This acts the exact same as the estop on the control cabinet. Press it if something goes wrong, and don’t hesitate.
Axis selection knob: This will select which axis the handwheel will move.
Step size selection knob: This dictates how fast the handwheel will move the selected axis
1x mode is used for extremely small and precise moves.
10x is used for general positioning.
100x is ONLY for getting the machine to move quickly to the general area you want to end up in.
Handwheel/MPG: This will move the axis you select with the axis knob, in the increment that you have selected with the step size knob. You must be holding the activation button to move with the handwheel.
Activation button: The MPG will not move the machine at all unless this button is being actively held down. This is an essential feature, and cannot be disabled.
All features of the main display will be disabled while the activation button is being held down.
¶ Navigating the Main Menu
-
The main menu can be accessed by pressing the “Shift” button when the "Main" page is active.
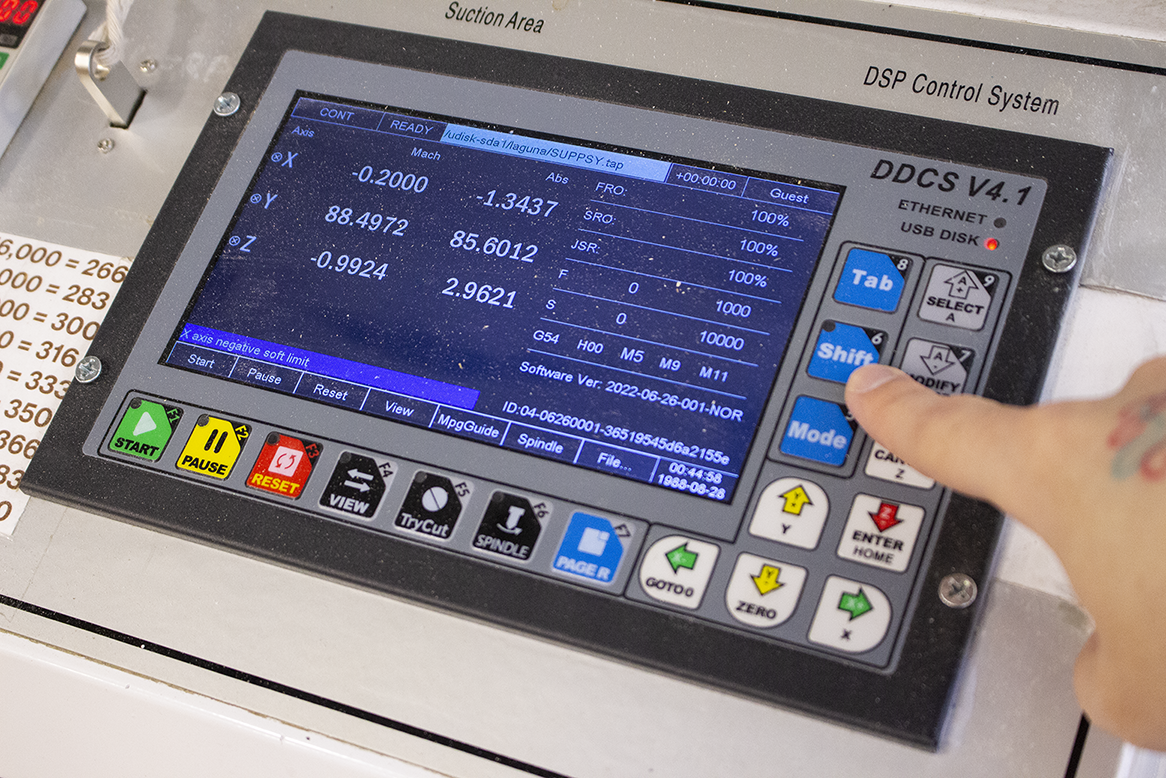
-
Navigate with the green "X +/-" and yellow "Y +/-" arrow keys.
-
The red “Z-” button acts as the enter button, and the red “Z+” as the cancel button.
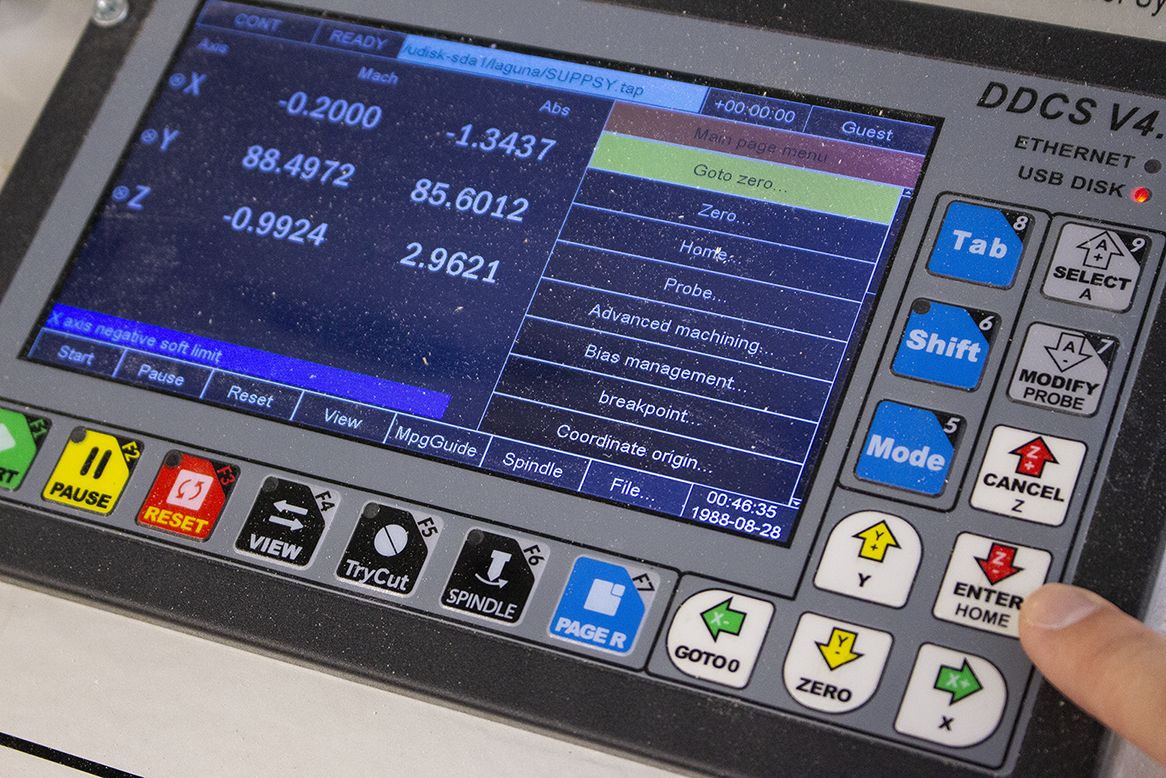
Selecting "Z+" will back out of the current menu.
If you are not within a navigable menu these buttons will move the gantry and the YZ car.
Within the shift menu, the functions we care about are as follows:
¶ Go to Zero: Return to Origin
This feature is not useful until absolute zero/origin/home has been set.
-
Select "Go to Zero" to open a submenu, with all of the different kinds of zero positions you can travel to.
-
Select "all axes goto zero." to send all axes to zero.
-
This will first move the Z axis out of the way to its highest position (machine coordinate Z = 0), then travel to the absolute zero for the X and Y axes.
¶ Zero: Set Origin
-
Select "Zero: Set origin" to open the submenu. This menu is used to teach the machine where its zero position is, also known as the origin.
-
You may now zero each axis individually (useful for using something like an edge finder), all axes at once, or just the X and Y axes. For this demo we will just zero the X and Y axes.
-
Move the machine to the corner of your workpiece that corresponds to the zero position in the CAM program, then zero the X and Y axes.
¶ Home the Machine
Homing the machine essentially reminds the machine where it’s resting position is. If it has not been homed since powering on, some features will be disabled until homing.
-
Return to the "Home" menu.
-
Home all three axes.
Each axis will return to its resting position.
¶ Probe: Set tool height
This menu sets the Z zero position, also sometimes referred to as the Tool Height.
-
Select "floating probing."
Do NOT set your Z zero height without your bit installed. Your coordinates will not be correct.
-
Remove the small brass probe disk from its orange holder on the front of the machine.
-
Use the pendant to position the bit directly above the spoilboard or the top of your material.
You will chose either the spoilboard or the top of your workpiece based on the settings in your file.
-
Place the brass probe disk directly under the tool, with the screw facing up.
-
In order to probe, hold down the Enter (Z-) button.
The Z axis will slowly lower the tool until it makes contact with the brass disk, then it will quickly back off a few inches.
You have succesfully set your Z zero height!
¶ Navigating The Main Page

- When the main page is active, you will see two sets of coordinates, machine (Mach) coordinates on the left, and absolute (Abs) on the right.
The machine coordinates describe where the spindle is relative to the home position, and the absolute coordinates describe where it is relative to the user-defined Zero position.
- On the right side of the screen are some common parameters, like the current feedrate, feed/speed overrides, and spindle speed.
FRO (feedrate override) and SRO (spindle rate override) can be changed while the machine is running. For more information visit How to Run a File on the Laguna CNC Router under "Live Tuning."
- At the top center of the page is the filename of the currently selected file.
¶ The Files Page
When the files mode is active, you will be greeted with a file explorer similar to a normal desktop PC.

Navigate with the green "X +/-" and yellow "Y +/-" arrow keys. The red “Z-” button acts as the enter button, and the red “Z+” as the cancel button.
If you have inserted a flash drive, the “USB DISK” indicator light should come on. If it doesn’t come on after ten seconds or so, try removing and reinserting the drive
-
Select "files and folders."
-
The files on the USB drive should display automatically when you navigate to the files page. If your files are not displating automatically, they are located under the ‘udisk-sda1’ folder.
-
To return to the previous folder, select the “..” line, which is at the top of the contents of any folder, and press 'Enter'.
-
Once you have found your file, hit ‘Enter’ to select it, and the machine will load the file and send you back to the main page.
Now you know your way around the controller, pendant, and menus!
¶ Next Steps
- Run a file on the Laguna CNC router..
- Clean up.
