¶ Introduction
Open Works has a JessEm router table. You must complete Wood Shop 2: Jointer, Planer & Router in order to start using the machine.
¶ Machine Overview
The router is an extremely versatile tool that accepts a variety of route bits to create decorative edges, dovetails, rabbets, and a variety of other channels and profiles.
| Router type | Handheld | E-Stop | Work piece size | Application |
|---|---|---|---|---|
| Router Table |  |
 |
small to medium | complex interior or exterior edges |
| Trim Router | |
|
medium to large | long edges |
| Plunge Router | |
|
medium to large | interior edges |
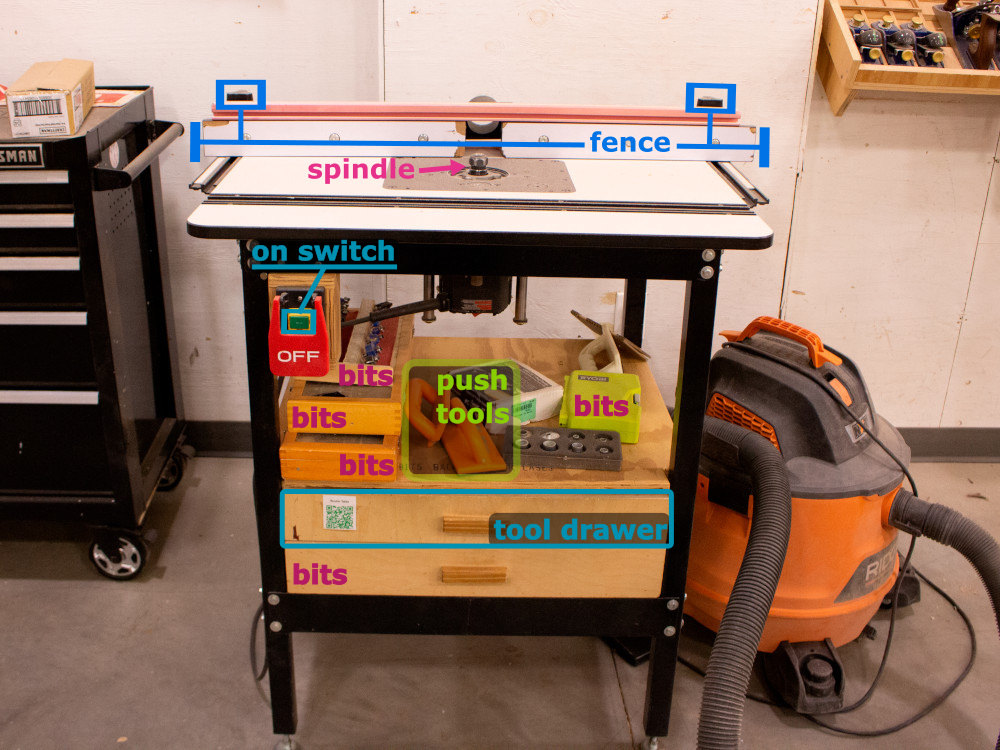
¶ Parts of the Machine
Click to see machine overview.
¶ Material Considerations
¶ Acceptable Materials
¶ Use with Caution and Proper Technique:
Always check moisture levels with the moisture meter and look for nails with the metal detector.
Reclaimed lumber.
¶ FORBIDDEN MATERIALS
DO NOT, under any circumstances, cut the following materials with the router:
¶ Safety
Safety Check:
For more information on shop safety visit Wood Shop under "Safety."
¶ Follow the "Three Points of Contact" Rule
- Hands - Keep at least one hand on the material at all times.
- Table - Keep the material flat against the table.
- Fence/Bearing - Keep the material flush against the fence/bearing.
The bit of this machine extends above the table and is unguarded. Be very careful of your fingers.
- Never force the bit or overload the router beyond the expectations of the tool.
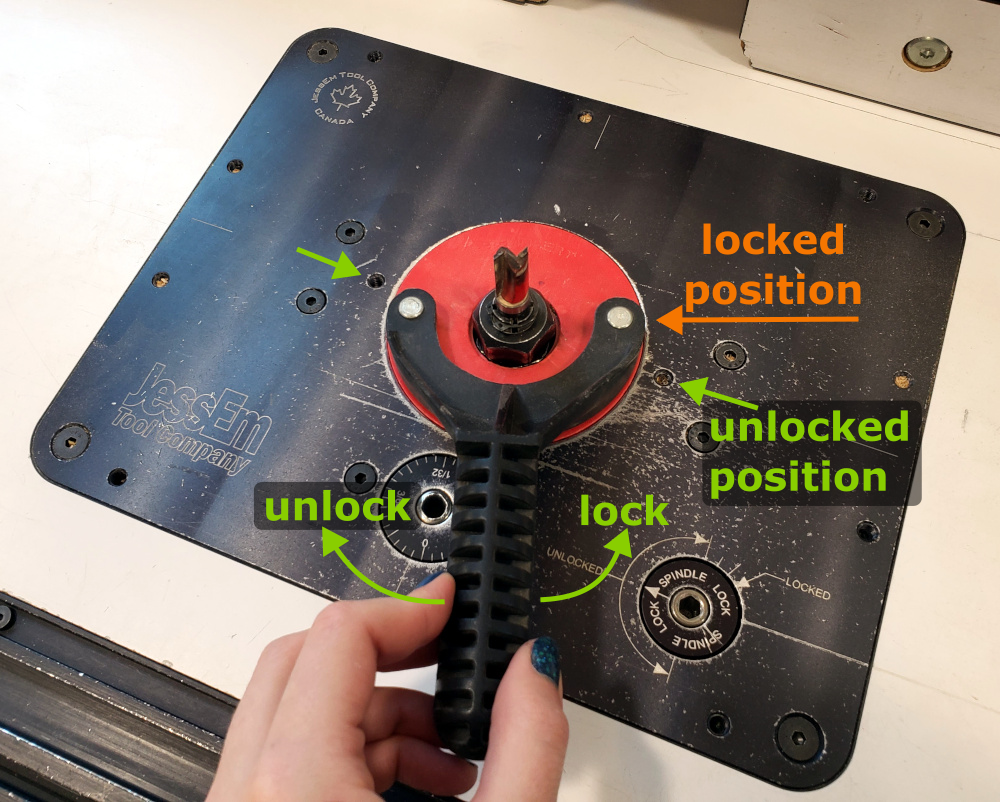
- Always make sure the fence on your router table is locked into position before each use.
- Always rout in two or more passes when large amounts of stock must be removed.
¶ Step-by-Step Guides
¶ Before You Begin
If your material is warped in any way, consider processing it through the jointer and planer before using the router. Material with at least one good flat face and smooth, perpendicular edges will produce a cleaner cut and be safer to work with.
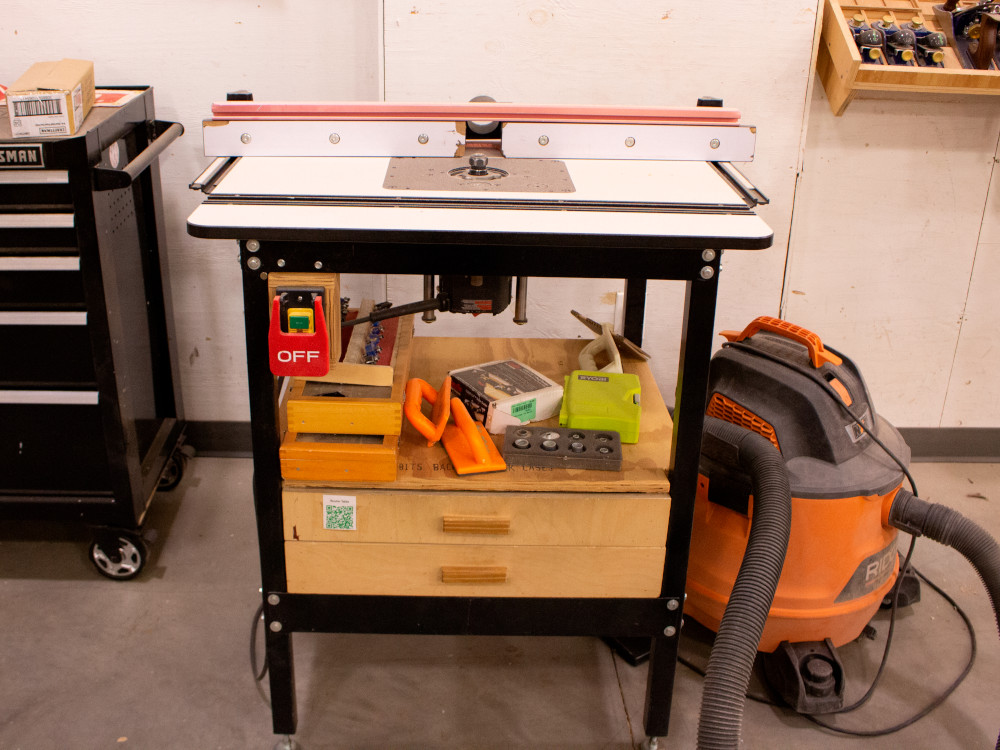
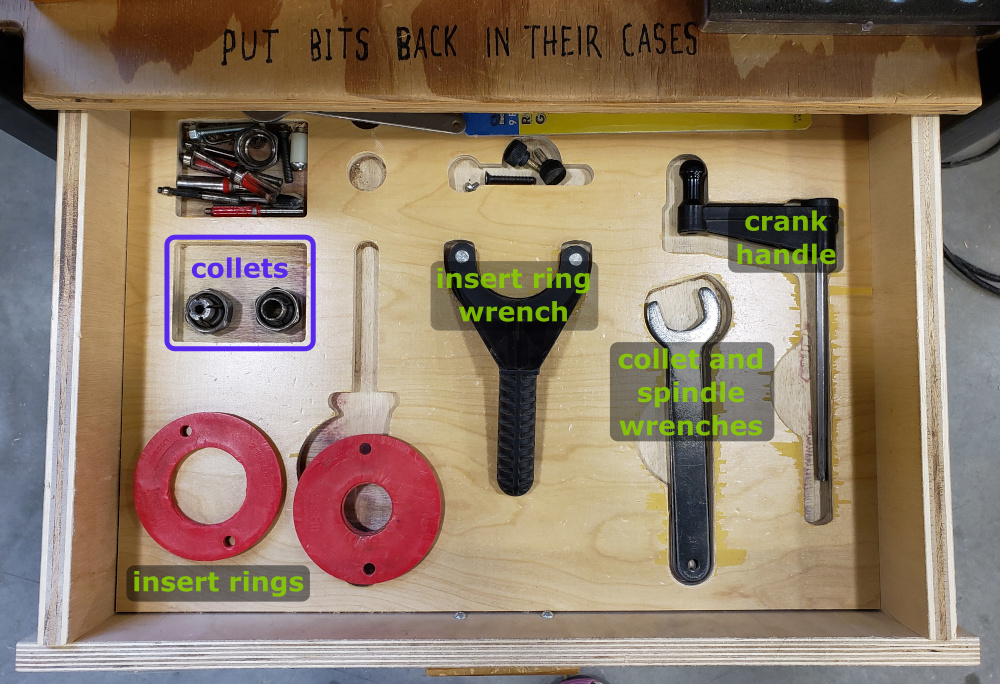
Tools for the router are in the drawer in the table
Click to see what's in the tool drawer!
¶ Setting up to make a cut
- Select a bit. Router bits have either 1/4 inch or 1/2 inch shanks.
There are several trays of router bits available. To ensure sharpness and the cut profile you want, you may wish to bring your own bit.
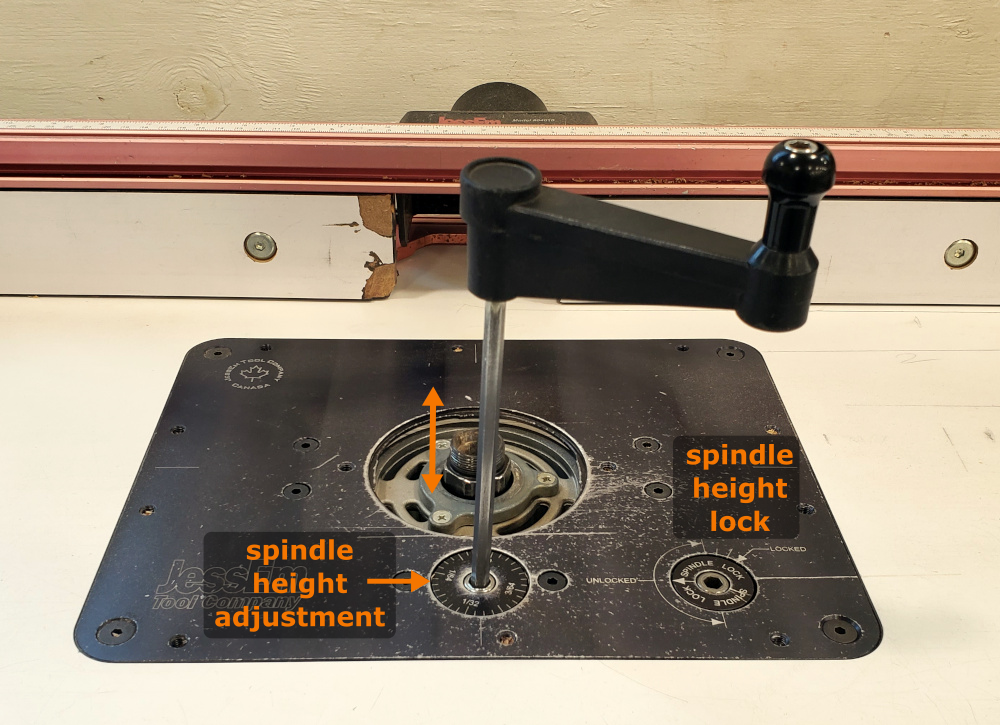
- Using the crank found in the drawer, raise the spindle above the table.
Make sure the crank is all the way into the socket by wiggling it gently.
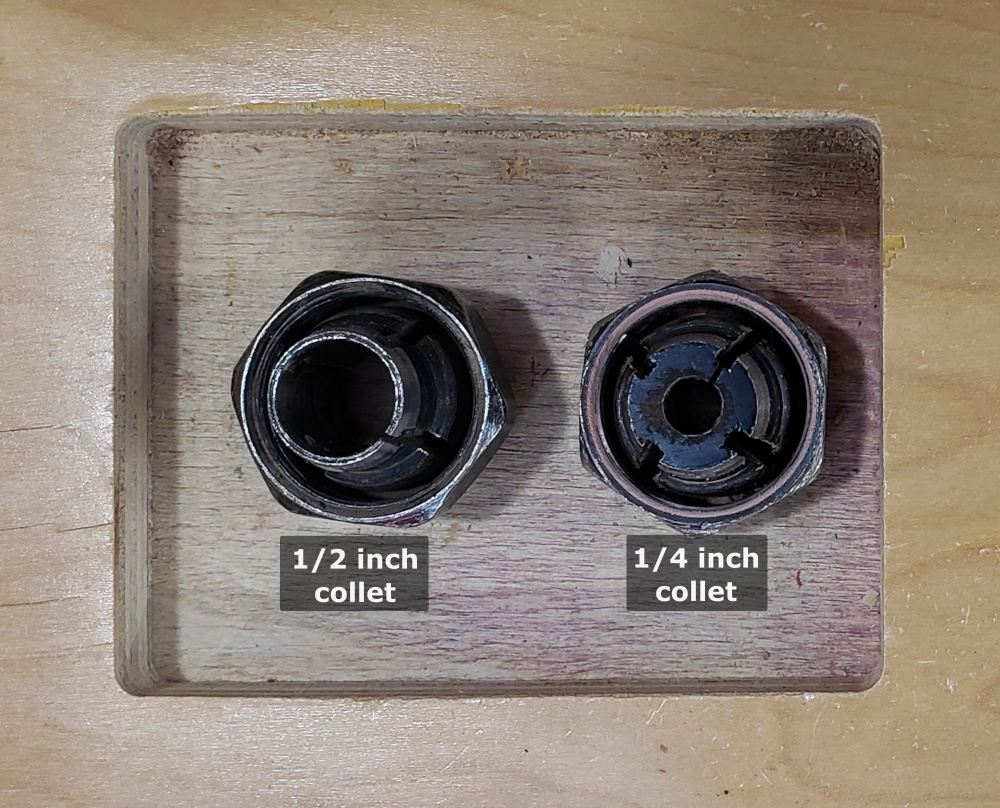
- Select the collet that matches the shank size of the bit. Screw the collet onto the spindle. Finger tight is fine, it will be tightened later.
The collet must match the shank size. The collets are bottom up in this picture to highlight the differences between them.
If you are using a very large bit or one with a 1/2 inch shank, set the router to a slower speed. The speed dial is on the underside of the router. Find a Community Technician if you're unsure about this.
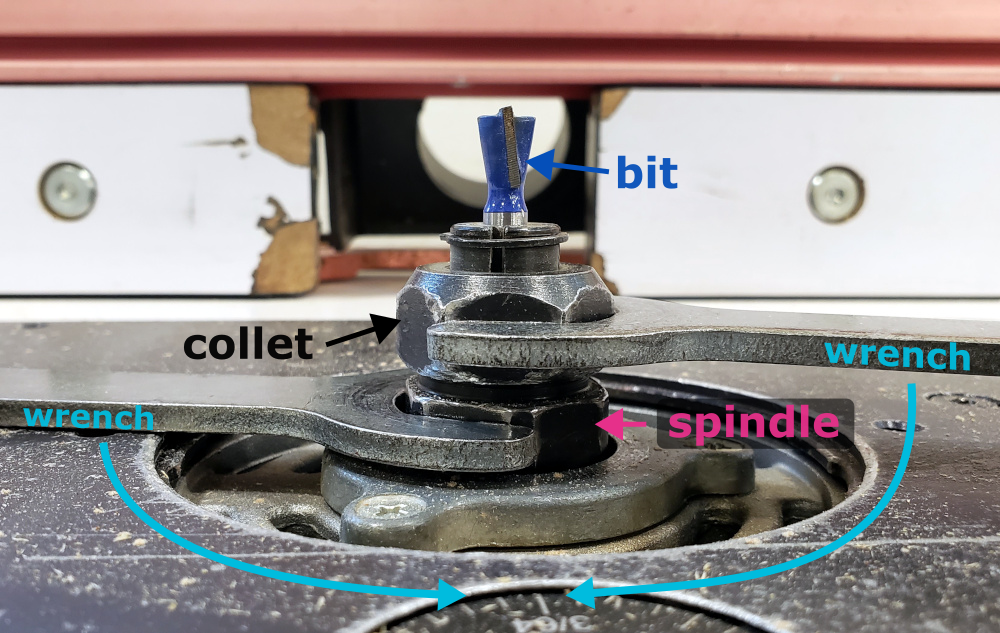
- Insert the bit into the collet.
- Using the pair of wrenches found in the drawer, tighten the collet by turning both wrenches towards yourself.
-
Use the crank to lower the bit to the desired height relative to the work piece.
-
Install the insert ring. Use the one with the smallest hole that still clears the collet and bit. You can use your fingers to turn the ring into place, or use the insert wrench. The insert ring keeps your work piece steady and from being sucked into the work table.
7.1 Align the two small holes in the insert ring with the small holes on either side of the spindle.
7.2 The insert ring should drop in and become level with the table surface. If it doesn't, wiggle it back and forth until it does drop in.
-
Put away the crank and wrenchs. Clear the table of any non-work piece materials.
-
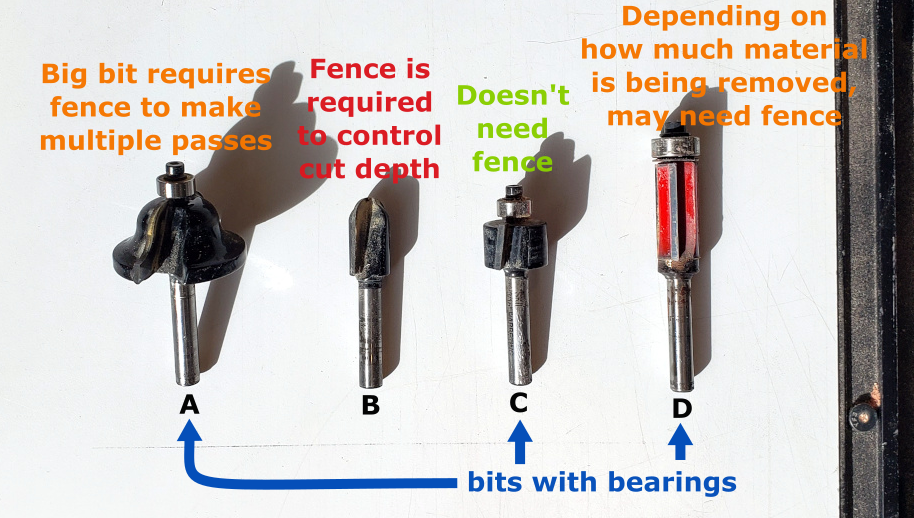
If the bit has a bearing and the depth of the cut from the edge of the blade to bearing is more than 1/4" OR if your bit does not have a bearing, the fence must be used as a guide. Adjust the fence to guide your cut.
The fence clamps on both sides.
- Hook up the vacuum to the port on the back of the fence.
¶ Making a Cut
There are many things to consider when making a cut on the router. Find details here: Making a Cut on a Router.
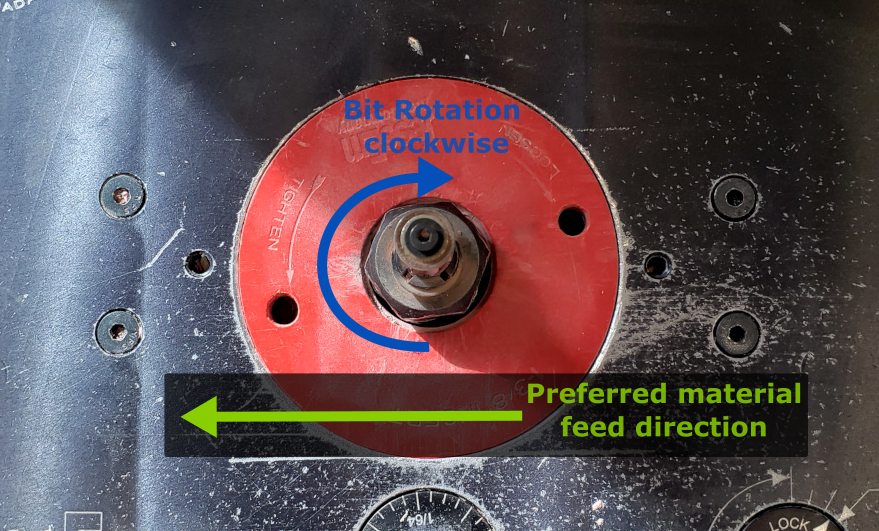
Conventional cuts go with the direction of the bit's rotation. The bit pulls the grain out of the wood and therefore is more prone to tearouts, but the cut is faster and the material easier to control. Good for edges and following templates.
Climb cuts go against the direction of the bit's rotation. Climb cuts are good for corners and across grain cuts. The bit presses the grain into the wood, reducing the possibility of tear outs but making the material harder to control. Press the material down against the table to keep it steady and resist kickback.
When using the router table, it is preferred to feed the material from right to left in a conventional cut- feeding the other way can cause kickback. The bit rotates clockwise and working with the rotation makes it easier to control and move the material at the increased risk of tear out.
To avoid tear outs you may wish to climb cut corners first, and then conventional cut the edges.
¶ Holding and moving the material
- Keep the material pressed firmly against the table.
- Move the material steadily.
- Push the material against the fence or bit.
- If the router struggles, use less force and make shallower cuts.
¶ Cleaning up
If you changed the speed of the router, reset the speed to how you found it.
- Vacuum the surface of the table, the shelf under the table, and the area around the table.
- Remove bit, collet, and insert ring and put them away. (Reverse steps of setting up to make a cut.)
How to cut dados using the router table.
¶ References
JessEm page for the router table package.
JessEm router table package manual.
Family Handyman's beginner's guide to routers.
Woodsmith's beginner's guide to router templates.
¶ Video Walk Throughs
¶ Glossary
Tearout: When the fibers of wood pull away from the cut edge.