¶ Overview
In order to prepare a graphic for cutting (and for some methods of printing), the graphic must first be simplified and vectorized. Simplifying a graphic reduces the number of colors in an image. Vectorizing a graphic (also called image tracing) represents the graphic as a set of mathematical instructions.
¶ Skills/Classes Required
- A membership or day pass is required to access the Computer Lab.
¶ Time to complete
15 minutes or more, depending on the complexity of the image.
¶ Tools Required
Adobe Illustrator and Inkscape are the most common software tools for simplifying and vectorizing graphics.
¶ Materials Required
A graphic to start from.
¶ Before you start
¶ Raster vs Vector
A raster graphic image is a dot matrix data structure representing a rectangular grid of pixels, viewable via a monitor, paper, or other display medium. When rescaled, they lose resolution. When it comes to Laser Cutting, ALL raster images (and some vectors) will be engraved, not cut. This includes .jpg, .png, .bmp, and anything that is flattened.
Rasters are good for:
- Engraving a drawing with shadows and/ or depth variation
- Pocket Clearing
- Decorative Applications for fills such as paints or enamels and mold making
- Identifying marks such as logos or maker’s marks
Vector graphics make use of geometric components such as points, lines, curves, and shapes to represent images. They can be scaled WITHOUT losing resolution. The laser will only produce a cut from vectors that are saved in a file type that supports that such as .dxf, .ai, .svg, sometimes .pdf, and others.
Vectors are good for:
- Stencils
- Patterns
- Decorations with thin lines
- Cutting items free from parent material
- Identifying marks such as serial numbers
Questions to answer: Does the CNC router do engraving? Do CNC Routing and Laser Cutting use the same terminology for engraving and cutting?
¶ Why simplify an image?
There are two main reasons to implify an image.
- Makes the final product look better.
- The final product takes less time on the machine.
¶ Why vectorize an image?
The term 'vector' is used to describe a lot of slightly different things. In general, a vector describes a way of getting from one place to another using distance and direction information. Vector graphics use distance and direction information (and color!) to describe how to draw an image. CNC tools such as routers, laser cutters, and vinyl cutters can use that vector information to describe how to move a tool. They need other information such as tool speed/power or when to raise/lower the tool that vector graphics don't contain, which is why it is necessary to put a vector graphic through a program (RDWorks, VCarve, etc) that will add that information and translate it all into a language that the machine can understand.
¶ Instructions
¶ Illustrator Instructions
Use Illustrator’s Image Trace feature to optimize a graphic.
¶ A graphical overview of the steps following the diagram
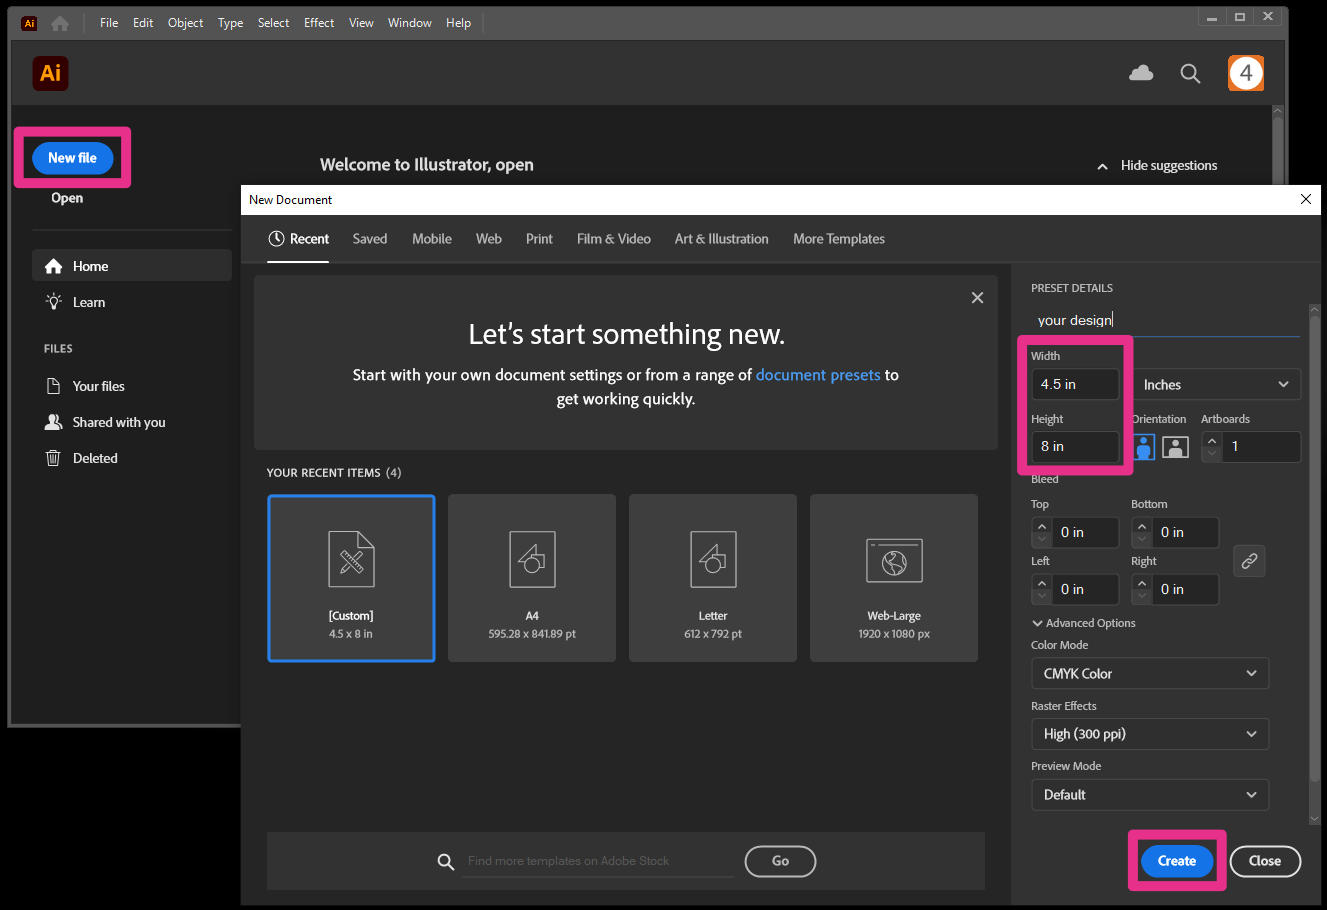
- Open Illustrator, and create a new file. Buttons and settings are highlighted in pink.
- Use the New File button on the upper left to get the New Document window.
- If you know the maximum size of your design, you may want to set your document size to those dimensions.
- Click the Create button on the lower right to make the new document.
- To insert your image, go to “File” -> “Place” or use Hotkey Shift+Ctrl+P
- If your image is the wrong size, press Shift to control the aspect ratio, then click one corner of the image and scale it.
- In the top menu bar, go to “Window > “Image Trace” or go to “Object” > “Image Trace” to open the Image Trace pane.
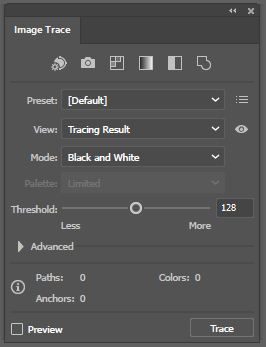
- The Image Trace window allows you to adjust the threshold of simplified shapes and amount of colors you want in the image. Make sure "Preview" is checked to see what each setting does as you adjust it.
- The supplied modes are a good place to start
- The Advanced tab provides more control over how Illustrator traces the image and the number and complexity of the paths generated.

- Try to make your image as simple as possible.
- Recommended: set "Mode” to “Black and White”
- Export the file to .dxf by going to the top menu: "File" -> "Export" -> "Export As"
¶ Inkscape Instructions
Use Inkscape's Bitmap Trace and Simplify path features to optimize a graphic.
¶ A graphical overview of the steps following the diagram
- Open Inkscape by using the icon on the desktop or by finding it in the menu.
- Do you already have a graphic? If not, there are many images available on the internet. It is important to only use images that you have permission to use, especially if you are planning on selling the final product. Here is a guide. One way to be certain that you have permission to use the image is to create it yourself from a photograph you've taken or a drawing you've made or commissioned.
- The Load and New Document buttons are in the lower right, highlighted in the image inside the green/red/yellow boxes. Click one of them.
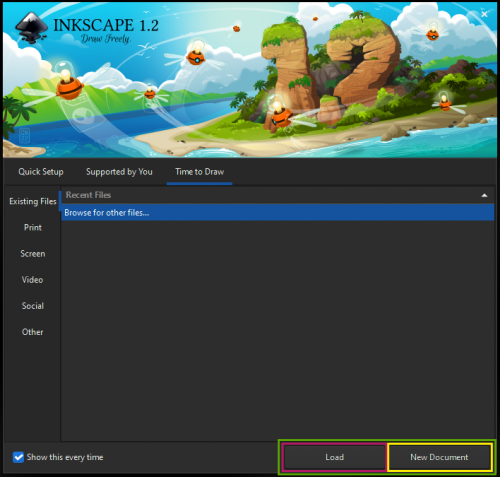
- The Load button will open a dialog to find your graphic. Find it and open it.
- If your graphic is not an .svg type, a dialog box will open asking how you want to import your image. Default settings are fine.
- Vectorize your graphic.
5.1 From the top of the toolbar on the left, select the Selection tool or use Hotkey S
5.2 Click your image to select it. A dotted line will appear around the edge of your image and black arrows will appear at the corners.
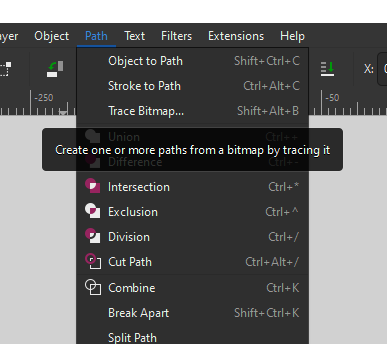
5.3 In the top menu bar use Path -> Trace Bitmap or use Hotkey Shift+Alt+B
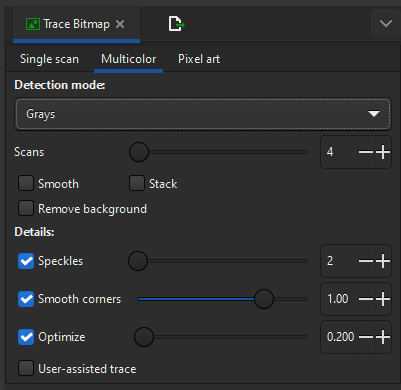
5.4 A pane will open on the right. There are many settings. Play around with them to see what they do. Recommended: Use Multicolor with Detection Mode set to Grays.
- Simplify the graphic.
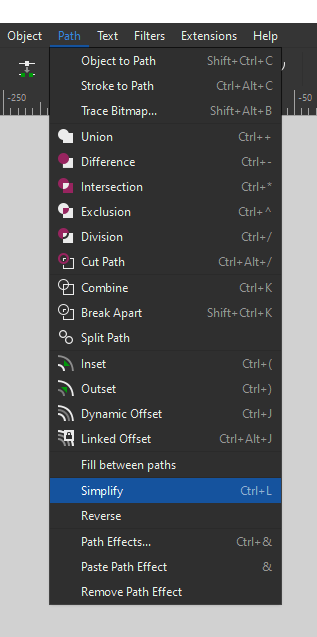
6.1 In the top menu bar, use Path -> Simplify or use Hotkey Ctrl+L. That will simplify all of the paths.
6.2 To simplify one path, you can use the use the Path Node tool (second tool from top in left toolbar or Hotkey N) to select one path simplify. Then use Path -> Simplify.
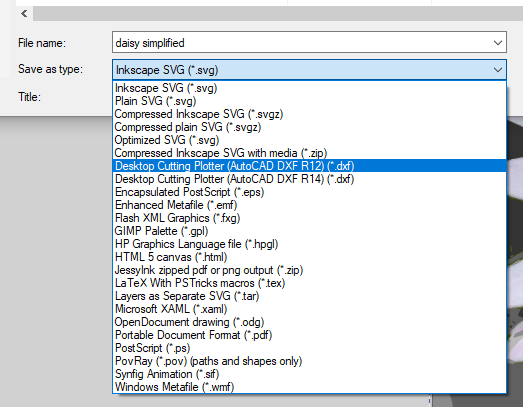
 - Save as .dxf
¶ Next Steps
- If using a laser cutter, go to: RDWorks or Glowforge
- If using a CNC router, go to: VCarve
- If using a vinyl cutter, go to: Vinyl Cutter and Plotter or Cricut
- If using a plasma cutter, go to: CNC Plasma Cutter
- If using a digital embroidery machine, go to: EMT-16 Digital Embroidery
¶ Glossary
raster graphics
A raster graphic represents a two-dimensional picture as a rectangular matrix or grid of pixels. Wikipedia: Raster Graphics
rescale
resolution
vector graphics
A vector graphic is an image which is created directly from geometric shapes defined on a Cartesian plane. Wikipedia: Vector Graphics
¶ File Types
.AI
Adobe Illustrator vector file.
.BMP
BitMaP file, a file raster type.
.DXF
A CAD data file format designed for sharing drawing data across CAD applications. Vector based.
.JPG
A raster file type.
.SVG
Scalable Vector Graphics (SVG) is a vector file format.