¶ Description
In this project you’ll create a design that uses two colors, cut it out of heat transfer vinyl, and apply it to fabric.
¶ Materials and Tools
- HTV (Heat Transfer Vinyl) in at least two colors
- StandardGrip® Machine Mat (Green)
- Fine Point Blade
- Scissors
- Weeding tools
- Heat press and heat resistant surface such as ironing board, towel, or heat press mat
- Parchment paper
¶ Prior Knowledge
Going into this project, you’re expected to know how to add objects to the canvas and manipulate them using the basic tools provided. You’ll also need to know how to use the Align and Distribute tools and manipulate layers in the Layers panel. If you need more help with those steps or want a refresher, review the prior projects or check out the Quick Guides.
¶ Registration Marks
Registration marks are marks used to align layers but which may not appear in the final product. They are often disguised as part of the design in order to make production easier.
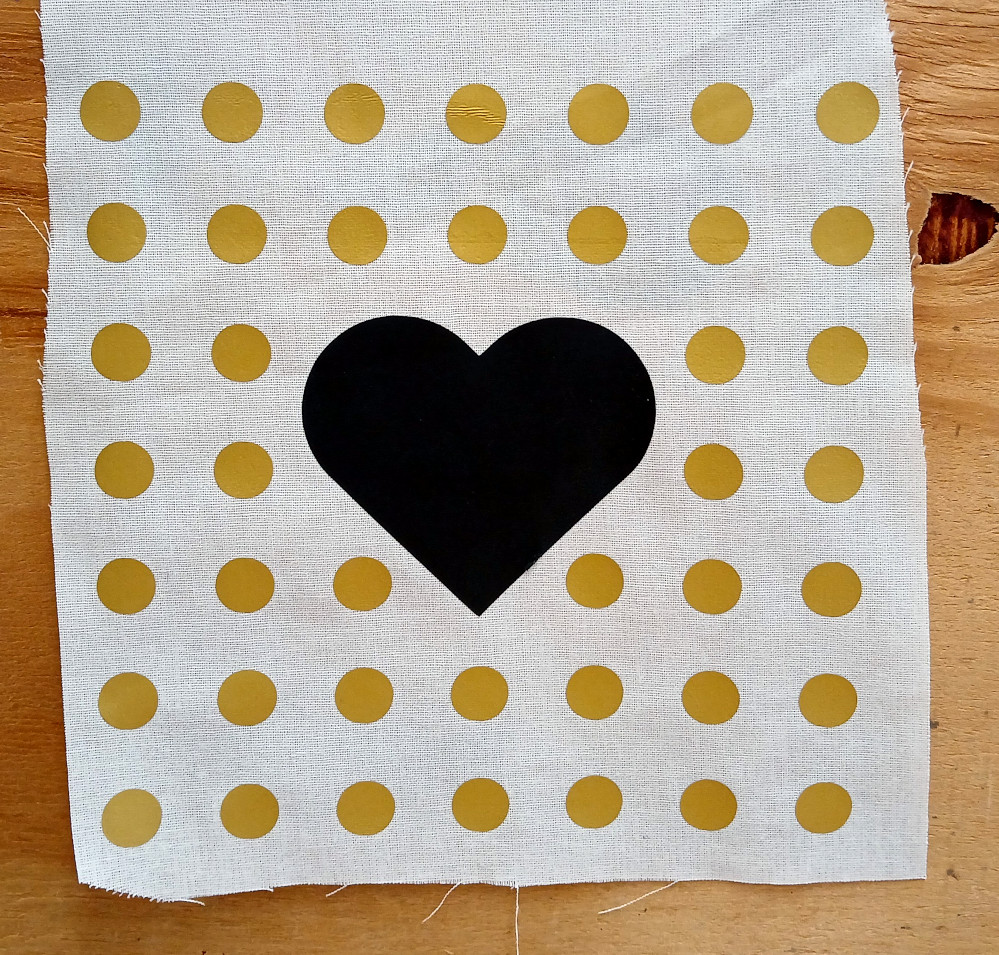
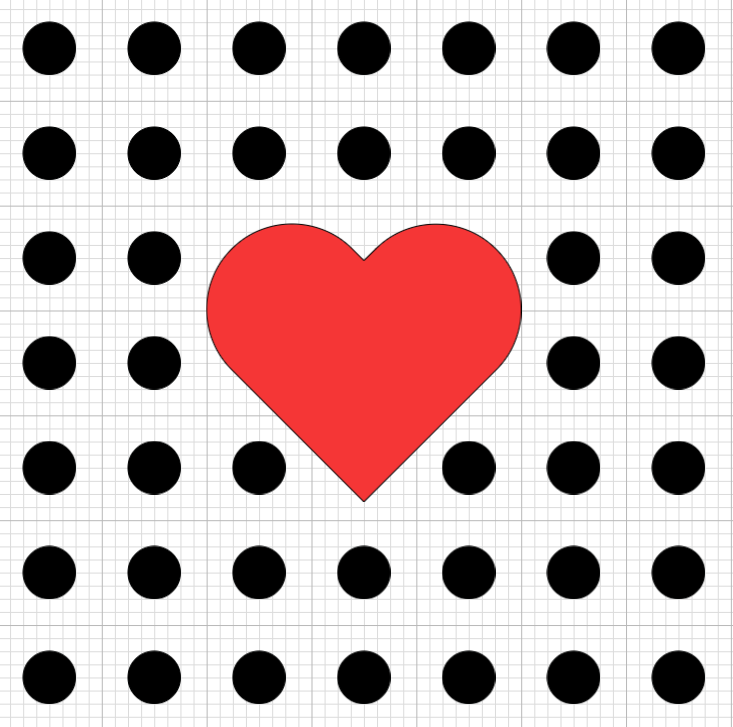
Consider this grid of black dots with a red heart in the middle. Because vinyl can only be cut one color at a time, the black dots and red heart will have to be cut at different times. The dots can be cut as one piece– the spaces between them are created by weeding out the excess material while leaving the dots in place on the carrier sheet. That preserves the relative positions of the dots while they are transferred to their final location.
After the dots are transferred to their final location, the heart will somehow have to be aligned with them in order to transfer it to the correct location. Because the heart and the dots do not touch anywhere, it would be difficult to do this by eye and quite tedious to do with a ruler (especially if making multiple of the final product).
The solution to this is to add registration marks to the heart.
Here, registration marks have been added to the design by duplicating two dots, changing their material to match the heart, and placing them over two black dots. The black dots still exist, they are just hidden by the red ones.
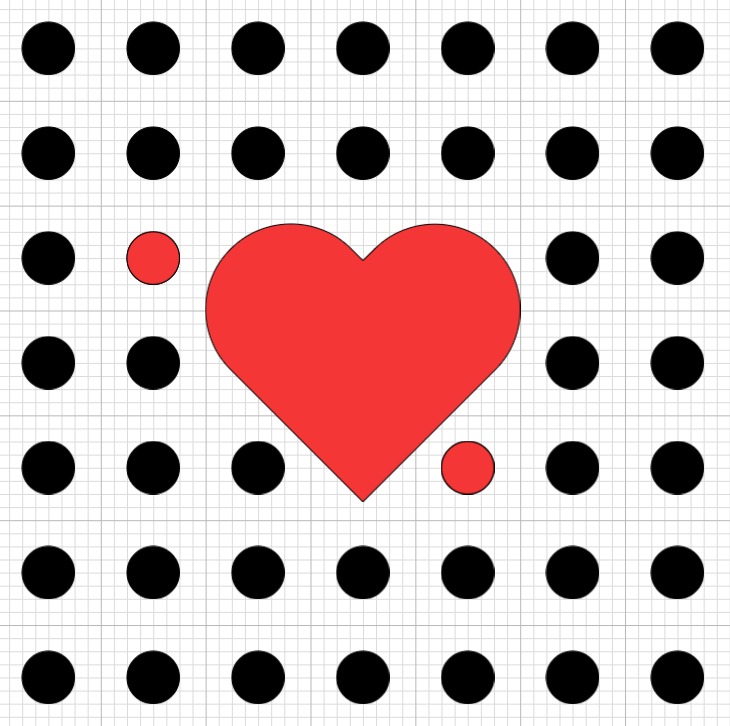
After the heart and its registration marks are cut, the carrier sheet will preserve their relative positions. When the heart is transferred to its final location, the clear carrier sheet allows you to perfectly align the red dots with the black dots underneath. Then the black dots are shielded from the red dots during the transfer and the red dots stay with the carrier sheet even as the heart transfers.
Tip: Registration marks are also used to align multiple interlocking colors because it’s easier to see if the alignment is correct using registration marks at the edges of the design. Additionally, when creating multicolor text, using the previous color of text as the registration for the current color will help keep the lettering even.
¶ Prepare the Design
You will use two or more colors of HTV to create an interlocking design. The design will use registration marks to align the colors during the transfer process.
You can create any design you like–the heart and dots are just an example. Consider trying text that’s in different colors, a shape that has a “shadow” behind it, or a design that has the registration built into it.
The layers pane for the dots and heart design looks like the example below.

Tip: use Ctrl+D (or Ctrl+C and then Ctrl+V) to quickly duplicate a shape.
Tip: use the tools in the Align menu to easily and precisely align shapes relative to each other.
Tip: use the Group tool (or Ctrl+G) to group shapes together so that they keep their alignment when moved.
When you are satisfied with your design, you can move on to cutting the design out.
Tip: place a rectangle around the entire design. This will make it easier to weed later.
¶ Put the material on the mat
HTV has an integrated transfer sheet (or carrier sheet). Typically the transfer sheet is shiny and covering the color that will be on the top once the design is applied. Typically the other side has a matte finish–this is the thermal adhesive.
To put HTV on a sticky mat, flip it so that the shiny side is down and the matte side is up and place it on the mat. Smooth it out so that there are no air bubbles and it is well stuck down.
¶ Cut the design
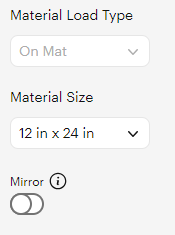
Click Make and set the mats up. While laying the mats out, be sure to check “Mirror” so that you design comes out facing the correct direction after being applied to the fabric. This is especially important for text.
Tip: if the parts of your design are being moved around in relation to each other during mat set up, go back to the design and use the Attach tool. This will keep them in the same positions relative to each other when Cricut Design Space puts the design on the mat.
Notice that when you set the material to HTV/Iron On that Cricut Design Space mirrors the design. Check to make sure that this has happened.
¶ Assemble
After the machine is done cutting the designs, there are a few steps left.
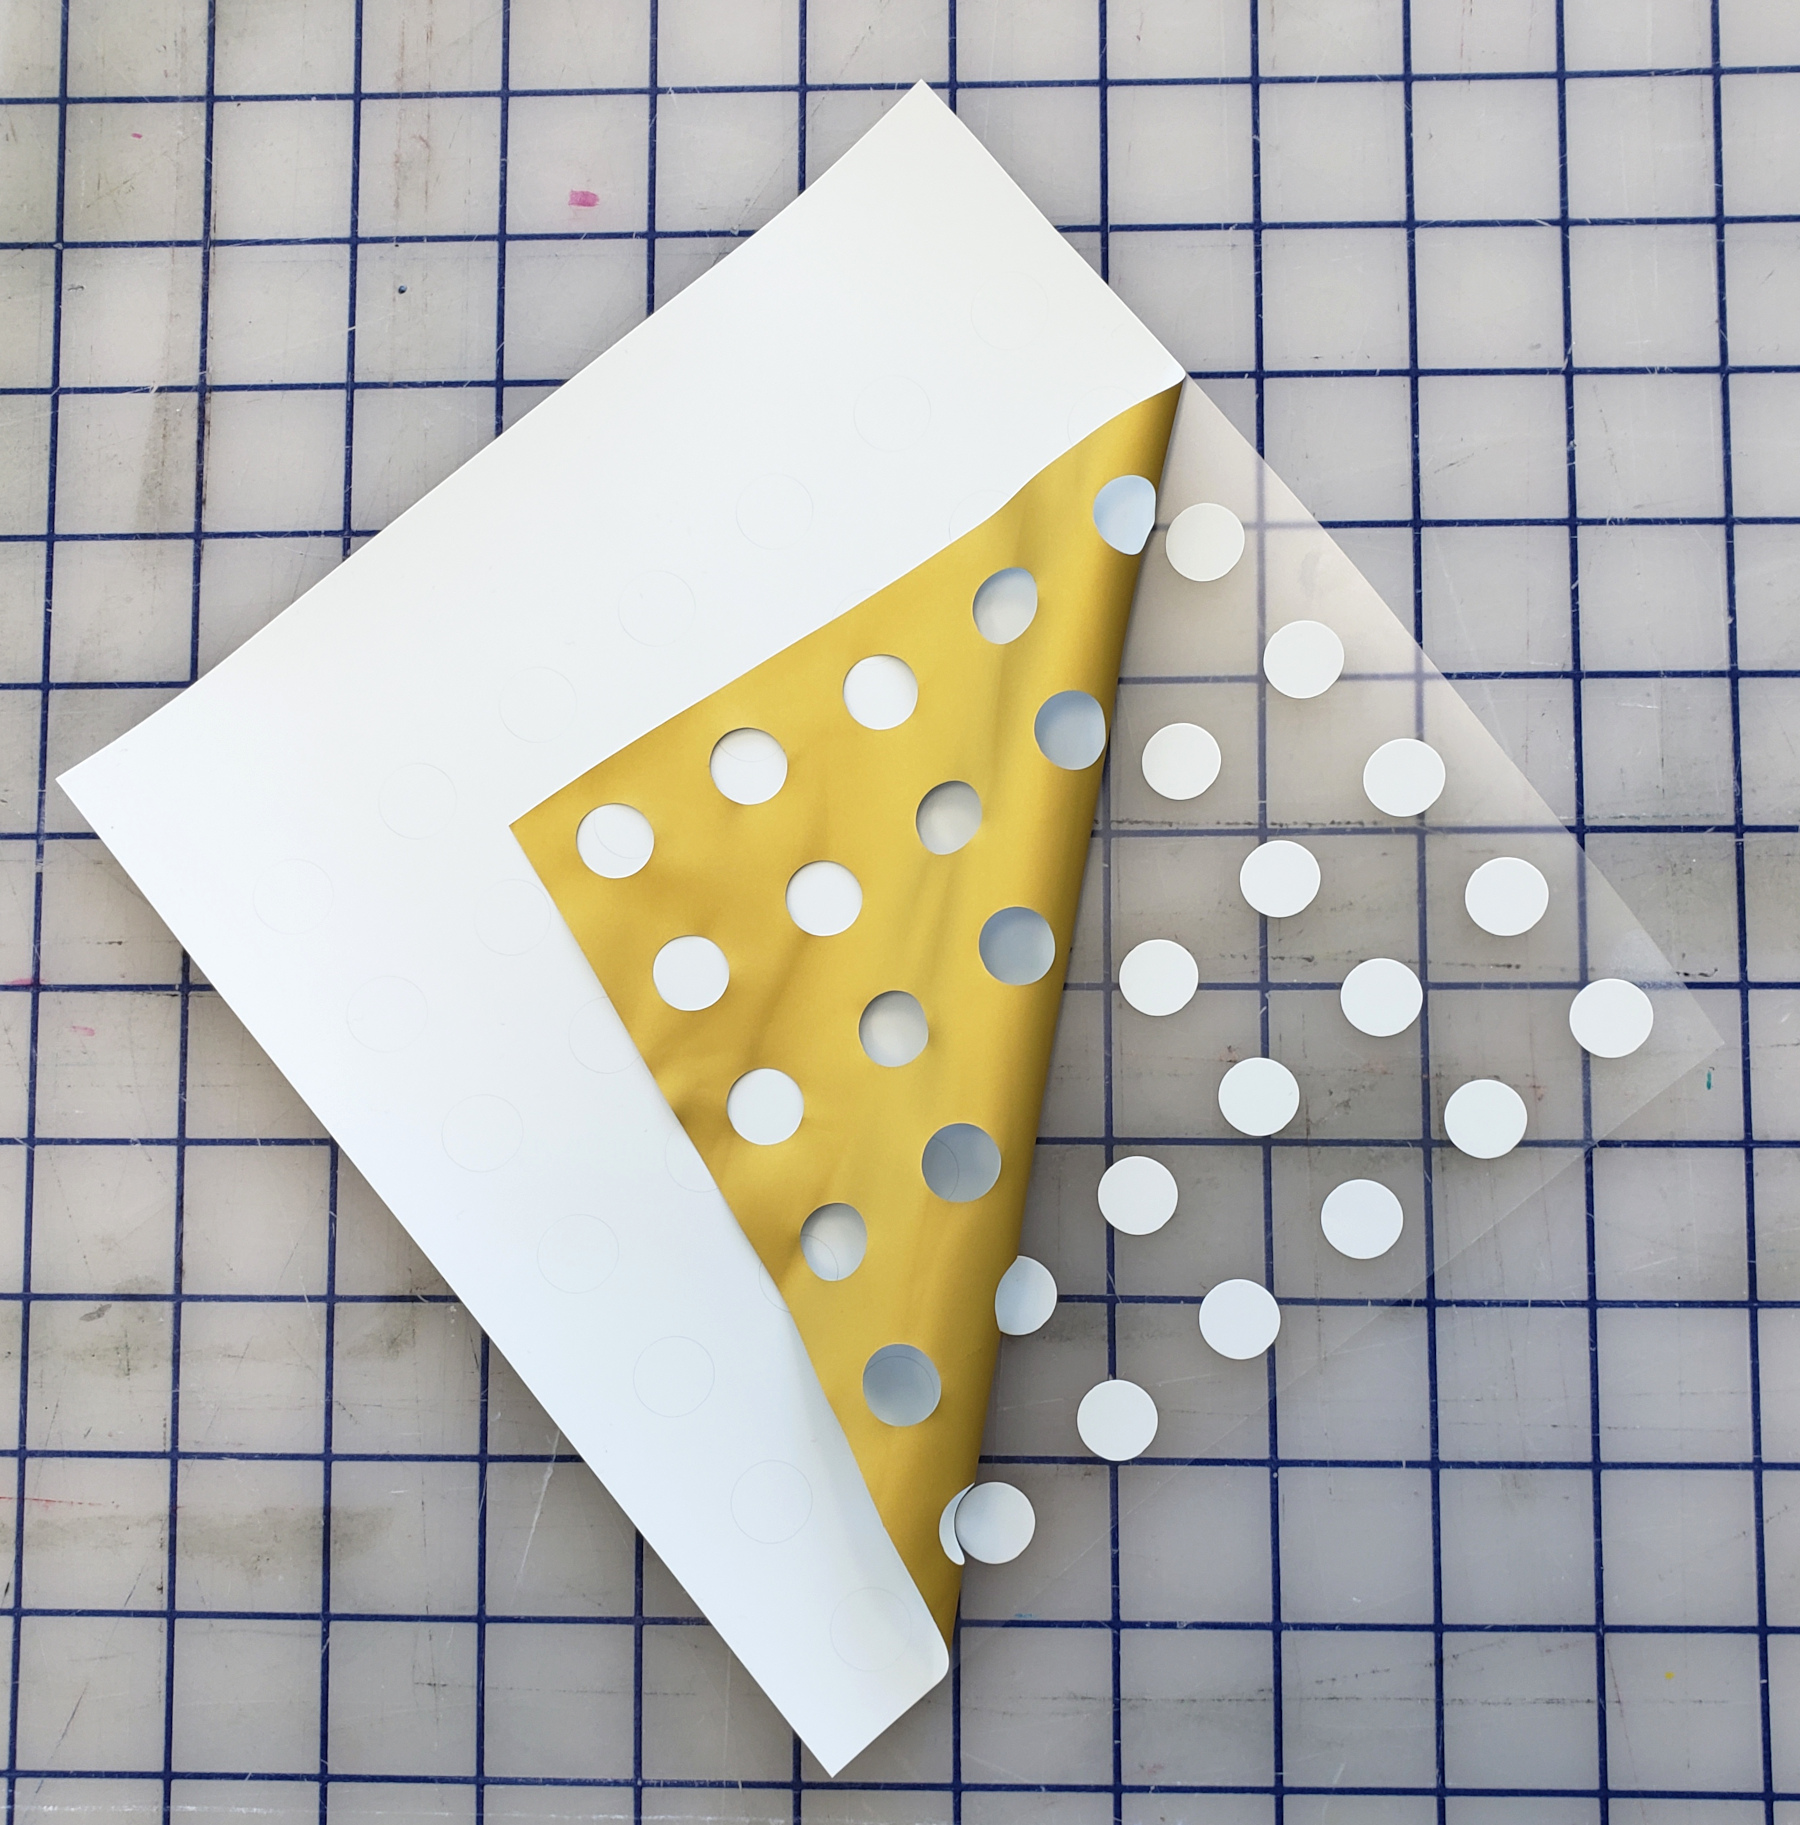
Peel the material free from the mat. Be sure to pick up the transfer sheet and not just the vinyl.
¶ Weeding
Weed the design using the weeding tools. Be sure to remove the parts that you don’t want. Leave the registration marks in place.
¶ Pressing
For more on using the heat presses.

Lay out fabric on the ironing board or other heat safe surface. Place the first layer of the design on top of the fabric with the transfer sheet on top. Press the design. Reduce both time and temperature from the manufacturer’s instructions in order to just tack the layer down. Once it has cooled, remove the transfer sheet.
Now, align the next layer on top of the first one. Notice where the registration marks are. Use a piece of heat safe tape or pieces cut from the transfer sheet of the first layer to protect the first layer from the registration marks on the second layer.
Before pressing this layer, make sure that no vinyl from the first layer will come into contact with the heat press surface. If the transfer sheet for the second layer is smaller than the first layer, stack the transfer sheet from the first layer on top of the second layer and proceed.
Press the design according to the manufacturer’s instructions for the time, temperature, and pressure. Once it has cooled, remove the transfer sheet and the registration marks.