¶ Description
In this project you will get familiar with the process of selecting and downloading a model from a model library, loading the model into the slicer to prepare it for the 3D printer, and printing the model.
The workflow for 3D printing is straightforward. The first step is getting a model to print–some people will make their own, others will download a model. However you get the model, the second step is slicing the model. Slicing the model usually takes 2-10 minutes, depending on how many settings you change and how complex the model is. Once the model is sliced and sent to the printer, the print will take however long it takes! The slicer’s estimate of how long it will take to print is usually pretty good.

¶ Materials and Tools
Model library such as
- Thingiverse: https://www.thingiverse.com/
- Printables: https://www.printables.com/
- Cults3D: https://cults3d.com/
- Bambu Studio has an internal library
- There are many model libraries and stores
Slicer: Orca or Bambu Studio
Filament: PLA or PETG
3D printer
¶ Obtain the Model
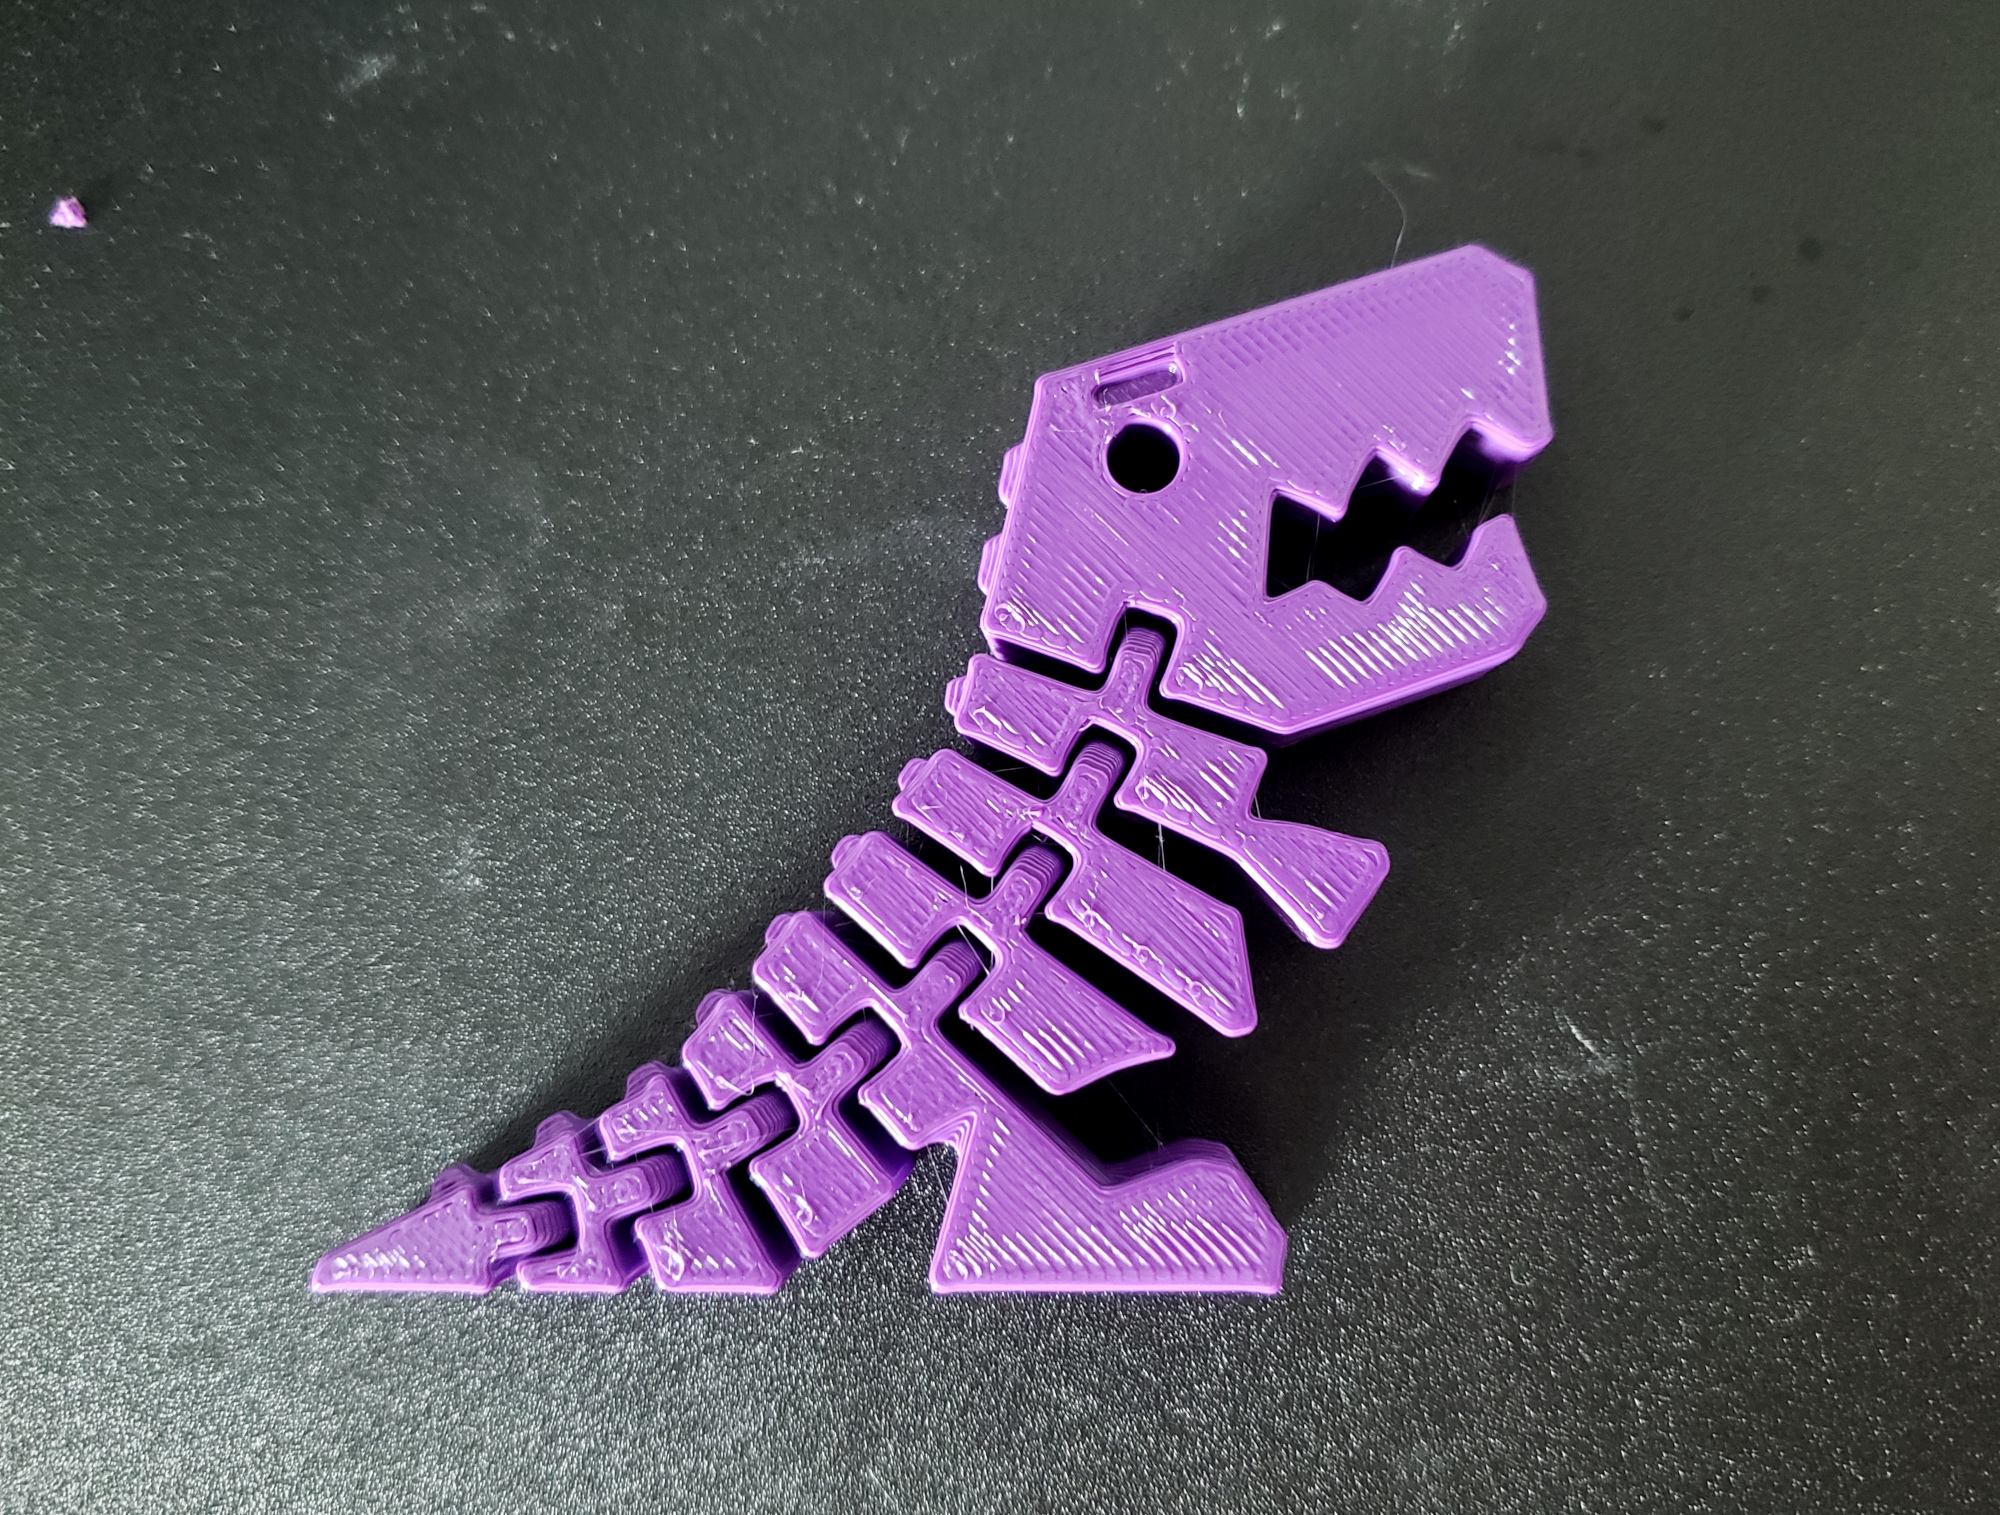
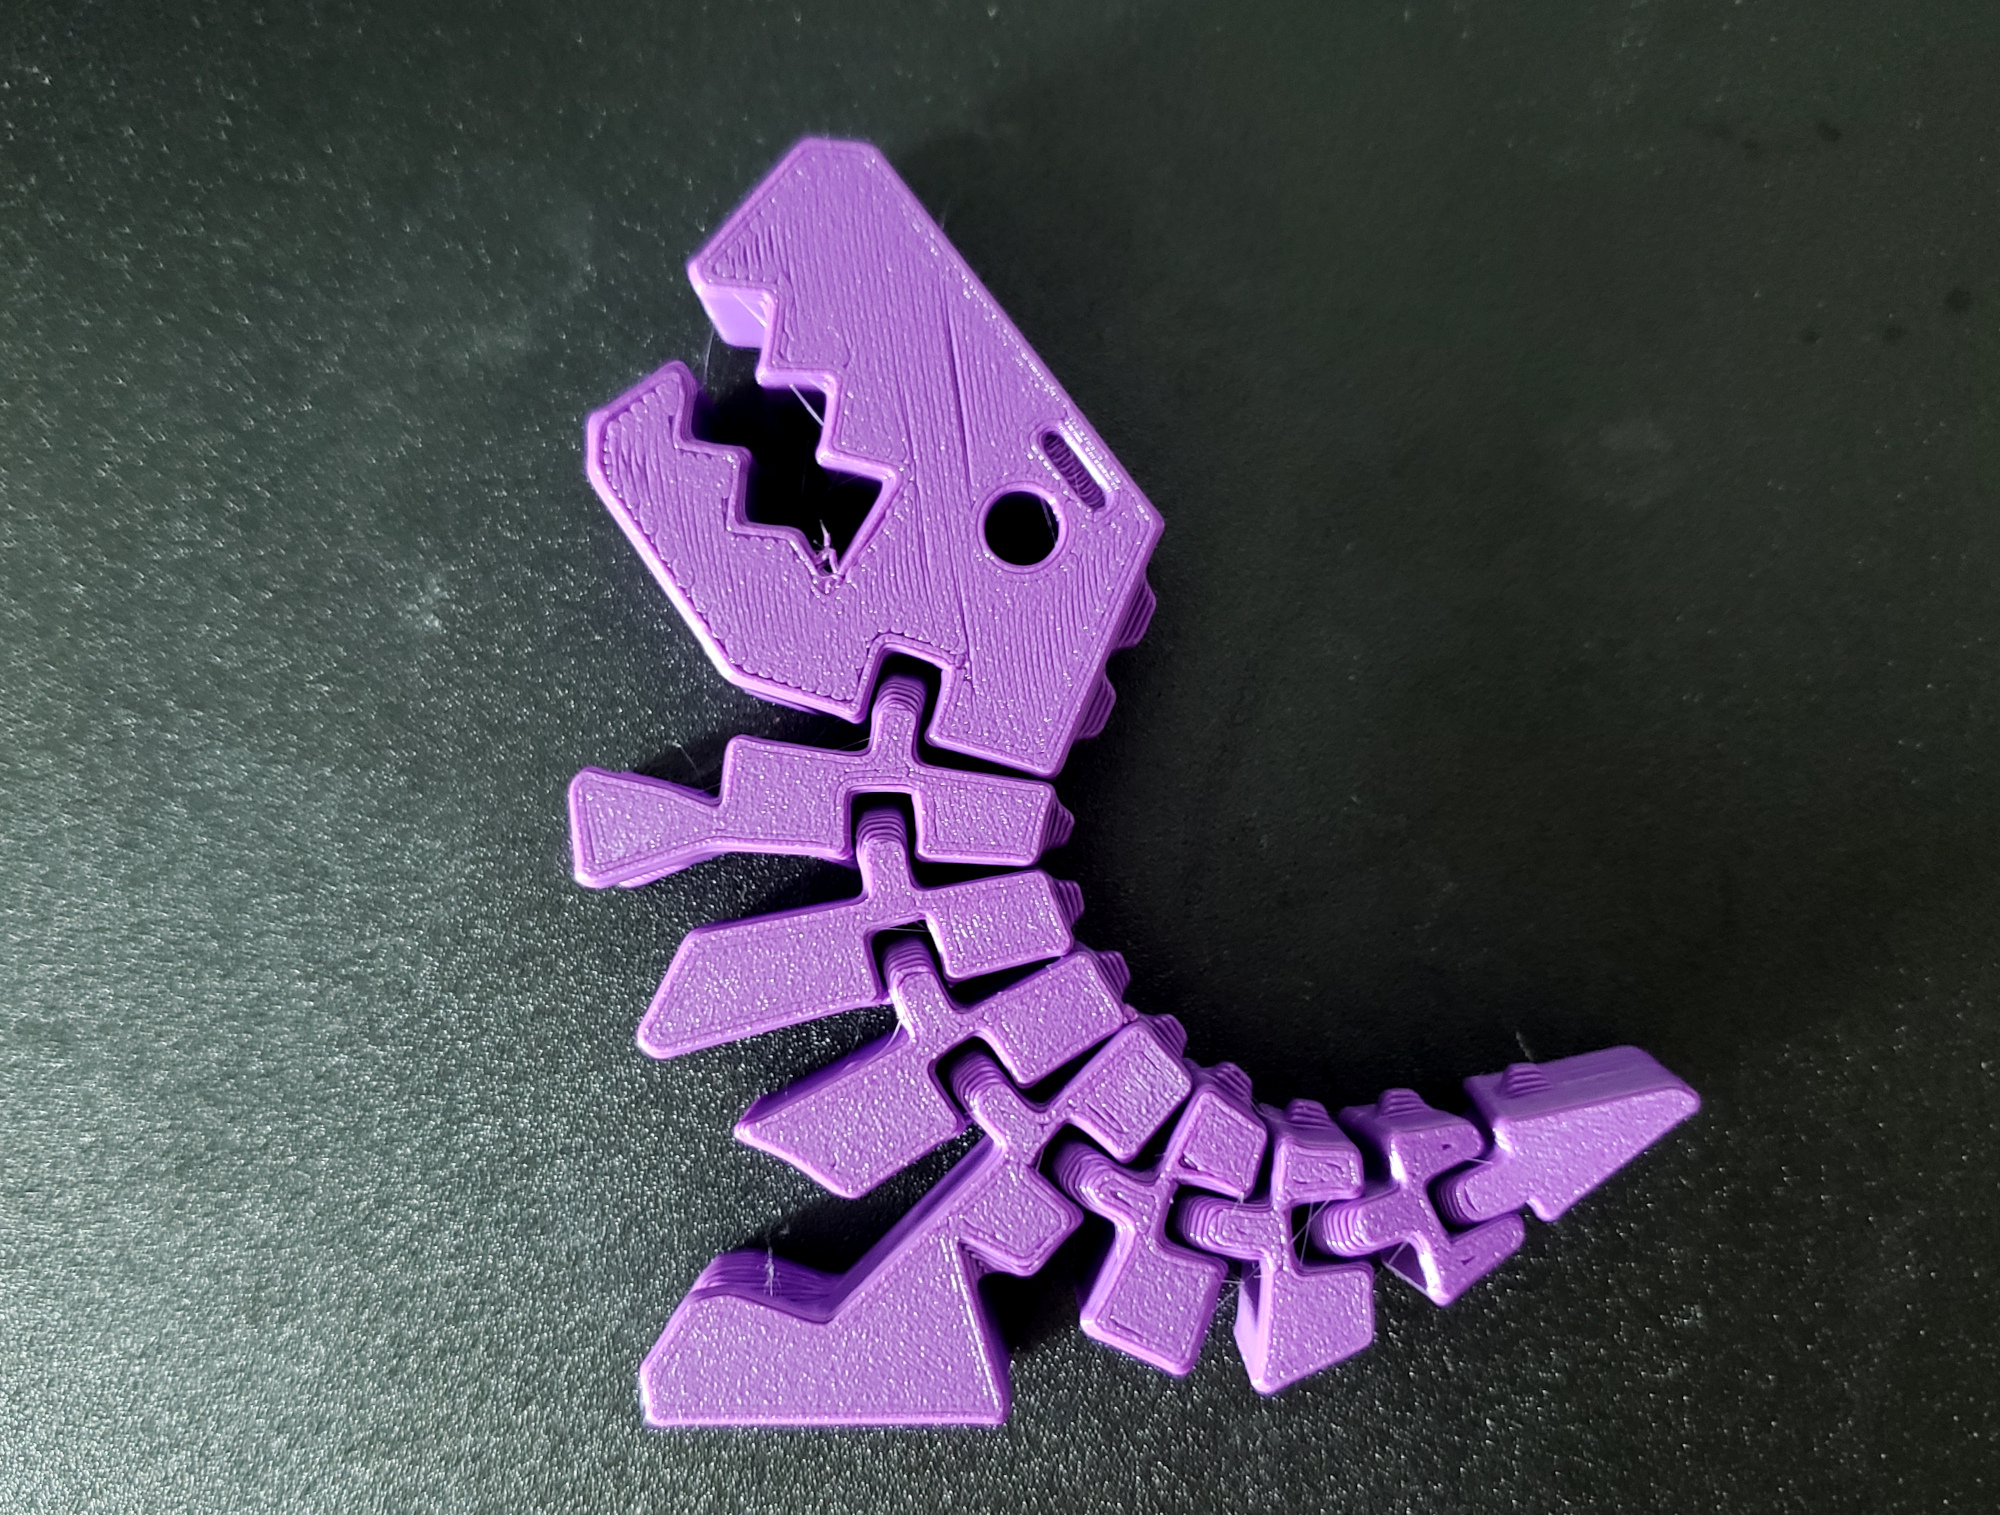
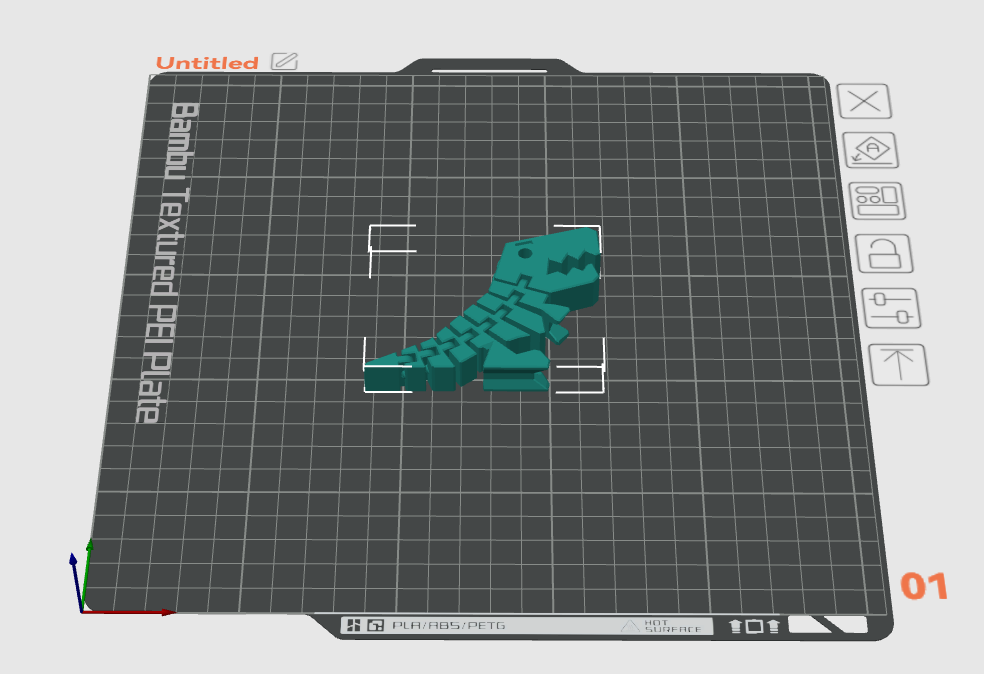
Go to a model library and select a model. For this project, we recommend doing a search for “flexi” and/or “print in place”. Flexi means that the model will bend or move in some way and print in place means that it does not require assembly. For example, something like this T-Rex (from https://www.thingiverse.com/thing:2738211) which is both flexi and Print in Place.
Download all files for the model. On Thingiverse and Printables, the best place to find the files is in the Files tab which will provide a list of all the files for the model and a download button for each file. If there are multiple files there may be a “Download all” button and they may download in a .zip file. If the files are in a .zip, right click on the downloaded zip file and choose “Extract” or “Unzip” or a similar option from the menu.
On the model website, check the description of the model for information. Some descriptions will recommend printing settings and other stuff to watch out for. This information will not always be provided and the provided information may not work for the printer you’ll be using but it’s good practice to look for tips.
¶ Slice the Model
“Slicing” is the process of turning a 3D model into code that a machine can understand. How a model is sliced depends on the make and model of the printer, on the filament material, on the nozzle size, on the size of the model, on the shape of the model, on the intended durability of the model… It can be very complex but most of the time the default settings work very well.
Open the slicer program. On Open Works computers, this will be Orca. If Orca is already open or opens with a project loaded, go to the Home tab (the house shaped icon in the upper left, then select New Project). Do not save the prior project.
Go to the “Prepare” tab.
Click on the cube with a "+" sign icon in the left of the upper center toolbar to add your 3D model or File -> Import -> Import 3MF/STL/… Use the file explorer that opens to locate the model file and open it.

Before moving on, check for overhangs and other areas that might need support. If there are overhangs, rotating the model relative to the build plate may make them go away. (Rotating the view will not rotate the model.) See the Quick Guide for more on Overhangs and Supports.
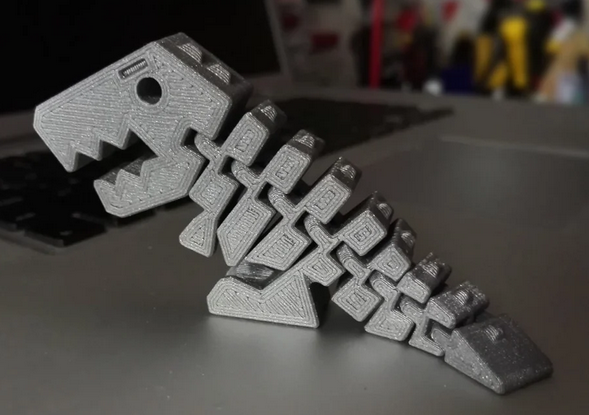
Consider the T-rex, which has been sliced in two orientations with support enabled and all other settings the same.
| The T-rex is on its side and generates with very little support–and the supported features are so small that the support may not be needed. It prints in about 40 minutes. | The T-rex is standing upright and almost the entire model requires support to print. It prints in about 80 minutes. |
|---|---|
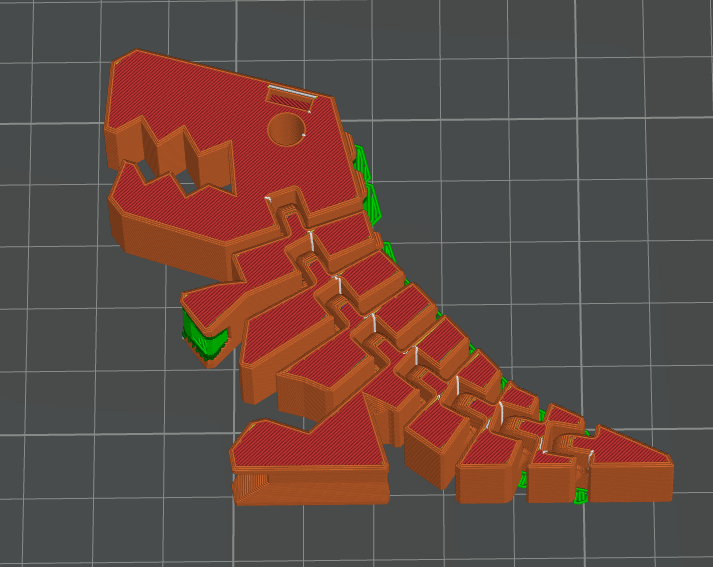 |
 |
| This model will come off the build plate with the build plate texture on the bottom, a smooth but not glossy texture on the top, and slight ridges going around the edges. | This model will come off the build plate with slight ridges going all the way around the model and a lower quality, stringier or damaged texture where the support was removed. |
How you choose to orient the model for slicing and the settings you use depend on the quality that you desire in the finished object.
Note that the representation of the model in the Prepare tab will not change as you tweak settings. Switch to the Preview tab to slice the model and look at what the settings are doing to the model. Switch between the tabs to update the Preview.
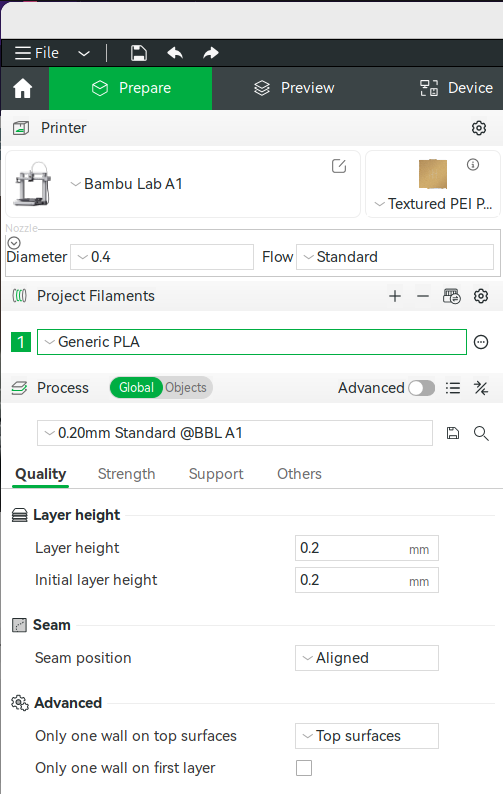
Verify that the printer is set to the correct make and model. It is important to set the correct printer model because different models have different capabilities. Open Works uses Bambu A1 or Creality Ender-3 V3 printers at most locations.
Verify that the build plate/print bed type is set to match the build plate on the printer that you will be using. Open Works provides a Textured PEI build plate.
Verify that the nozzle diameter is set correctly. Open Works typically uses 0.4mm nozzles, which is the most common nozzle size.
Verify that the filament type is set to the correct material. PLA and PET (or PET-G) are different materials and print differently and getting the two mixed up can damage the printer. Check the label on the reel of filament that you intend to print with for the filament type.
Set the process type or layer thickness. This determines the thickness of each layer as the object is printed. Thicker layers means fewer layers means a quicker print but it also means a rougher texture with more obvious layers which may not be desirable. When in doubt, pick standard/default.
Seam position sets where in the perimeter the extruder returns to the inside of the model. Aligned produces a visible, vertical seam. Random places the change randomly on each layer in an attempt to make it less visible.
If you’re printing the T-rex on its side, you won’t need to change anything in the Strength, Support, or Others tabs. If you’re using a different model or printing the T-rex standing up, you may need to adjust settings in here:
- Strength lets you tweak the number of shells/perimeters, top and bottom solid layers, and the amount of infill. It also lets you set the patterns used for the top layer, bottom layer, and infill, all of which can change the finished appearance of the object and how long it takes to print. Infill is typically set to 10-20%. More infill does not necessarily make the object stronger but it always means it will take longer to print.
- Support lets you enable/disable support generation. Support keeps overhanging areas of the model from collapsing during the printing process. Try enabling “Advanced” settings to get support style “Snug”.
- Others lets you tweak a few more settings. Skirt is a single line that goes all the way around the base of the model at a slight distance. It helps get the extruder moving and lets you quickly check the location of the object on the build plate. Brim is a flange that generates around the base of the model that helps it be more firmly secured to the build plate. Use Brim when the model has a very small amount of contact with the build plate.
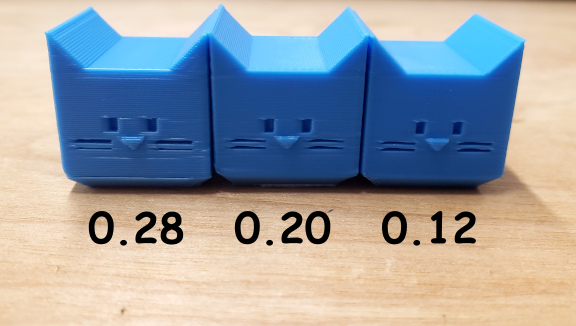
Layer height, also known as layer thickness, changes the vertical resolution of the printed object. For example, the CaliCat’s head has been printed at three different layer thicknesses to demonstrate how the amount of detail and the crispness of the detail changes as the layer thickness changes.
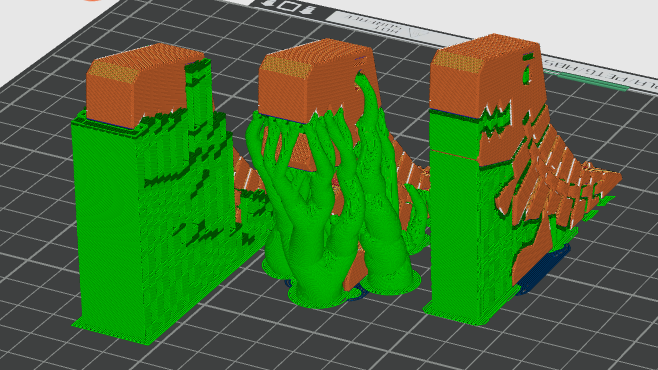
Support is used to prevent overhanging areas of the model from collapsing during printing. Here are examples of Grid, Tree, and Grid (Snug).
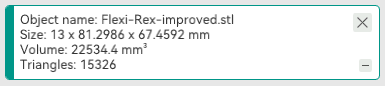
Before you print, it is important to check how big the model will print. Select the model and check the size shown. Use the scale tool found in the upper center toolbar to change the size of the model.
Switch from the Prepare tab to the Preview tab. This will slice the model. Switch back and forth between Prepare and Preview to refresh the Preview tab.

The model will be colored according to what printing modes are used where and statistics about how long it will take to print and how much filament it will use will appear.
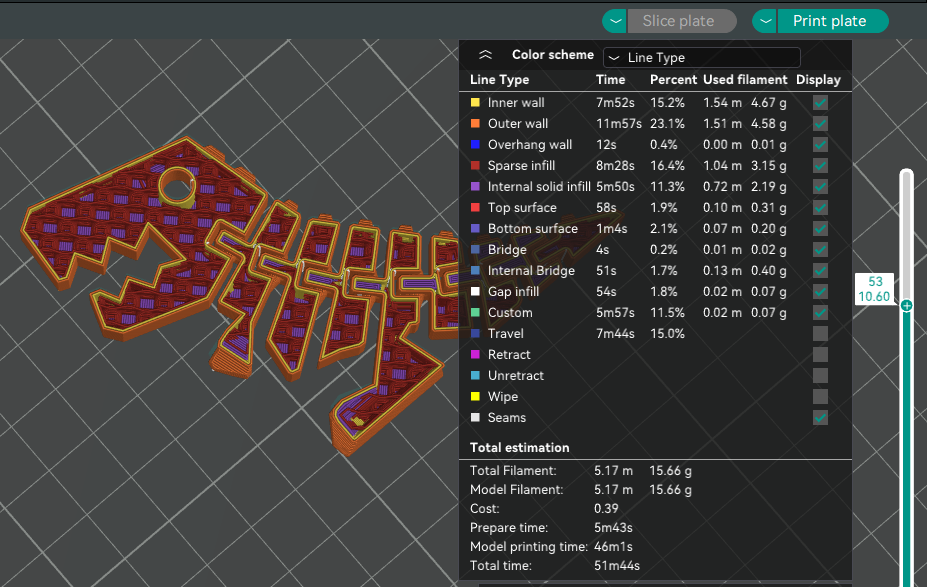
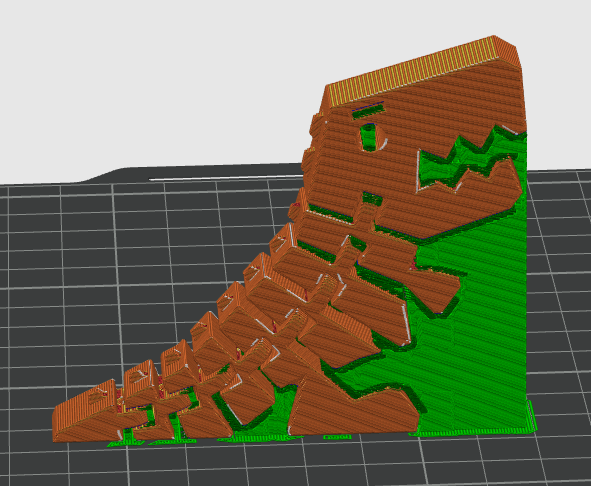
Tip: The vertical bar on the right lets you view the model at various layers so you can see the infill and perimeters. Click and drag the + symbol at the top of the bar to move through the layers. To the right you can see the insides of the T-rex at layer 53 as well as other stats about the print.
Tip: If you want to save this project for later, use File → Save Project As. If you want to save the g-code for later, export it and save it to your personal usb drive or cloud account. File → Export → Export G-code
¶ Starting the Print
Once you are satisfied with the slicer settings, click the Print button.
| ↙ From the Slicer to the Printer ↘ | |
|---|---|
| Bambu A1 | Creality Ender-3 V3 |
| 1. Choose the printer from the dropdown in the window that pops up 2. If the printer is not available, make sure that it is plugged in and powered on. 3. Verify that the filament material shown on the printer’s controller matches the one on the spindle. Tap Filament, then Edit if it needs to be updated. |
1. Export G-code to SD card 2. Insert SD card into printer 3. Select “Print” menu option, click knob, select file, click knob, select “confirm”, click knob |
You need to make sure there’s enough filament and that the build plate is clean. A clean build plate does not have any debris on it from other prints and is free of grease and dust. Pry off any old plastic and wipe it with isopropyl alcohol. Refer to the Quick Guide for more info on changing the filament.
When instructed to start printing the model, the printer will take care of heating the extruder and build plate. The Bambu A1 and Creality Ender3-V3 take care of calibrating the build plate for flatness, but other printers may not.
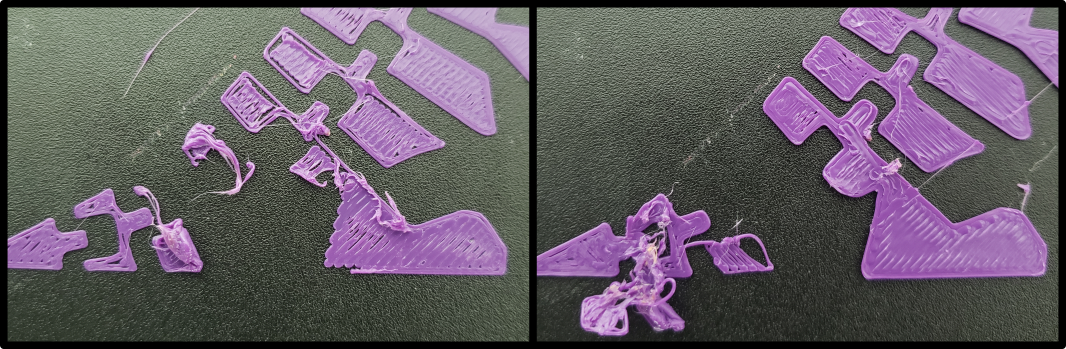
Hang out with the printer while it’s working to keep an eye out for problems. Problems often occur in the first one or two layers and if the first layer fails, the print will not recover. Even multi-hour prints that seem to be going well should be checked on every hour or so. It is always best to cancel a failed print before it gums up the printer.
- Saves time
- Saves filament
- Reduces damage to the printer!
An example of poor first layer adhesion causing the first and second layers to fail. Poor adhesion may be improved by cleaning the build plate, or, in more persistent cases, by tuning the printer settings.
¶ Finishing the Print
After the print is done, be safe and wait a few minutes for it to cool.
- The hot end, build plate, and object may be hot enough to burn you.
- The plastic may still be soft and could be deformed by the force used to remove it from the build plate.
- The object will be easier to remove from the build plate after it has cooled because the plastic shrinks slightly as it cools.
Wait longer for smaller parts because they are more influenced by the heat from the build platform. Large prints can be grabbed and popped off. Smaller prints may require removing the build plate and bending it to pop them off, and small prints may require using a scraper to pry them off. If you removed the build plate, return it to the printer.
Remove any support material from the object. It should be removable using your fingers but tweezers, needle nose pliers, or a craft knife to trim off thread ends may help.
And that’s it! Enjoy your new object!