¶ Workflow and File Types
The workflow for 3D printing is straightforward.
The first step is getting a model to print–some people will make their own, others will download a model. However you get the model, the second step is slicing the model. Slicing the model usually takes 2-10 minutes, depending on how many settings you change and how complex the model is. Once the model is sliced and sent to the printer, the print will take however long it takes! The slicer’s estimate of how long it will take to print is usually pretty good.

¶ Resolution of a Printed Object
You are likely familiar with resolution in the context of images–a high resolution picture has more detail in the same space than a low resolution image. It appears crisper. In images, resolution is defined by dots per inch or pixels per inch.

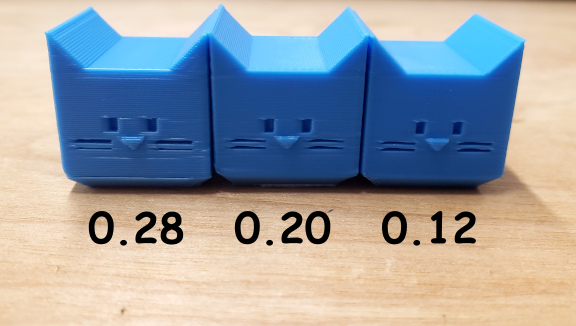
3D printed objects also have resolution, which is typically different in the horizontal and vertical directions.
Horizontal resolution is defined by the width of the extruded thread which is defined by the diameter of the nozzle. Horizontal resolution defines how crisp the corners of protrusions can be. Smaller nozzles produce crisper features at the cost of a greatly increased print time. It also changes how steep an overhang can be before support is needed.
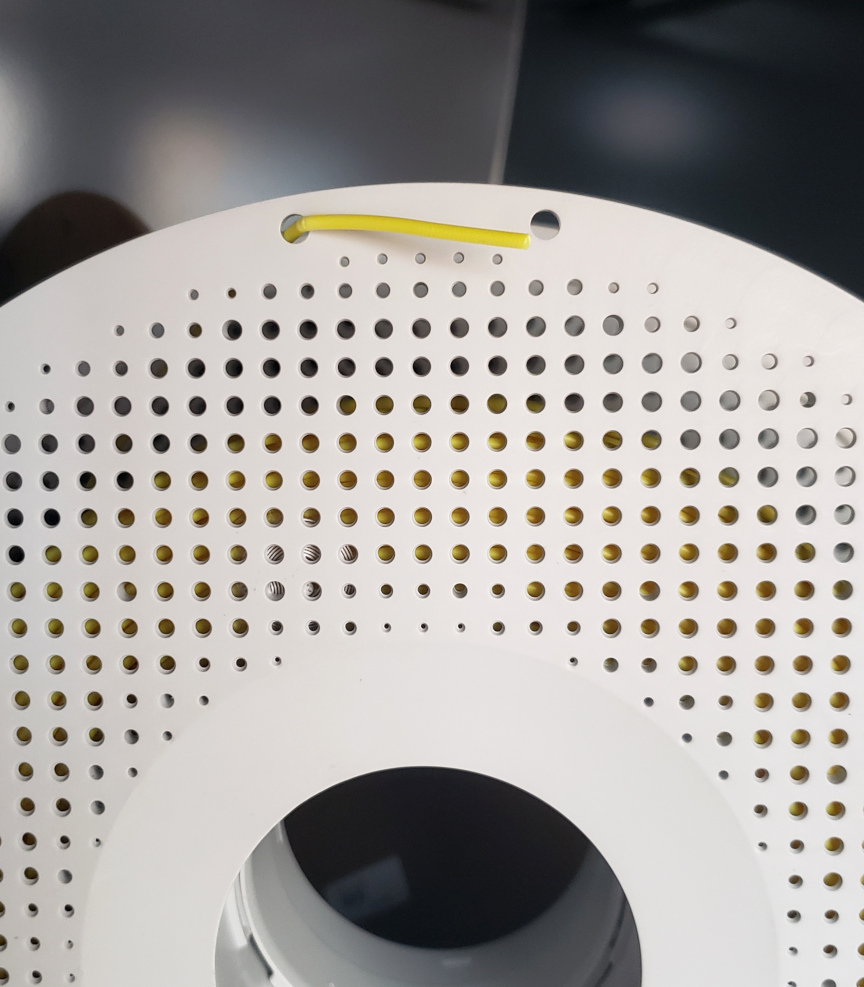
Notice in the Cali Cats to the right that the smallest feature that can be printed is two threads wide–this is because a perimeter is one continuous line. When it goes around an extremely narrow shape, the smallest width it can create is out and back again.
Vertical resolution is defined by the layer height or layer thickness, which can be set by the user in the slicer. Thicker layers print faster but the layer lines (ridges) on the sides of the object are much more pronounced, which may not be desirable.
For example, the Cali Cats to the right were printed with three different layer thicknesses with the thickest layers on the left and the thinnest layers on the right. Notice how the slopes of the ears smooth out and the triangle shape of the nose gets clearer as the layer thickness decreases.
¶ Parts of a Printed Object
First layer: the most important layer of the object. If this one has a problem the print will fail. The slicer often sets this layer to be a little thicker than other layers and to print slower than the others in order to improve adhesion.
There are typically 3-6 bottom layers, all of which are solid.
The middle layers are composed of the perimeter and the fill. The perimeter is typically 2-3 threads that go around the outside of the object. The fill gives the object sturdiness.
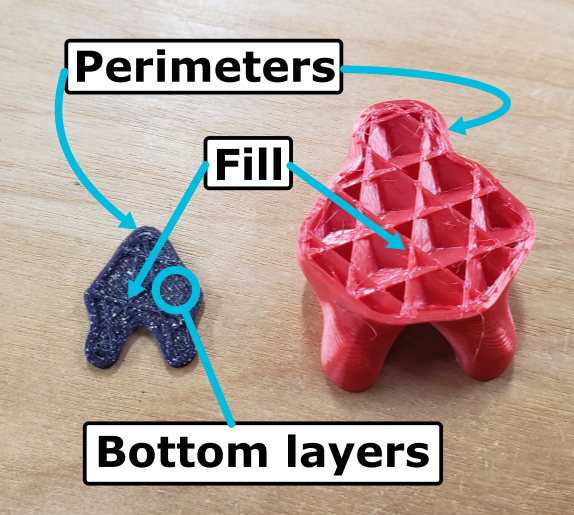
The last layers are the top layers, typically 2-6 solid layers.
There may also be support structures. When enabled, the slicer will generate support structures to hold up overhangs and bridges where needed.
¶ Identifying a Good Model
A “good model” is somewhat subjective. However, there are a couple of things to look out for when choosing or creating a model for 3D printing.
- Overhangs and bridges, and the sizes of them
- Size of the features and details
- Amount of the model that’s in contact with the build plate
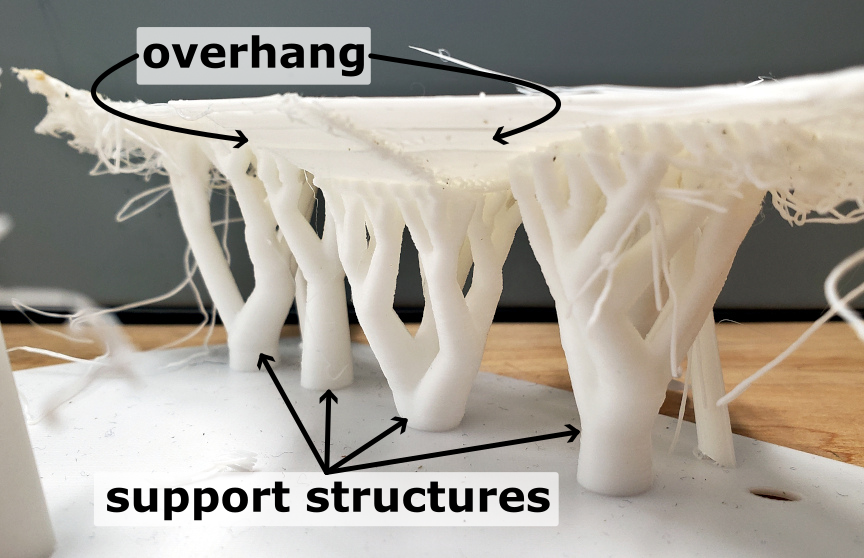
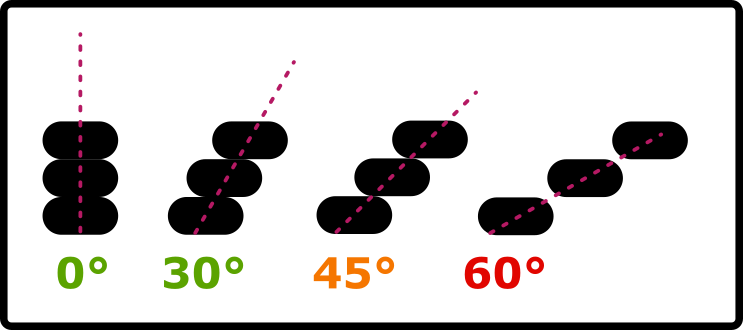
Overhangs and Bridges: Overhangs and bridges both occur when the 3D printer is laying a thread down over an open, empty space. The difference is that overhangs have support at one end and bridges have support on both ends. The larger the open space that must be crossed, the harder it is to cross it without threads drooping, snapping, or falling out of place.
The effects of overhangs and bridges can be mitigated by designing the openings with 45° or less amount of lean, or by enabling support material in the slicer. The slicer may also have a bridge setting that can be enabled.
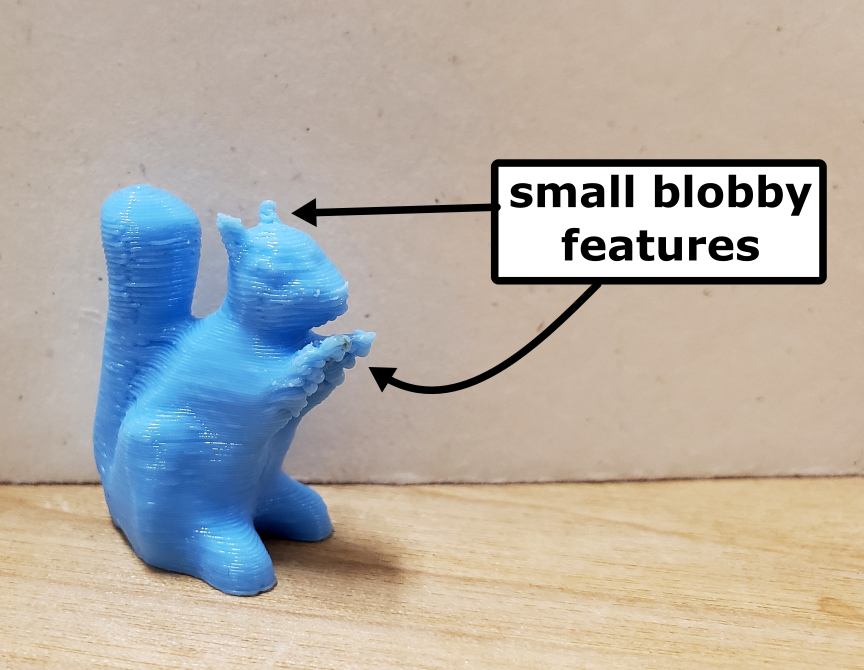
Feature and detail size: Small details and features are harder to print without distortion. Really small features can get blobby because they don’t cool down enough to solidify before the next layer. Layers also form small ridges up the side of the object and the thickness (also known as height) of each layer determines how much detail can be created in the vertical dimension.
Blobs can be mitigated by printing the model at a slower speed or with an increased time between layers. Vertical detail can be controlled by setting the layer thickness to thicker or thinner depending on what is needed.
Contact with the build plate: The amount of contact with the build plate influences how well the model stays adhered and in place during the build process. Models with very small footprints (1 cm2) to small footprints (1 in2) are extremely susceptible to being knocked loose during printing and to the effects of thermal warping, which is when the plastic shrinks as it cools. Additionally, prints that have a small footprint and are taller than they are wide are very easy to knock over.
When a model gets knocked off of the build plate, the printer will keep going but without any surface to put the thread on, it will create spaghetti.
The effects of a small footprint can be mitigated by enabling the brim or raft features in the slicer. The brim creates a one layer thick flange around the base of the model to help increase the size of the footprint. The brim can be peeled off easily when the print is done.
The raft feature creates a very solid and wide grid pattern underneath the model which increases the size of the footprint. The model can be popped off of the raft when the print is done.
It may also be possible to rotate the model in order to create a larger footprint. If one side or the top is larger than the bottom and you’re not worried about any of the visible sides having the build plate texture on it, it can help to rotate the model in the slicer to get a larger footprint.
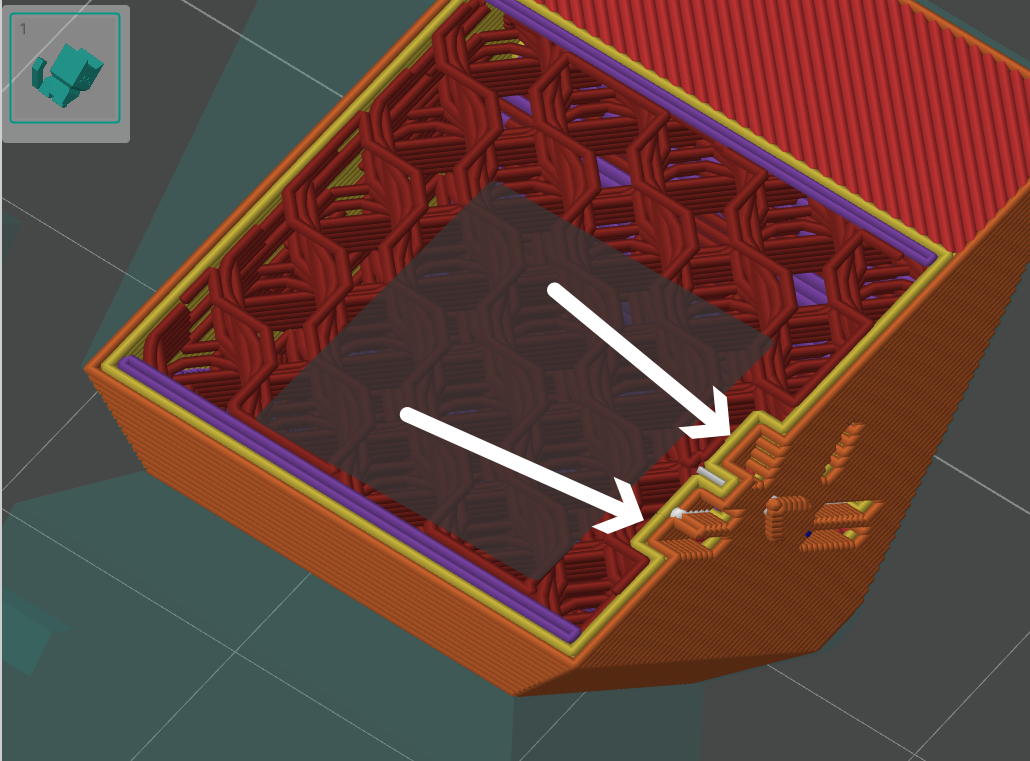
¶ Support and Support Generation
¶ A Quick Introduction to Support
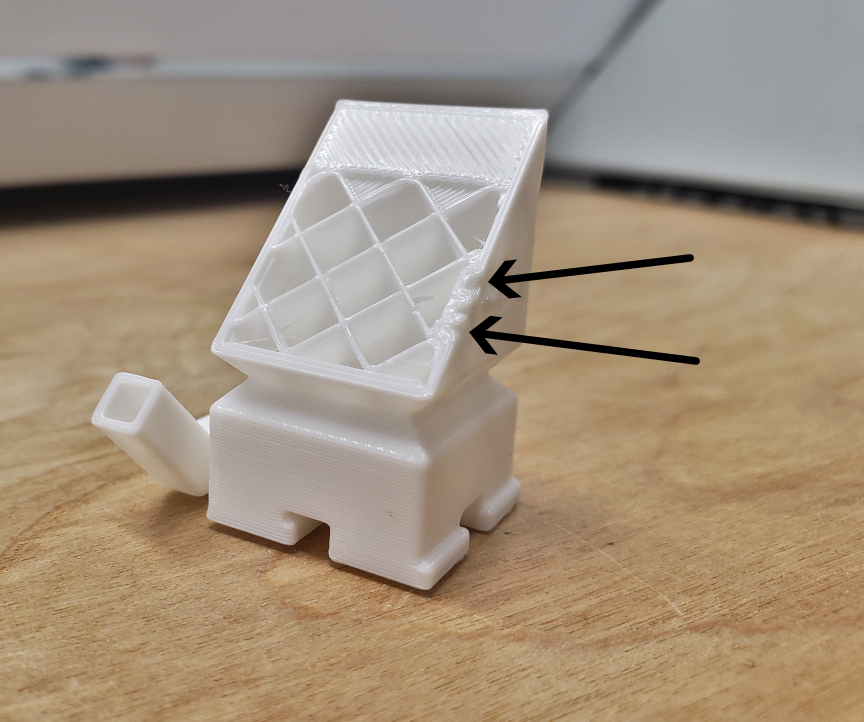
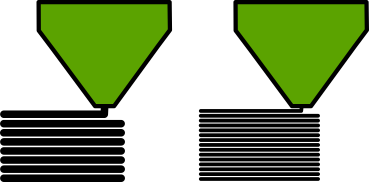
Support is used in 3D printing to improve print quality when there are areas of the model that overhang too much for the next layer of the print to catch on or adhere to the previous layer.
The diagram to the right represents the outermost threads in three layers. As the overhang increases, the overlap with the thread in the previous layer decreases until it is no longer supported. Unsupported threads can fall off the bottom of the feature. This causes distortions, bad print quality, and can even cause the print to fail.
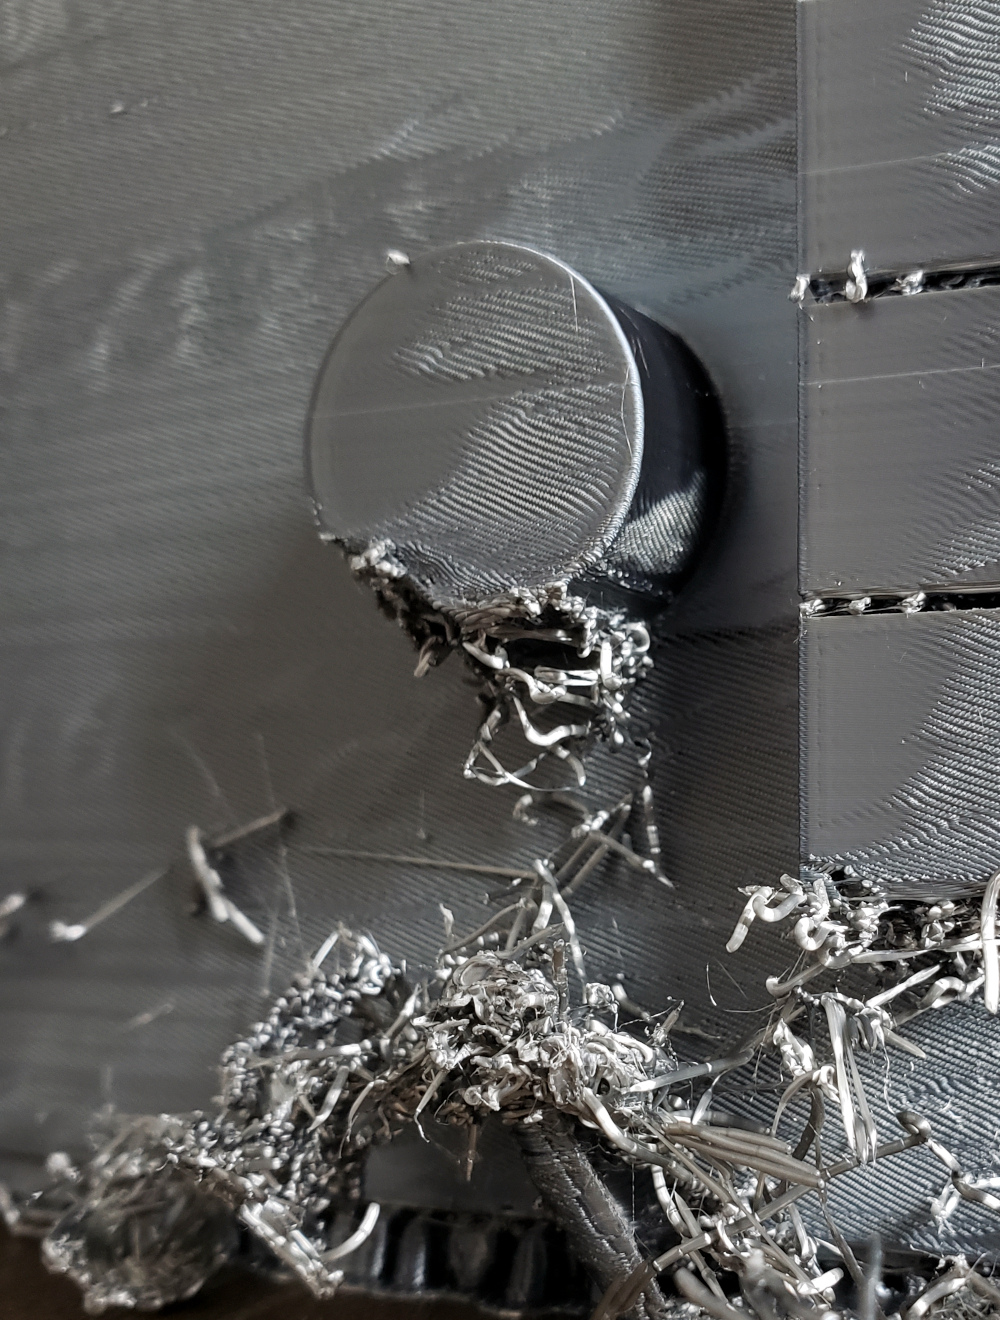
For example, the image to the left shows a cylindrical protrusion that was printed without support. The print eventually recovered because enough layers built up to create support, but the overall quality of the print is very low.
Meanwhile, the image on the right shows a spherical bump that was printed without support. The first layer of the sphere is very small and protrudes only a little bit, so it doesn’t fall far enough to disrupt the rest of the print. There is support holding the opening above in place.
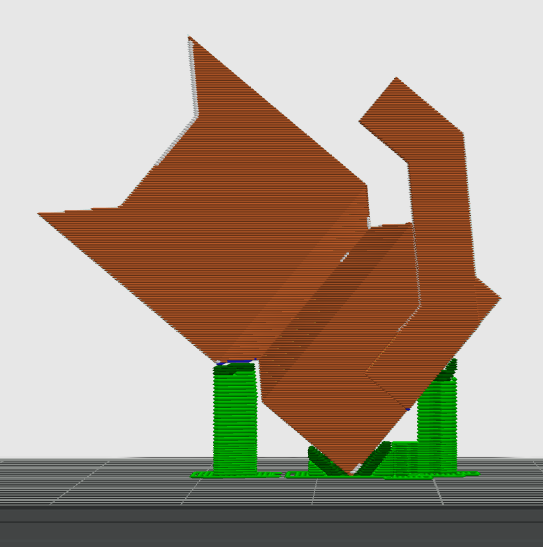
¶ Enabling Support Generation
Go to the Support options tab and click Enable Support. The Normal/Grid style of support will generate, but also check out the Tree/organic support style. In addition, enable the Advanced Settings and try out some different Type and Style combinations.
¶ Starting a Print
| ↙ From the Slicer to the Printer ↘ | |
| Bambu A1 | Creality Ender-3 V3 |
| 1. Choose the printer from the dropdown in the window that pops up 2. Verify that the filament material shown on the printer’s controller matches the one on the spindle. Tap Filament, then Edit if it needs to be updated. |
1. Export G-code to SD card 2. Insert SD card into printer 3. Select “Print” menu option, click knob, select file, click knob, select “confirm”, click knob |
You need to make sure there’s enough filament and that the build plate is clean. When instructed to start printing the model, the printer will take care of heating the extruder and build plate. The Bambu A1 and Creality Ender3-V3 take care of calibrating the build plate for flatness, but other printers may not.
Hang out with the printer while it’s working to keep an eye out for problems. Problems often occur in the first one or two layers and if the first layer fails, the print will not recover. Even multi-hour prints that seem to be going well should be checked on every hour or so. It is always best to cancel a failed print before it gums up the printer.
- Saves time
- Saves filament
- Reduces damage to the printer!
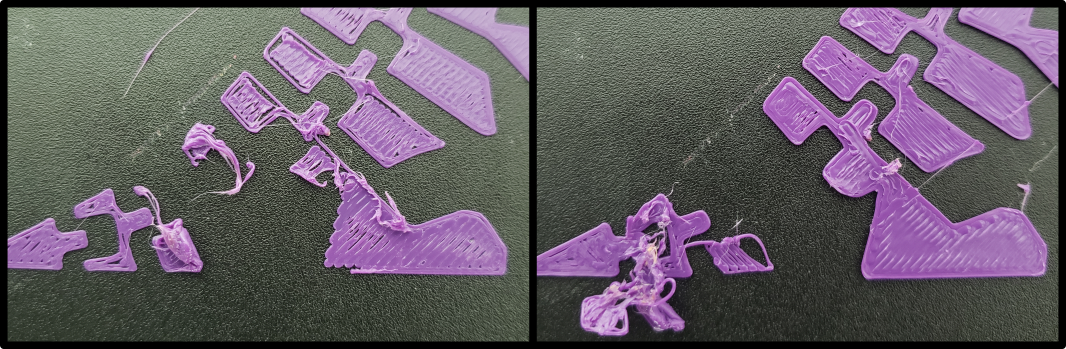
An example of poor first layer adhesion causing the first and second layers to fail. Poor adhesion may be improved by cleaning the build plate, or, in more persistent cases, by tuning the printer settings.
¶ Finishing a Print
After the print is done, be safe and wait a few minutes for it to cool.
- The hot end, build plate, and object may be hot enough to burn you.
- The plastic may still be soft and could be deformed by the force used to remove it from the build plate.
- The object will be easier to remove from the build plate after it has cooled because the plastic shrinks slightly as it cools.
Wait longer for smaller parts because they are more influenced by the heat from the build platform. Large prints can be grabbed and popped off. Smaller prints may require removing the build plate and bending it to pop them off, and small prints may require using a scraper to pry them off. If you removed the build plate, return it to the printer.
Remove any support material from the object. Most support structures can be easily popped off. Smaller structures or ones in small spaces may need tools to remove. Common tools include tweezers, needle nose pliers, a blunt flat head screwdriver, or a craft knife to trim off thread ends.
¶ Changing Filament
Changing the filament in a printer has two steps. Most printers provide an “Unload” or “Retract” function that will warm up the hot end before driving the filament backwards in order to make it easier for you to pull the filament the rest of the way out. The second step is to insert the new filament. The end of the filament should be cut at 45°, to produce a bevel, in order to make the filament go in easier.
| Unloading the Bambu A1 | ||||
|---|---|---|---|---|
Tap Filament 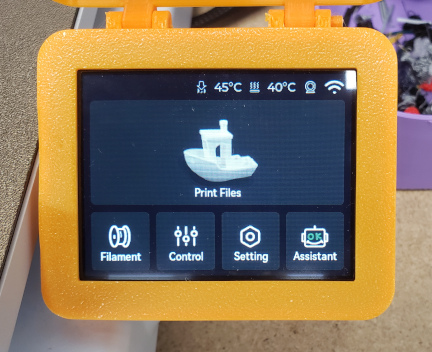 |
Tap Unload 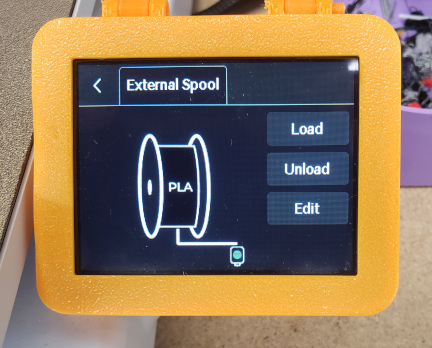 |
The printer will heat the hot end and cut the filament. | Once the printer has cut the filament, roll the filament reel to withdraw the filament from the tube. | Secure the end of the filament to the reel using the holes in the rim of the reel. This is to prevent the filament from tangling. |
| Loading the Bambu A1 | ||||
| Tap Filament |
Tap Load |
The printer will heat the hot end to prepare for extrusion. While the printer is heating up, get the spool hung on the spool holder and the end of the filament prepared with a 45° cut. |
When the printer is ready, feed the cut end of the filament into the tube until it reaches the hot end and see some filament come out of the extruder. Follow printer instructions. | Tap edit. Tap the Filament type to get a list of other filament types and use that list to select the filament type you’ll be printing with. |
| Unloading the Creality Ender3-V3 | ||
|---|---|---|
| Use the knob to select Prepare, then Retract. | The printer will heat the hot end to prepare for retracting the filament. | When the printer is ready, firmly pull the filament out of the top of the extruder while pressing the lever on the left side. |
| Loading the Creality Ender3-V3 | ||
| Use the knob to select Prepare, then Extrude. | The printer will heat the hot end to prepare for extruding the filament. | When the printer is ready, firmly push the filament into the top of the extruder while pressing the lever on the left side. Feed filament in until you feel the printer grab the filament and pull it. |