¶ Introduction
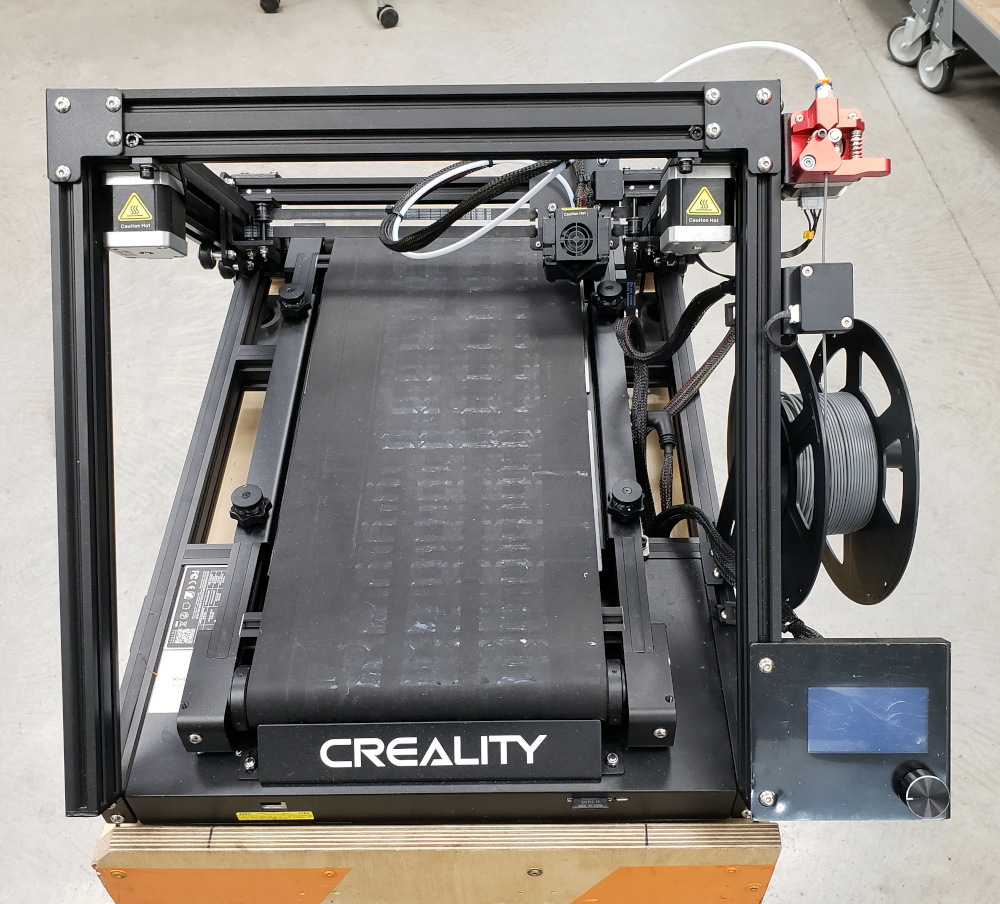
The following page acts as an introduction to the Creality CR-30 3DPrintMill.
¶ Shop Access
A membership or day pass is required to access 3D Printing. The workshop 3D Printing provides additionl training, but does not provide instruction for the PrintMill.
The Creality CR-30 3DPrintMill is not yet available for member use!
¶ Machine Reservations
You can make machine reservations in the following ways:
Click to expand
- In person at the front desk.
- Reserve a machine any time through our Mind Body Portal.
- Call the front desk during business hours at (410) 862-0424.
- Email us at frontdesk@openworksbmore.com. Please include your name, the machine you'd like to reserve, and the date(s) and times of the reservation(s).
Open Works recommends slicing your file before making a machine reservation. The slicer will provide a time estimate which you may use to accurately book your reservation.
¶ Machine Overview
The CR-30 3DPrintMill is unique as one of the few 3D printers available that features a conveyor belt style print bed. The benefit of this design is both the capability of printing extra long prints and the ability to easily batch print. The print head prints at a 45 degree angle which can create issues in prints such as gaps in shapes, and uneven extrusion. The CR-30 3DPrintMill is recommended for the advanced 3D printing user.
There is one CR-30 3DPrintMill available.
¶ Parts of the Machine
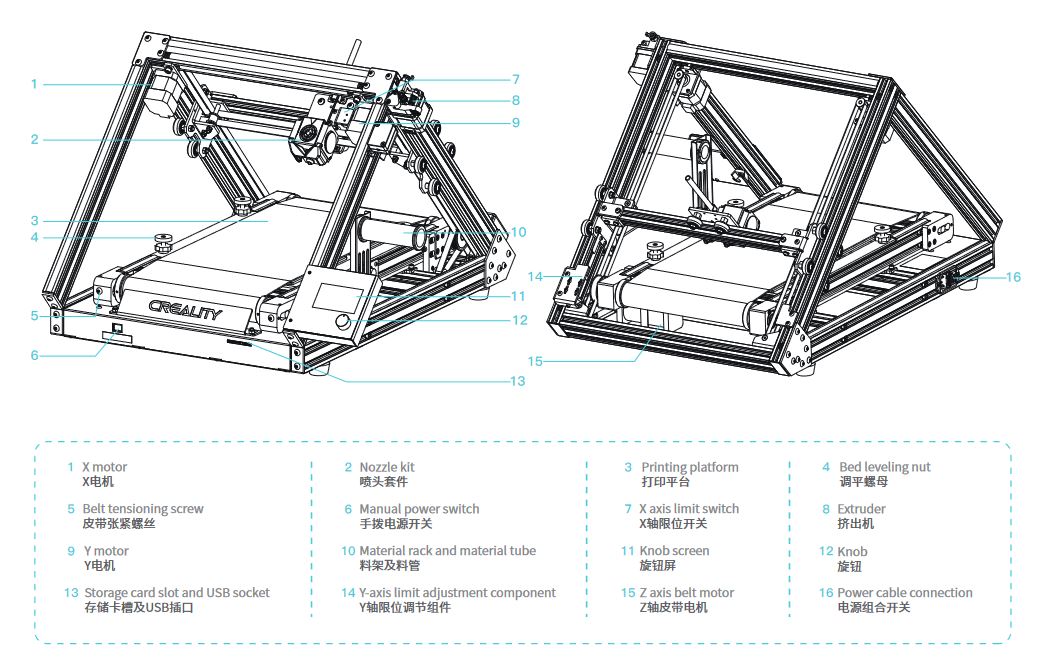
Click to see a diagram of the PrintMill!

¶ Materials
If a filament is not listed you can assume the material is not allowed.
¶ Acceptable Materials:
PLA
¶ Use with Caution and Proper Technique:
PETG
¶ Forbidden Materials:
ABS
Nylon
TPU
¶ Safety
As in all of the shops, sturdy, close-toed shoes must be worn at all times for traction and stability.
For more information on shop safety visit 3D Printing under "Safety."
The nozzle and bed of the 3D printers get hot! Do not touch the nozzle or the bed while they are
hot!
¶ Slicing
Use CrealityBelt to slice the model.
At this point you should have a gcode file for the printer.
¶ Preparing the Printer
Make sure you have reserved the machine for more than the print time estimated by the slicer.
¶ Loading Filament
Check to make sure there is enough filament to print your model.
- Put a spool on the hangar with the filament coming off the top pointing towards the back of the machine. If not already done, cut the tip of the filament at an angle.
- Feed the filament through the detector.
- Feed the filament into the extruder arm (red block). You may have to press the lever to get the filament through.
- Push the filament all the way through to tube to the hot end.
- On the controller, use "Load/Unload Filament" -> "Load Filament" to finish loading the filament.
¶ Bed Leveling
The bed leveling process is fully manual. The bed needs to be level relative to the path of the print head, which means that the rollers that move the belt and the belt support platforms contribute to the levelness.
Assuming that the rollers and the print head are aligned correctly:
- Using a non-flexible straight edge, lay it so that it touches both rollers.
- Adjust the belt support platforms using the knobs on either side of the belt until the straight edge just rests on the rollers with zero clearance between the belt and the straight edge for the whole length.
¶ Printing
Use the controller on the printer to select the file you wish to print and start the print.
¶ Post Processing
If the print is still on the machine, gently break it free of the build plate and bring it to the front desk to be weighed and the filament used paid for.
Clean up any support material and stray threads.
¶ Machine Maintenance
All machine maintenance pages are only accessible to Staff. All machine maintenance is only to be done by Staff.
¶ Calibration
Running a Calibration Print on the PrintMill is just a regular print with a specific file. Lately the CaliCat (Calibration Cat) has been used. The calibration print will be placed on or near each printer in the morning.
¶ Cleaning the Print Bed
Materials: 70% Isopropyl Alcohol, lint free cloth
- If the print bed is hot, wait for it to cool.
- Remove any stuck on debris with plastic tools to avoid scratching the build plate.
- Soak some isopropyl alcohol into the lint free cloth.
- Scrub the surface of the belt all over with the cloth. Like, really scrub that thing.
¶ Removing Clogs from the Nozzle
- Preheat the nozzle to melt the plastic.
- Insert a small wire, needle, or cleaning probe to dislodge the jam.
- Manually feed filament or use the 'load filament' command to feed filament. Look for even extrusion.
- Repeat if needed.
¶ Troubleshooting
All troubleshooting pages are only accessible to Staff. All troubleshooting is only to be done by Staff.
¶ References
¶ Video Walkthroughs
¶ Resupply Form
Click here to report any consummables needing to be replenished within 3D Printing!