flowchart LR
a("Concept") ---> b("Design") ---> c("Tool Specific Software") ---> d("The Tool")
click a "/VOW/intro-to-digital-design/concept" "This is a link to the concept page" _blank
click b "/VOW/intro-to-digital-design/design" "This is a link to the design page" _blank
click c "/VOW/intro-to-digital-design/software-tool" "You are here!" _blank
click d "/VOW/intro-to-digital-design/tools" "This is a link to the tool page" _blank
classDef basicNode fill:#78cdd1,stroke:#7c7e7f,stroke-width:2px;
classDef hereNode fill:#f37322,stroke:#7c7e7f,stroke-width:4px;
class a basicNode
class b basicNode
class c hereNode
class d basicNode
Every digital manufacturing tool has software associated with it. This software has a range of functions; typically they will have tools to create or modify a digital design, tools to set options related to the process, and a way of controlling the machine or generating code that controls the machine. Generally tools meant for home or domestic use such as the Cricut vinyl cutter or Glowforge laser cutter will have better design tools than than tools meant for industrial applications which assume that the design will be done using different software and imported.
Here is an example workflow to covert a photograph to an embroidered image.
flowchart TD
a("Digital photograph") ---> b("GIMP (GNU Image Manipulation Program)<br> to reduce the color palette and manipulate the image") ---> c("Inkscape to convert to vector and reduce the complexity of the vectors") ---> d("Inkscape (InkStitch extension)<br> to convert the design to digital embroidery paths") ---> e("Design Shop Pro<br> to set thread colors and finalize other settings") ---> f("Use Design Shop Pro to communicate with MelcoOS,<br> which lives on the digital embroidery machine and controls the actions of the machine")
Even though it seems complex, each of these software tools is used to take advantage of its strengths and make the steps in the next tool easier. It is not necessary to use InkStitch as Design Shop Pro can do all of the same things and has a much better interface but InkStitch is free and Design Shop Pro is extremely not, and if you wish to work from home (or even the computer lab), then InkStitch is for you.
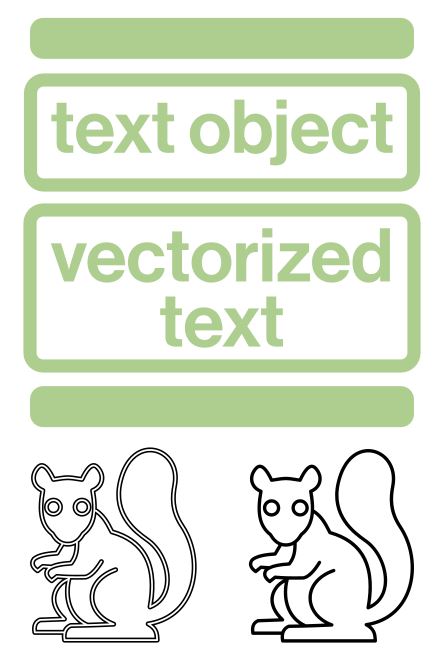
Here we will go through a basic exercise with each (or as many as possible) piece of software in order to highlight some tricks. We will use the same starting vector file which will include a text object (to demonstrate how that breaks), vectorized text, and a vector graphic. Then we will import that into the software and discuss what did and did not work, and how to fix it (if possible).
The test drawing with a filled rectangle object, a rectangle object with stroke, a text object, a rectangle path with stroke, vectorized text, a filled rectangle path, a squirrel path with stroke, a squirrel path with fill.
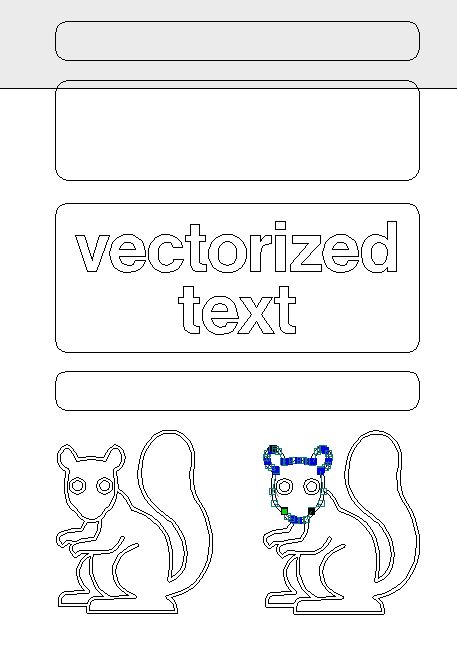
Overview of how VCarve imports the elements.
VCarve dropped the text object but interpreted the rest as paths without fill. The squirrels got interpreted as multiple paths, with several interior paths and one exterior path wrapping around the outside. VCarve does not interpret a path as anything until a process type is assigned to it, letting you determine if it is a hollow or a line to cut along.
Design tools have limitations, must be online to use
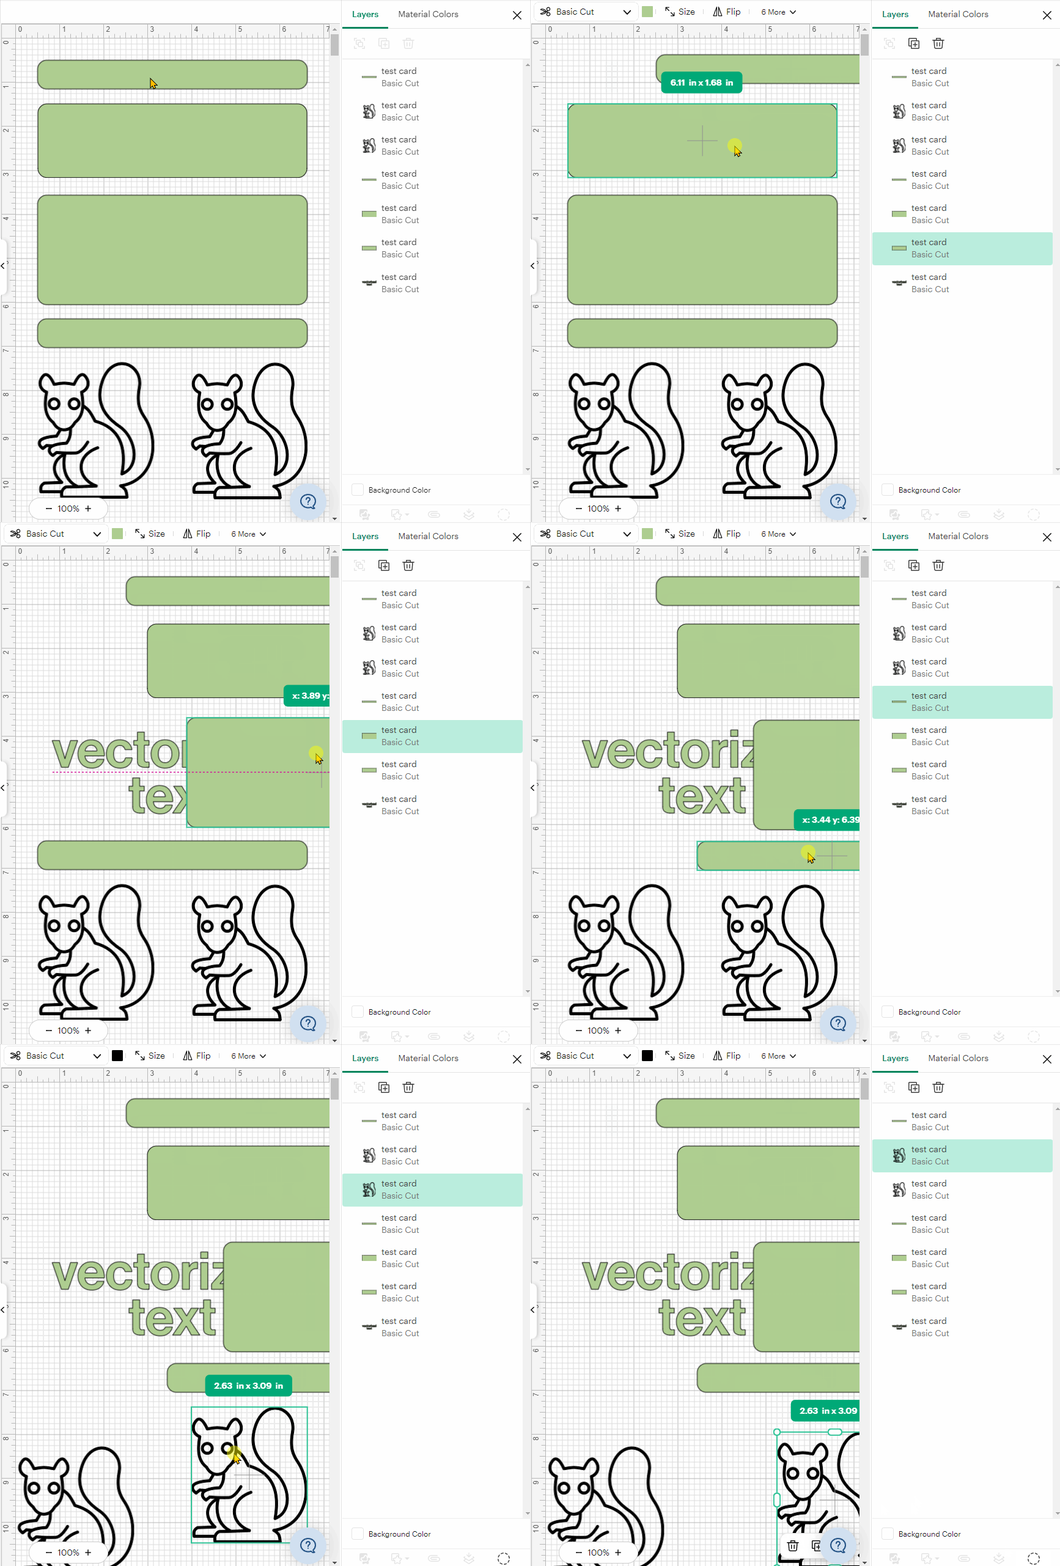
The test drawing showing that the rectangle and text objects didn't render as anticipated.
On import, CDS dropped the text object and rendered the rectangle object as filled instead of as having stroke. Additionally, the vectorized text got hidden behind the rectangle path. CDS interprets every path as a line to cut along.
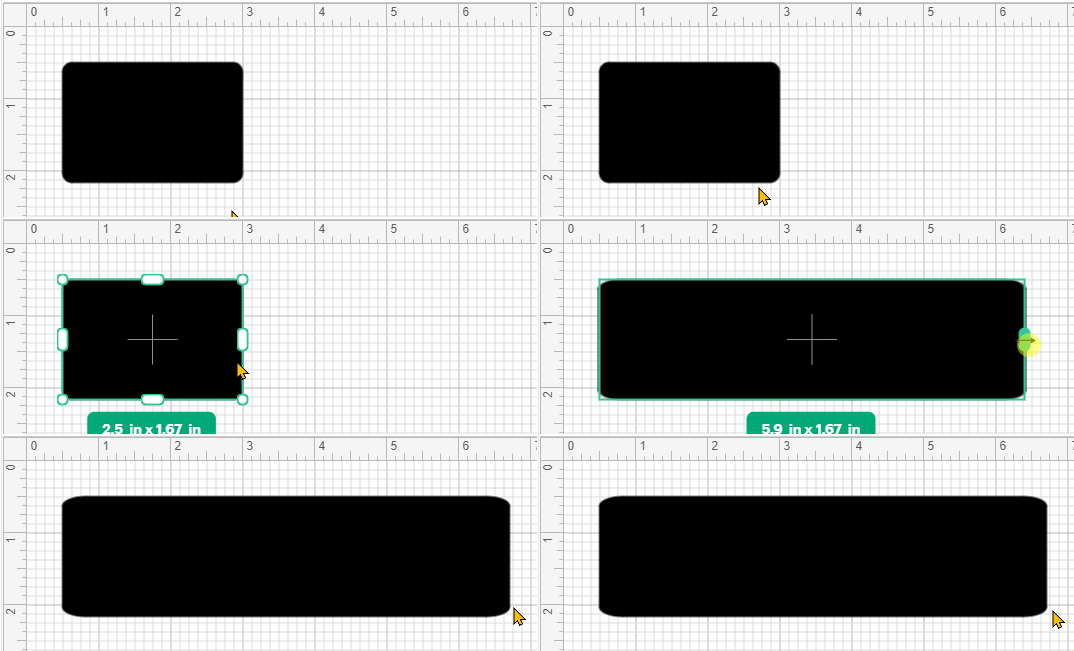
Demonstration of CDS transform tools.
CDS doesn't use path editing tools to adjust the sizes of shapes. Instead, it uses transform tools, which can be seen in the corner radius becoming smushed as this rectangle is resized.
Ink/Stitch stitch library is here. This provides visual examples of many types of stitches with links to how to create those stitches using Ink/Stitch. Here is their guide for using Ink/Stitch.
These slicer programs assume that the model has been created elsewhere and should not be used as modeling programs. They do provide tools for modifying existing models by adding or subtracting basic volumes (cubes, spheres, etc) and raising or embossing text on a surface. They may also provide mesh repair tools and direct control over the 3D Printer.
As slicers are meant to work with 3 dimensional data, we didn't try feeding them the 2D test image since it doesn't make sense to do that.