¶ Introduction
Instructions to replace an attachment on an angle grinder.
¶ Skills/Class Required
A membership or day pass is required to access the Metal Shop. The following Shop Safety Class is required to access the angle grinders:
¶ Machine Reservations
The angle grinders do not require a machine reservation and are available on a first-come first-serve basis.
¶ Before You Begin
Personal Protective Equipment (PPE):
• Sturdy, close-toed shoes must be worn at all times.
• Long hair, jewelry, and loose clothing must be tied back.
• Safety glasses and earmuffs must be worn when using the angle grinders.
• A face shield must be worn to protect from sparks!
• A dust mask or a NIOSH certified respirator is recommended.
Absolutely no synthetic fabrics within the Metal Shop!
For more information on shop safety visit Metal Shop under "Safety."
¶ Time to complete
- 5 minutes.
¶ Tools Required
- Angle grinder.
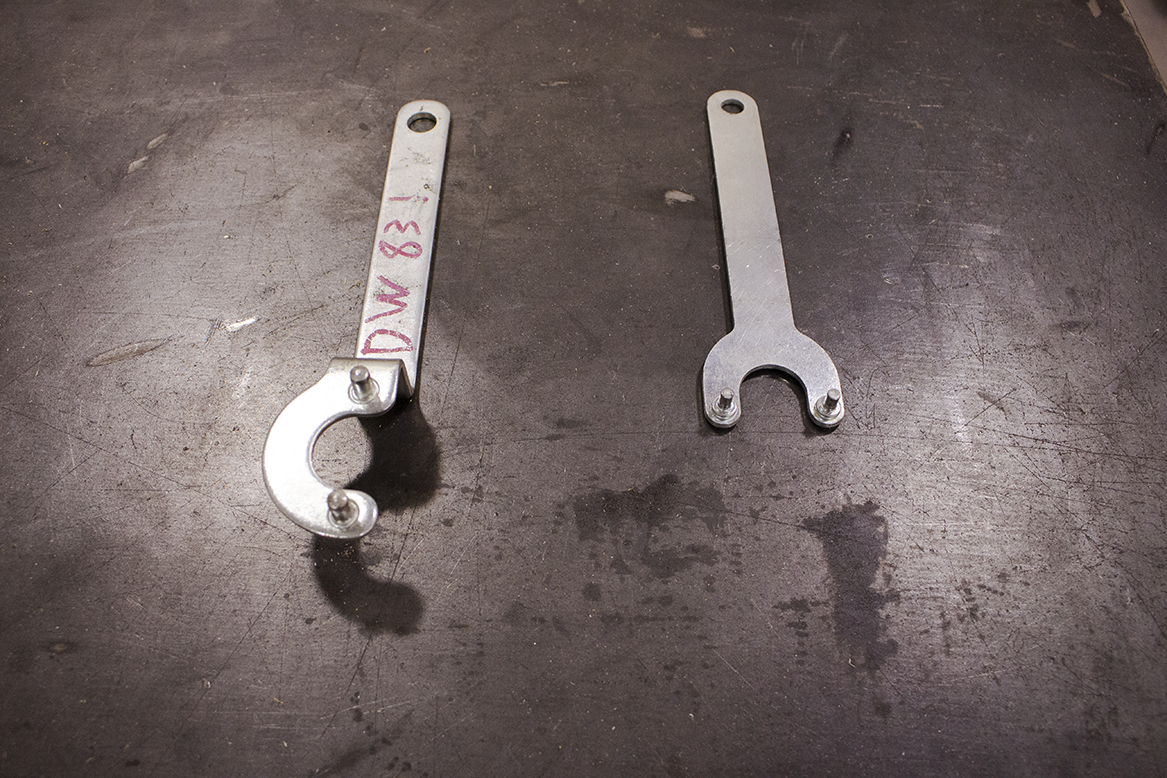
- Spanner wrench.
¶ Materials Required
- Guard.
- Unthreaded backing flange.
- Threaded locking flange.
- Grinding disc.
- Cutting disc.
- Flap disc.
- Sanding disc.
- Polishing wheel.
¶ Installing Angle Grinder Attachments SOP:
¶ Step-by-Step Guide:
-
Before installing or changing an attachment make sure the angle grinder is unplugged or the battery is removed.
-
Press in the spindle lock button to stop the attachment from rotating.
-
With the button depressed you may use your hand or a spanner wrench to loosen the threaded locking flange.
-
Remove the threaded locking flange.
-
Replace the old attachment with the new.
-
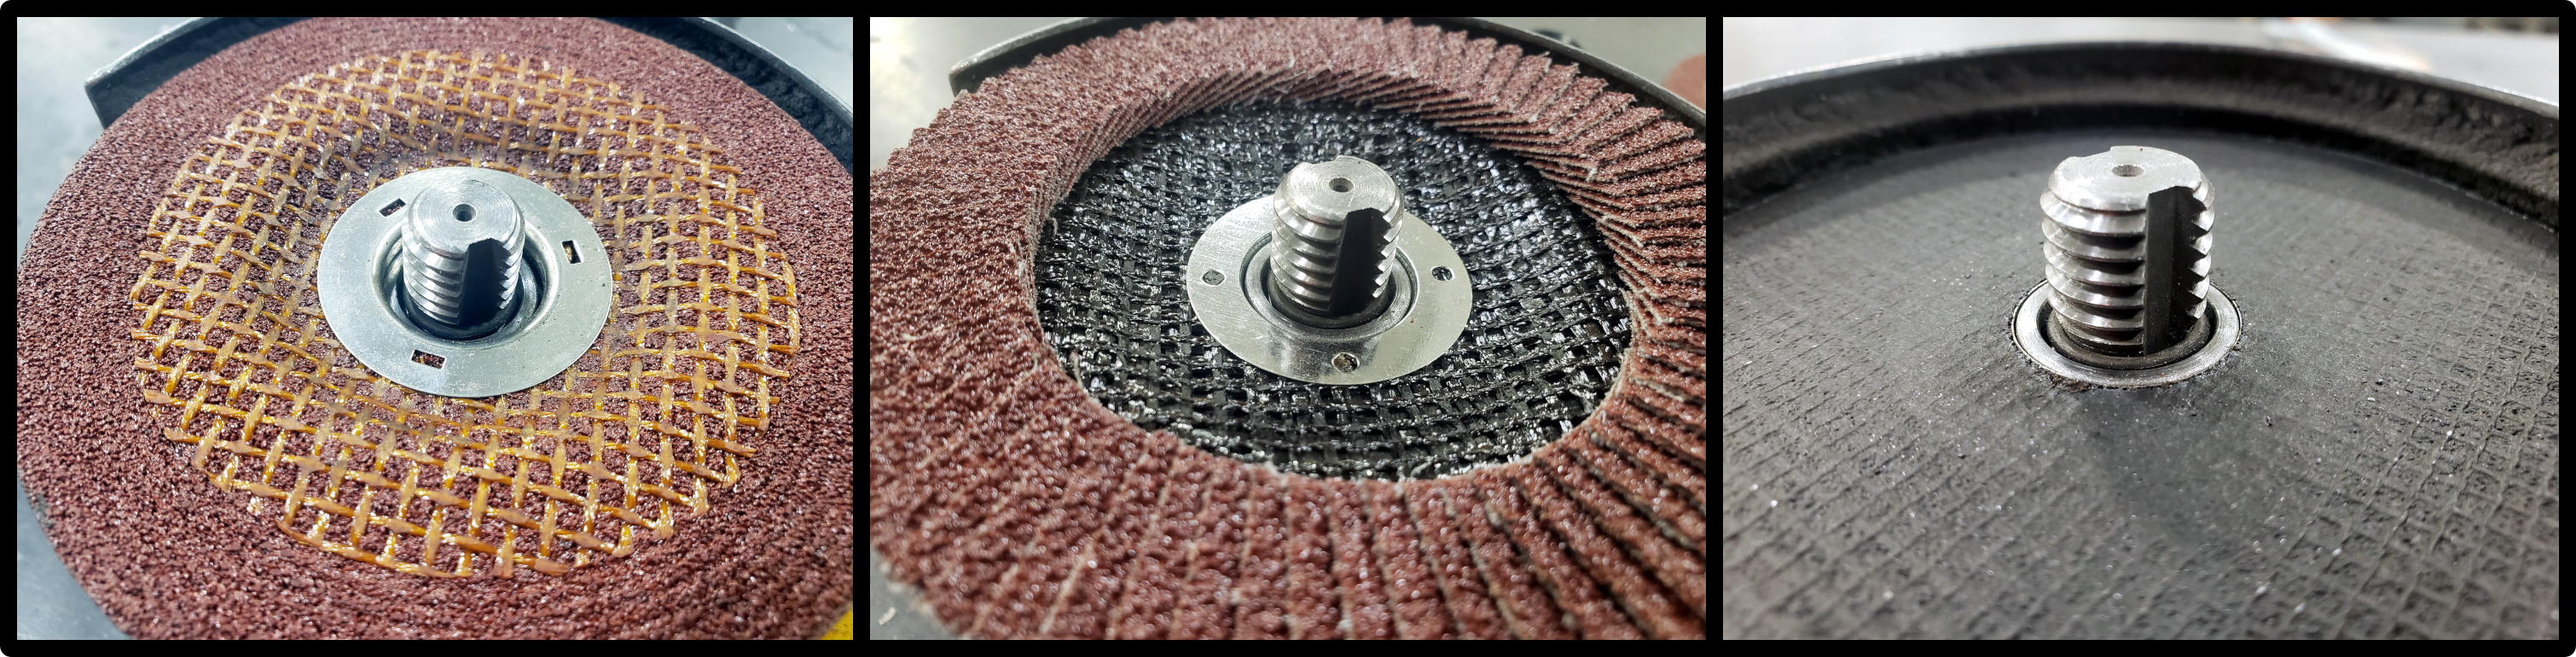
Examine how the attachment sits on the spindle, looking for the interior ring in relation to the thickness of the attachment.
-
Examine the threaded locking flange and notice that one side is flat and one side has a raised interior ring.
-
If there's a lot of space between the spindle and the inside of the attachment, orient the threaded locking flange so that the raised interior ring is towards the attachment and thread it on.
-
Hand tighten the attachment. Once the attachment feels secure, depress the spindle lock button and tighten the attachment by spinning the attachment.
Do not use the spanner wrench to tighten! Over tightening can damage or break thin attachments such as the cutting discs!
- Check the attachment for looseness and wiggles. If the threaded locking flange is secure but the attachment is loose, try reseating the attachment and flipping the threaded locking flange over.
You have successfully installed an attachment on the angle grinder!