¶ Creating a File in VCarve Pro - Trial Edition
¶ Introduction
VCarve’s primary purpose is to generate the G-Code[1] that the CNC[2] routers require for operation. This G-Code tells the CNC router how to cut the various toolpaths.[3]
The types of Toolpath include:
- Profile cut.[4]
- Pocket clearing [5]
- drilling, inlays, and lettering.
VCarve can also be used as a rudimentary vector[6] drawing program with the ability to import files from more advanced drawing programs (e.g. Illustrator, Inkscape, CorelDRAW, Fusion 360, etc.)
- Drawing features include shapes, lines, text, arcs, etc.
- VCarve can also generate the code for duplicates of the same item.
- VCarve Can generate the code necessary for 2-sided objects as well as rotary machined objects.
- Bit-mapped objects (pictures) can be imported, and code can be generated to produce toolpaths of their outlines.
¶ Where to Use VCarve (Home, PC Lab, and DFAB/3D Printing)
- Users have to be added to the Makerspace Group before they can use VCarve at Open Works or at home.
Members can use this permalink to either create a Vectric account that is linked to our Makerspace Group or join an exisitng Vectric account our Makerspace Group. This handout explains the process of creating a new account or join their existing acocunt to our Makerspace Group. Once a member has a Vectric account that is joined to our Makerspace Group they just sign into the latest Trial V12.0.13 (as of Feb. 2025) of VCarve Pro using their account credentials.
- Free trial version of vcarve pro can be run at home on Windows computers, or used in the PC Lab at Open Works
The free version cannot export usable tool paths. The full version is required for that.
- Using your USB key to bring your design to the computers in DFAB or 3D printing to export your toolpaths. When booting up your job file on the Shopbot-attached PCs, ensure that V-Carve Pro Makerspace Edition is open and that it is logged in as the OW admin, Riggs. Ask a CT for those login credentials.
¶ Skills/Class Required
- A membership or day pass is required to access the Computer Lab.
- Creating a file in VCarve is covered in depth in CNC Router 1 Shop Safety.
CNC Router 1: Shop Safety is not required to access VCarve.
CNC Router 1: Shop Safety is required to run a VCarve file on an Open Works ShopBot CNC Router.
CNC Router 2: Laguna is required to run a VCarve file on the Open Works Laguna CNC Router.
¶ Before you Begin
- Create a Vectric account or join our Vectric Makerspace Group using this link
- Select a bit
- Select a material for your workpiece.
- (OPTIONAL) Create a .dxf file in Adobe Illustrator 2023.
¶ Time to complete
- Variable.
¶ Tools Required
- VCarve Pro - Trial Edition latest edition available
- (OPTIONAL) Adobe Illustrator 2023
- Measuring tape
- Calipers
- CNC router bit[7]
- Flash drive[8]
¶ Materials Required
- (OPTIONAL) .dxf[9] file
.DXF files works best.
Objects from 3D software can also be used but they need to be flattened to create toolpaths.
¶ Toolpaths
It is important to select the correct type of toolpath and bit function for the job you are trying to execute.
- Profile cuts and pocket clearing describe the path the tool makes around a shape.
- A profile cut follows the contour of a shape instead of removing material inside the lines.
- A pocket clearing etches the surface of the material, milling out the space inside a shape.
¶ Climb Cut
A climb cut designates that the bit rotates in the same direction the tool is moving.
Climb cuts are the preferred choice for CNC routers at Open Works.
¶ Conventional Cut
A conventional cut designates that the bit rotates opposite the direction the tool is moving.
¶ Instructions
- This guide will focus on the basic steps for completing a simple design with the appropriate toolpaths in VCarve.
- For tutorials covering more advanced applications of VCarve click here.
¶ Begin a VCarve File
- Launch VCarve Pro Trial from the desktop.

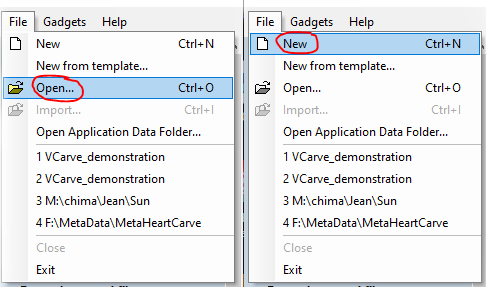
Occasionally, VCarve will struggle to open .dxf files.
If you experience this error export your .dxf file using an earlier AutoCAD version.
2007/2008/2009 works well.

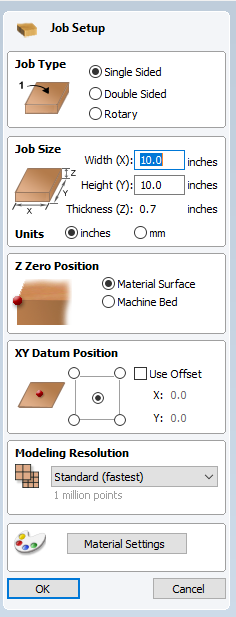
- Whether opening an existing design or creating a new design within VCarve the Job Setup menu will pop up on the left hand side of the screen.
For the purposes of this guide we will use the following settings:- Job Type: Single Sided
- Z Zero Position: Material Surface
- XY Datum Position: Center of the Workpiece
If you have not measured your workpiece, now is the time to do so using your measuring tape and calipers. Measure carefully and input the exact dimensions of your work piece into the "Job Size" parameters. Note that the given dimensions of material may not be the real dimensions of the material. For example, something labled as 0.75" thick may actually be 0.65" thick, and it may vary from piece to piece and manufacturer to manufacturer. For this reason it is important to measure carefully every time.
- For those who plan to create their design in VCarve:
- Under "Drawing" you can find tools for creating and manipulating vectors.
- Under "Modeling" you can find tools for creating and manipulating 3D forms.
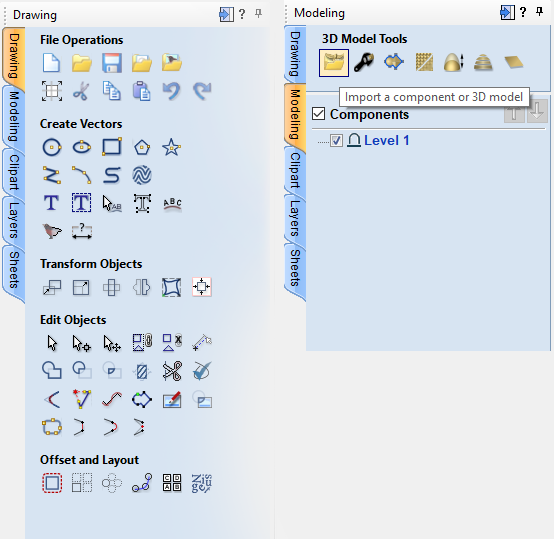
Hover over any icon in VCarve to see the corresponding tool tip.
If you require more in-depth guides to drawing in VCarve Pro click here.
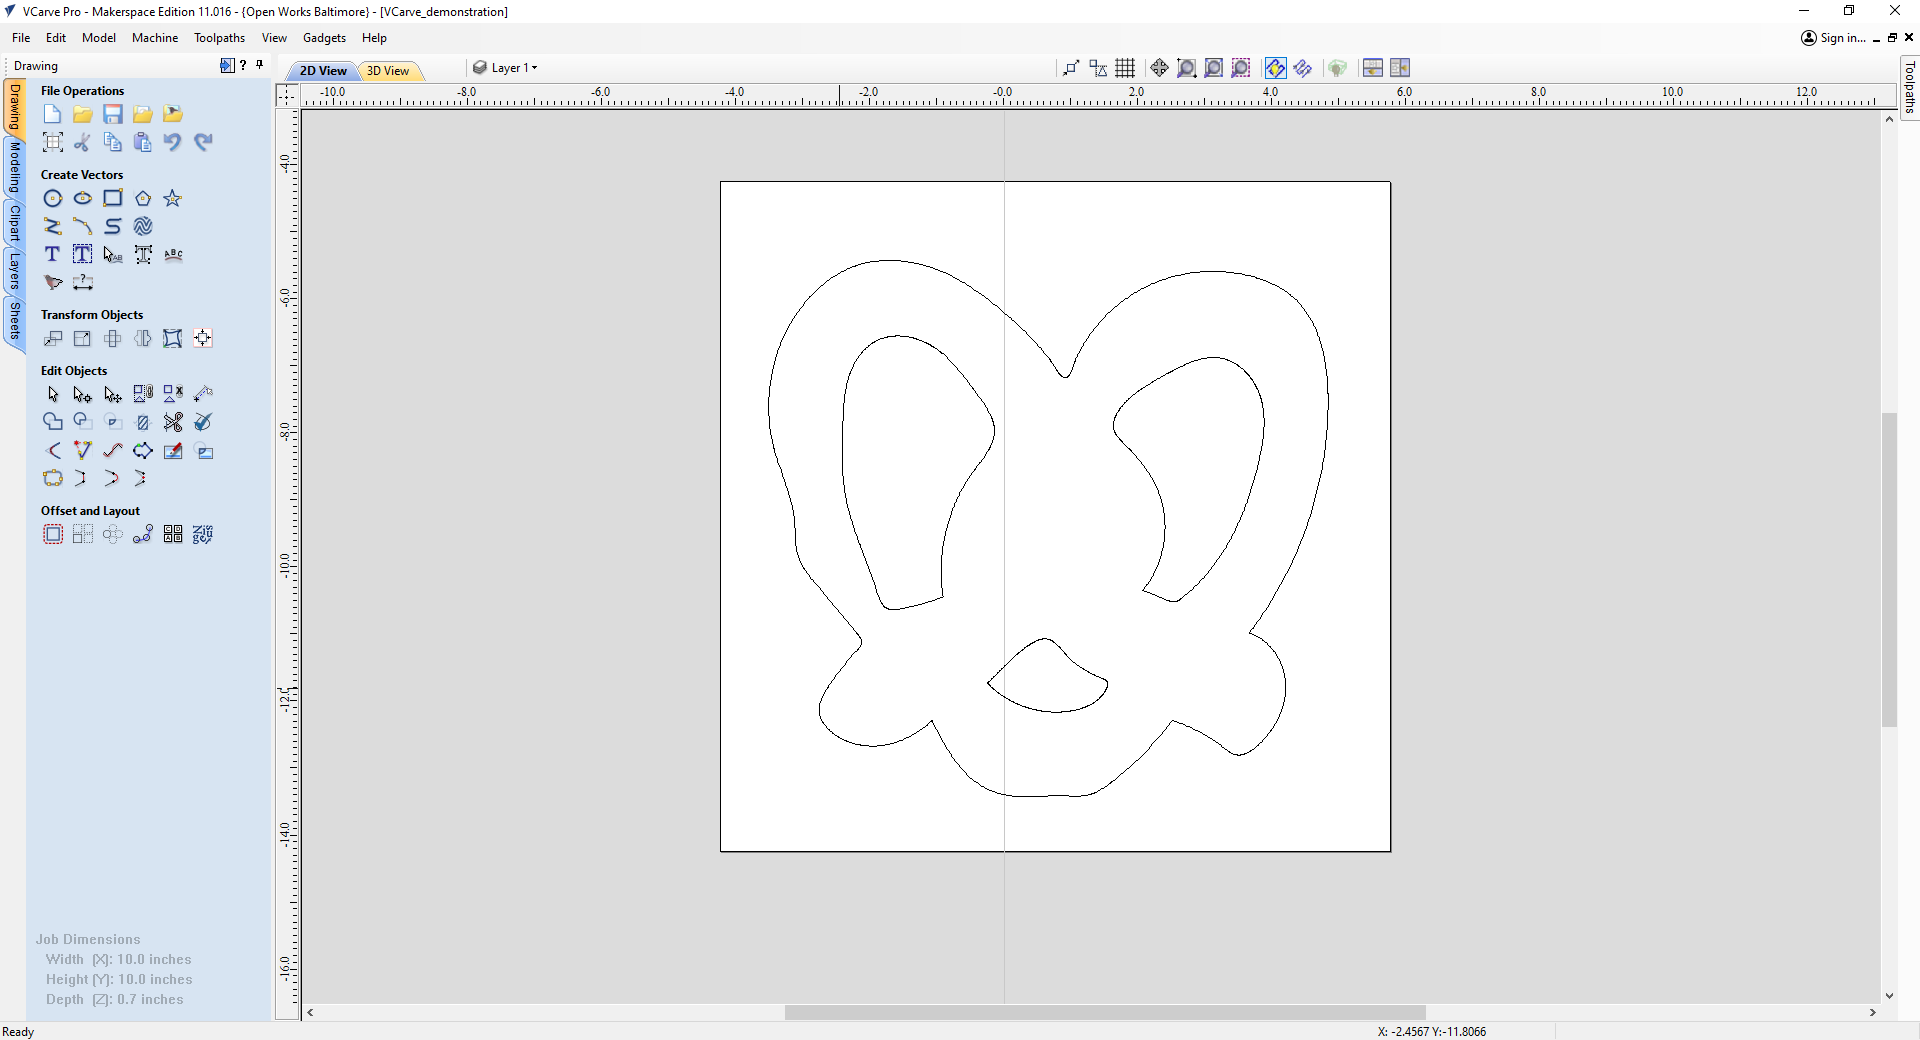
Your design is complete and open in VCarve!
¶ Create an Offset (Optional)
- Select your outermost vector by left clicking directly on the vector. The selected vector will be highlighted in pink.
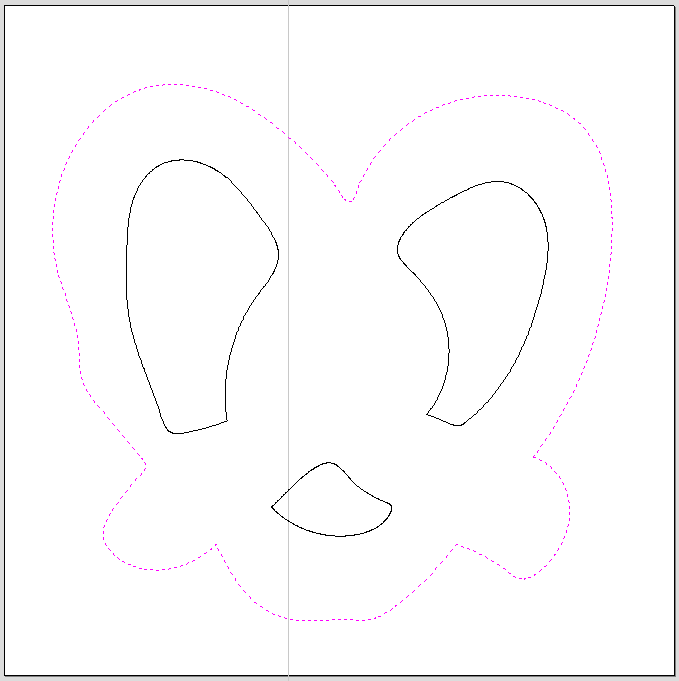
If clicking on the outermost vector selects the entire design you will need to ungroup the vectors.
To Ungroup: select the entire design, right click > "Ungroup Objects" > "Ungroup onto groups layer"
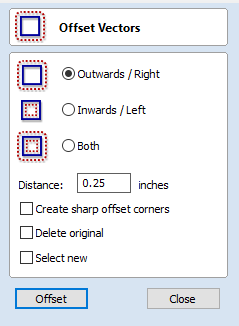
- With your outermost vector still selected, click on "Offset" under "Offset and Layout."

- Chose "Outwards / Right." In "Distance:" enter the measurement of your offset. Click "Offset" and then click "Close."
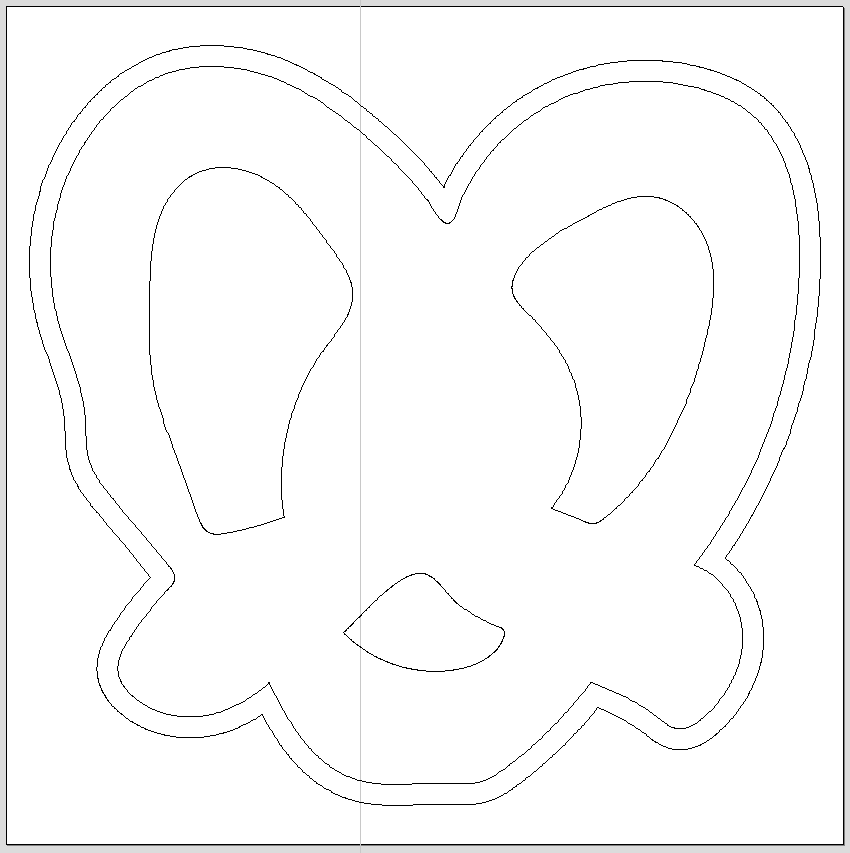
You have successfully created an offset!
¶ Create a Profile Cut Toolpath
- When selecting a toolpath type (profile, pocket, engraving, etc.) you must also select what type of bit will be used.
Open Works has many preset cutting parameters, but it is always good to check that they are suitable for your job.
For more information on the different toolpaths please see the "Toolpaths" section of this page.
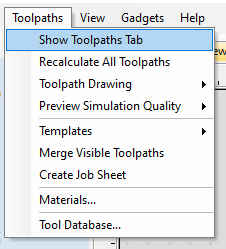
- From the toolbar go to "Toolpaths" > "Show Toolpaths Tab."
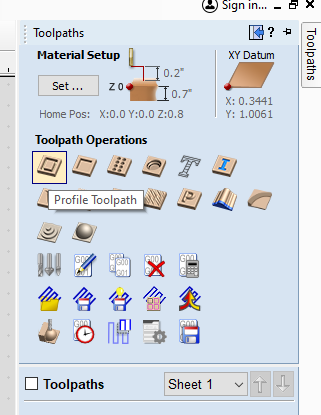
- The "Toolpaths" window will now be open on the right hand side of the page. Select "Profile Toolpath."
- Under "Tool:" click "Select..." to open the tool database.
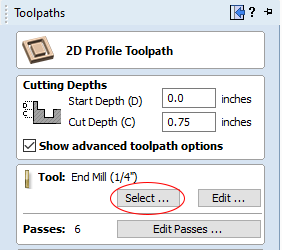
It's imporant to set the cut depth to no more than 1/32" (0.03125 inch) larger than the thickness of the material. This makes sure that the cut will go all the way through the material without cutting too deeply into the spoilboard.
- Within the tool database you can select a bit from the left hand side of the screen. With the correct bit selected (I will be using an End Mill 1/2'' bit) you can input the values for the feeds and speeds.
- Visit CNC formulas for help calculating the feeds and speeds.
- Under "Tool Number" give your bit a number. It is important for your tool number to be consistent.
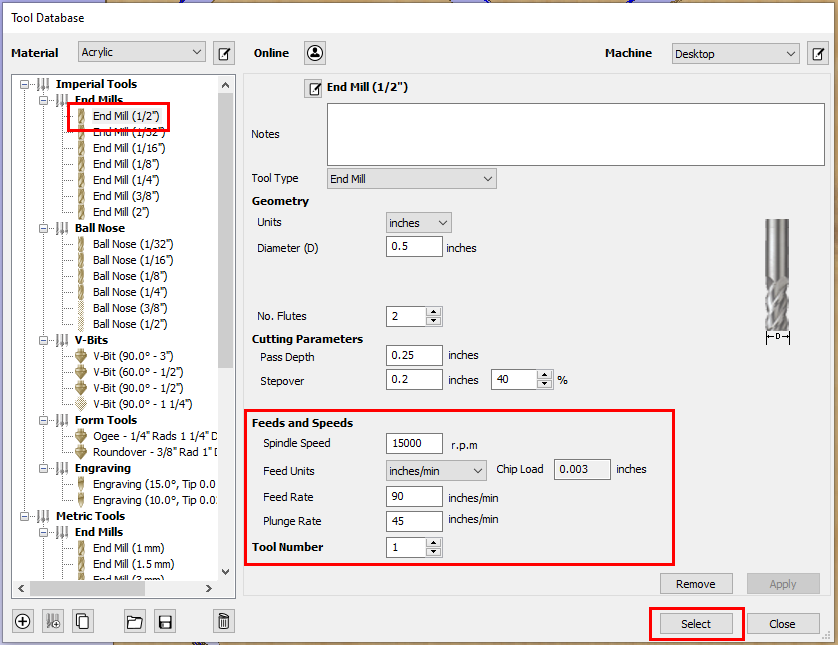
Spindle Speed should not exceed 15,000 RPM when operating the ShopBot PRSalpha.
Spindle Speed should not exceed 18,000 RPM when operating the Laguna Swift.
Plunge rate should be half the value of the feed rate.
-
With your values set click "Select" to close the tool database and return to the "Toolpaths" window.
-
From the "Toolpaths" window, we can set the path of our tool. Select "Outside / Right" if you want the profile to cut directly outside of the vector. "Inside / Left" will have the bit carve directly inside of the vector. "On" will have the bit directly trace the vector.
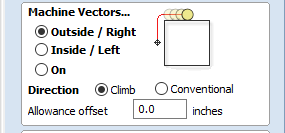
Open Works recommends selecting "Climb" under "Direction."
With this setting your bit will perform a climb cut.
- Next, select "Add tabs[10] to toolpath." Tabs help stabilize your project as it is cut from the workpiece.
Under "Length" and "Thickness" input your desired measurments.
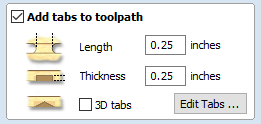
The standard 0.25'' for both "Length" and "Thickness" will be used in this demo.
- Select "Edit Tabs..." to place your tabs on the toolpath.
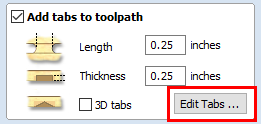
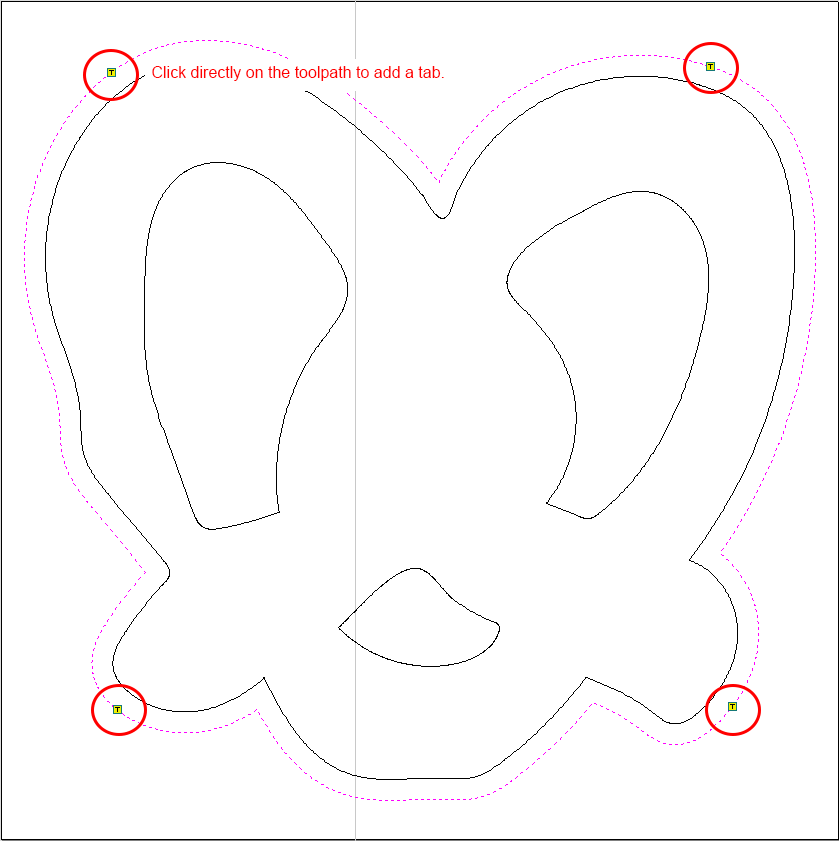
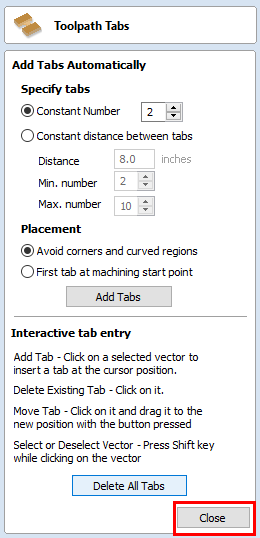
- "Toolpath Tabs" will open. You can add tabs automatically from here, or you can click directly on your toolpath to manually add tabs.
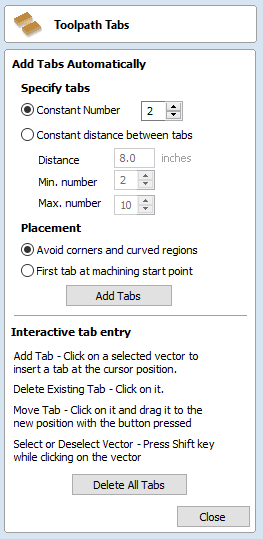
- When manually adding your tabs click directly on the toolpath to add a tab. A tab is indicated by a small yellow "T."
- Click "Close" on the "Toolpath Tabs" window.
- Click "Calculate" on the "Toolpaths" window.

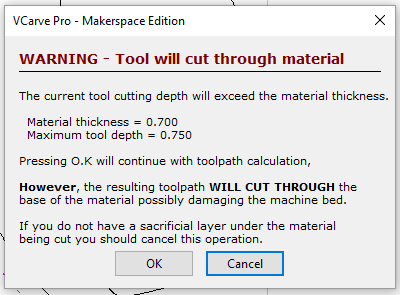
The following pop-up will apear:
For a profile cut this is fine. Select "OK."
If you received this message for an engraving or a pocket cut, you would adjust your measurements.
- Preview the toolpath you just created.
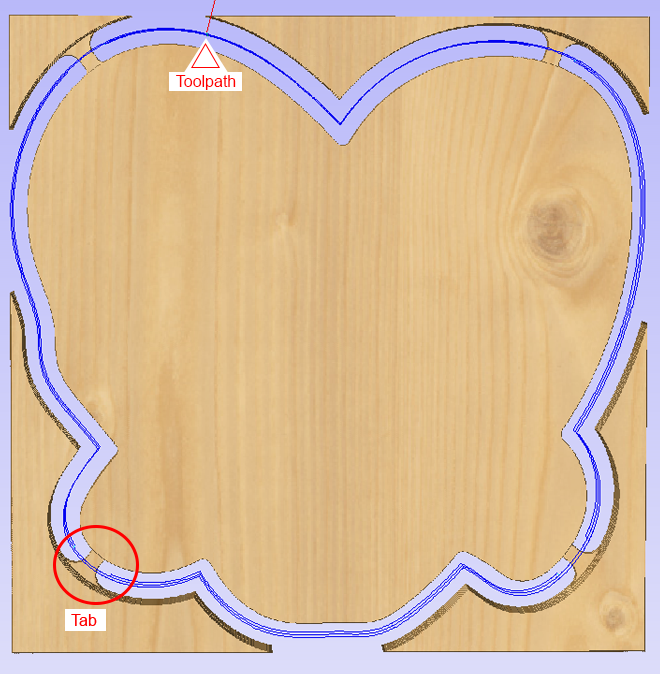
You can preview the toolpath in "2D View" or "3D View" using the tabs in the upper left corner.
You have successfully created a profile cut toolpath!
¶ Create a Pocket Clearing
- Left click the vectors you would like to engrave.
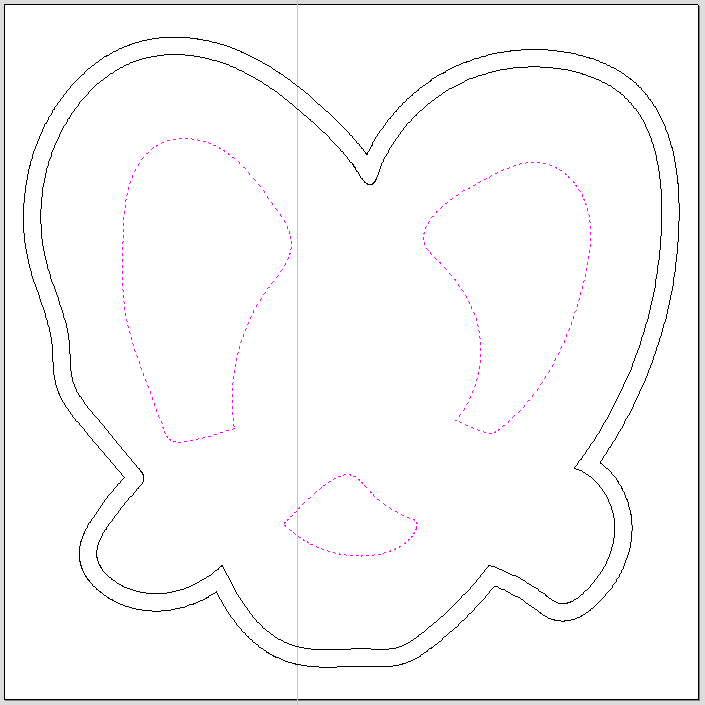
Hold the "Shift" key while clicking to select multiple vectors at once.
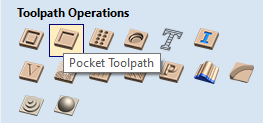
- Select "Pocket Toolpath."
- Select your bit from the tool database.
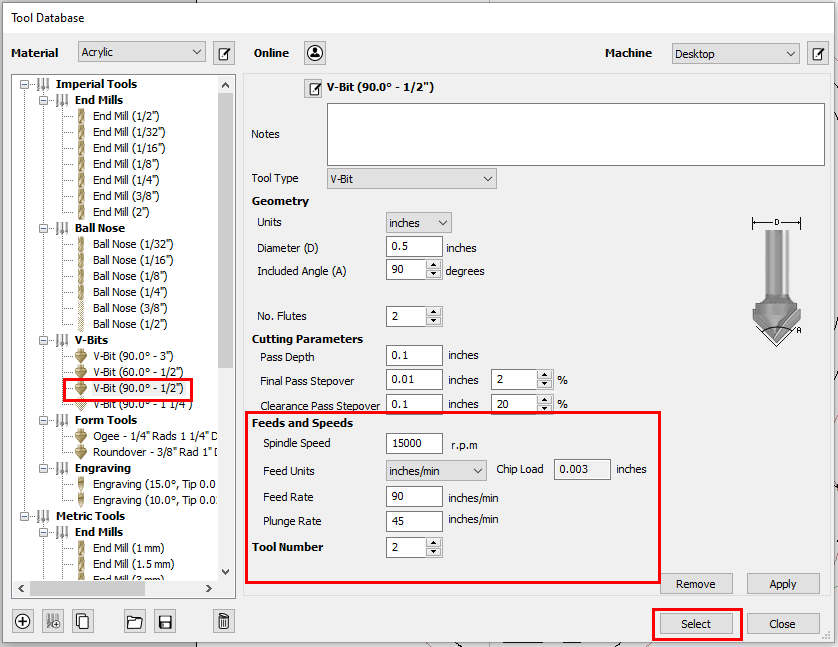
Pay attention to the tool number you set for each bit!
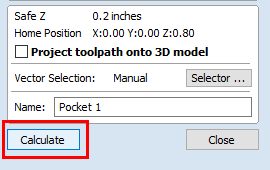
- With your settings input, select "Calculate."
- The "Preview Toolpaths" menu will pop-up. Select "Run."
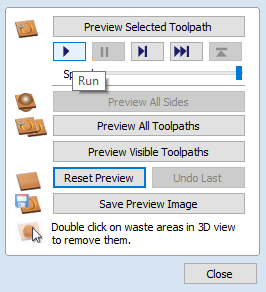
- Review your preview, check for problem areas, and adjust accordingly.
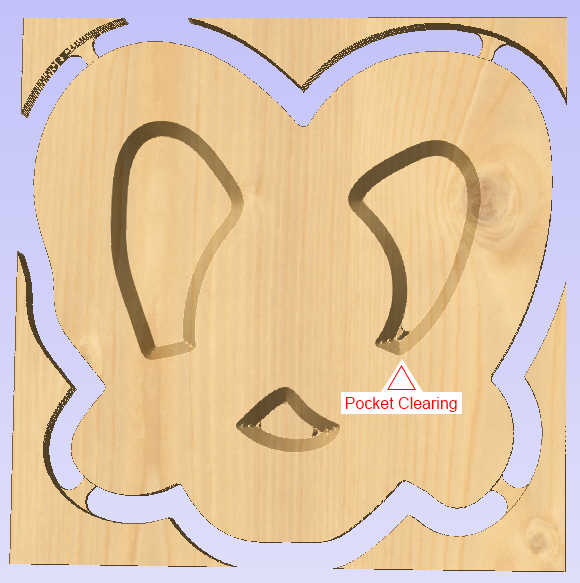
Several passes over the same path with different settings may help get the best results.
Performing a toolchange between passes can also improve the finish.
You have successfully created a pocket clearing toolpath!
¶ Saving Toolpaths
- Select the toolpaths you would like to save.
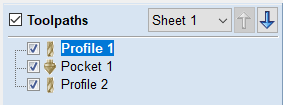
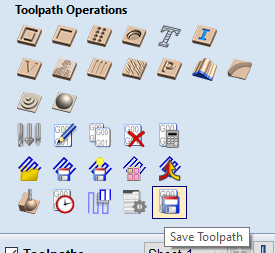
- Left click "Save Toolpath."
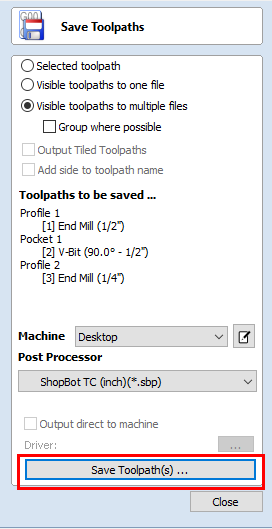
- Within the "Save Toolpaths" window, select "Visible toolpaths to multiple files."
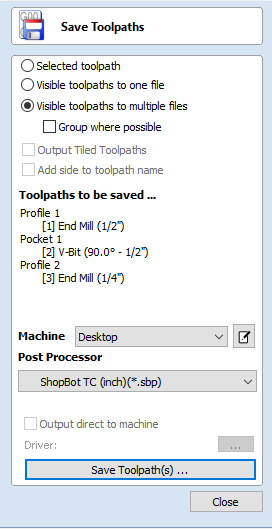
Under "Post Processor" select "ShopBot TC (inch)(*.sbp)" when completing a project on the ShopBot.
Under "Post Processor" select "G-Code (inch)(*.tap)" when completing a project on the Laguna.
- Select "Save Toolpath(s)..."
- Navigate to a designated folder within your thumbdrive. Members and day pass users can also save a file within their designated folder on the "Members" drive. Select "Save."
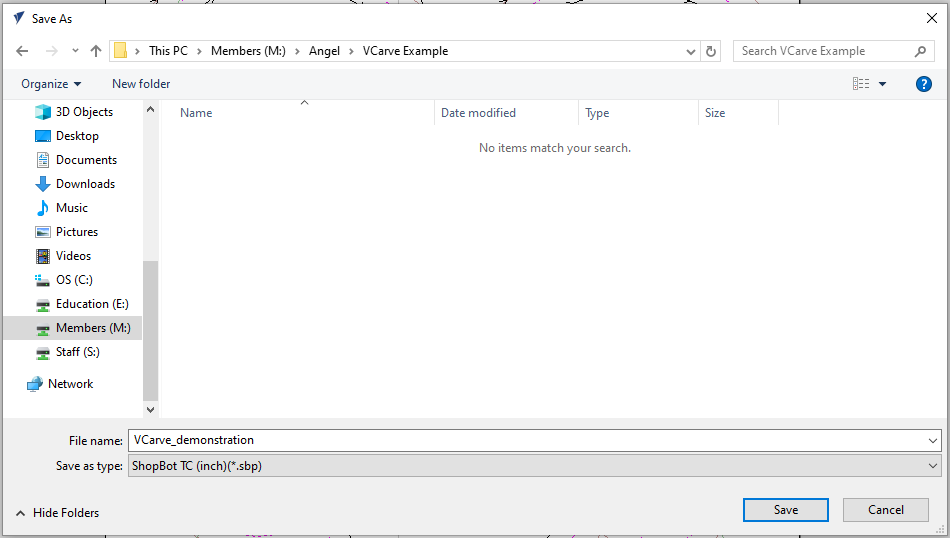
- Each toolpath will be saved in an individual .sbp or .tap file.

Multiple toolpaths for a single project can be saved together.
You have succesfully saved your toolpaths! You are now ready to run a project!
¶ Next Steps
- For the ShopBot PRSalpha CNC router visit:
- For the Laguna Swift CNC router visit:
¶ Glossary
G-Code: A programming language that tells digital fabrication machines the type of action to perform. ↩︎
CNC: Computer numerical control; a type of automated manufacturing process which uses
computer code to control machines. ↩︎Toolpath: A series of coordinate locations that the cutting tool will follow on a CNC machine. Settings for each toolpath are defined based on a number of variables and the desired outcome. ↩︎
Profile cut: A type of toolpath for CNC machines that is used to cut the contour of a shape. ↩︎
Pocket clearing: A type of toolpath for CNC machines that is used to clear away large quantities of material. ↩︎
Vector: A type of 2-dimensional design format that uses equations rather than pixels to define an image. A vector can be scaled infinitely without loss of quality. ↩︎
Bit: The interchangeable cutting tool used in a CNC mill to remove material. There are many different sizes and shapes of bits for specific applications. ↩︎
Flash drive: A small portable storage device used for transferring files. ↩︎
.DXF: Drawing Exchange Format; a type of CAD file that is compatible with the CNC routers. ↩︎
Tab: A feature that can be added to a CNC toolpath which connects the cut object to the outer material to secure while milling. Tabs are removed by hand after the cut is finished. ↩︎

