¶ Description
In this project, you’ll cut a design out of temporary vinyl and apply it to a hard surfaced object of your choice, such as a water bottle or laptop lid.
¶ Materials and Tools
- Temporary or removable vinyl
- Fine Point Blade
- LightGrip Machine Mat (Blue)
- Weeding tools
- Transfer tape
- Scraper or similar tool like a credit card
- Hard surfaced object such as a mug or water bottle
¶ Prepare the Design
Open Cricut Design Space® by clicking the icon on the desktop.
![]()
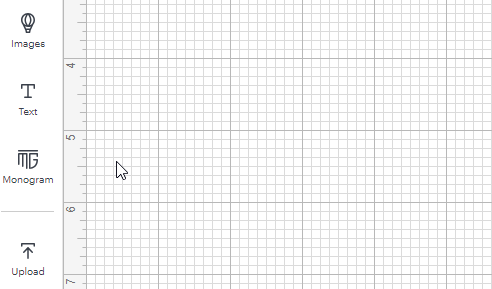
After it opens, click on the New Project button and choose “Blank Canvas”. This will bring you to the canvas on which you will create your design.
The sidebar on the left provides a number of tools.
Click the Text option. A text box will appear.
Change the contents of the text box to something else, such as your name or a phrase.
Things to try:
- Changing the font.
- Warp tool. The warp tool is a text specific tool that lets you distort the text.
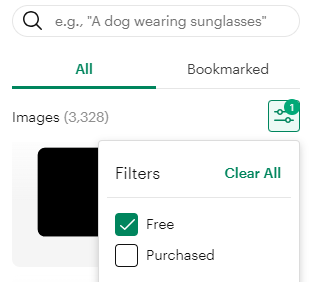
Warning! Not all fonts, images, or shapes are free. Check out the filters (the icon with two lines with circles on them) to narrow your choices.
Bonus: Experiment with the offset tool to create an outline around the text.
Bonus: try adding a shape around the text (or using the outline created in the previous bonus) and subtracting the text from the shape. Use the layers sidebar to put the text on top of the shape. Then using the Subtract tool, found in the Combine menu at the bottom of the layers sidebar, subtract the text from the shape.
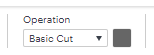
For the text (and shape), make sure that the Operation type is “Basic Cut”.
¶ Put the material on a mat
It is important for the material to be held flat and firmly so that that machine can manipulate it. For most materials, this means using a mat to support the material. For this project, use a blue or green mat.
¶ Sizing material for the design
Material should be at least an inch larger than the cut size of the design on all sides. So, if a design is 3x4, the material should be at minimum 5x6. It is not necessary to cut the material down to the size of the design in advance–you can do that after the design is cut and you know exactly how big and where it is–and larger pieces of material stick to the mats better.
Tip: the alignment of the mat and where the machine thinks the mat is can be off by up to an inch, so it’s important to have extra material to make sure the entire design gets cut out.
¶ Locating material on the mats
The mats have a grid printed on them to help you align the material. Typically material is aligned with the upper left corner of the mat because that is where the design program defaults to placing the cut. However, if you are using a piece of material that has been used before or a mat that is losing its stickiness, you can put the material elsewhere on the mat. Later you will be able to tell the design program where it is before starting the cutting process.
Tip: the inch grid on the mat aligns with the inch grid shown in the Design Space mat preview (but the position of the design on the canvas does not correspond to where Cricut Design Space will put the design on the mat).
¶ Sticky mats
Sticky mats come in several sizes and with differing amounts of stickiness.
If present, remove the clear protective cover from the mat. Keep this cover for later.
When applying material to a mat, start by aligning one corner of the material with the markings printed on the mat and then smoothing the material into place working from that corner to the other side. Avoid air bubbles by peeling the material back up if a bubble starts to form and resticking it. You can also use a brayer/roller to push air bubbles to the edge and out.
When removing material from sticky mats, the mat may grip the paper backing of the vinyl strongly enough to tear it. If a tear starts, stop and restart peeling from another corner of the material or peel up the edge of the tear and keep going.
When done with a mat, it is important to replace the protective cover in order to extend the lifespan of the sticky.
¶ Cut the design
When you’re ready, click the green Make button. If you have not already saved the design, it will ask you to name and save the design.
A new dialog will open. Design Space will ask you what sort of mat you’re using, and then what size. Once you’ve told it what mat you’re using, click the Confirm button.
A new dialog will open. Design Space will show you how your design is laid out on the mat. Here you can click on your design and move it around. If you have put your material in an unusual location on the mat, this is where you move the design to match the material location.
Tip: the inch grid on the mat aligns with the inch grid shown in the Design Space preview.
Tip: if the parts of your design are being moved around in relation to each other during mat set up, go back to the design and use the Attach tool. This will keep them in the same positions relative to each other when Cricut Design Space puts the design on the mat.
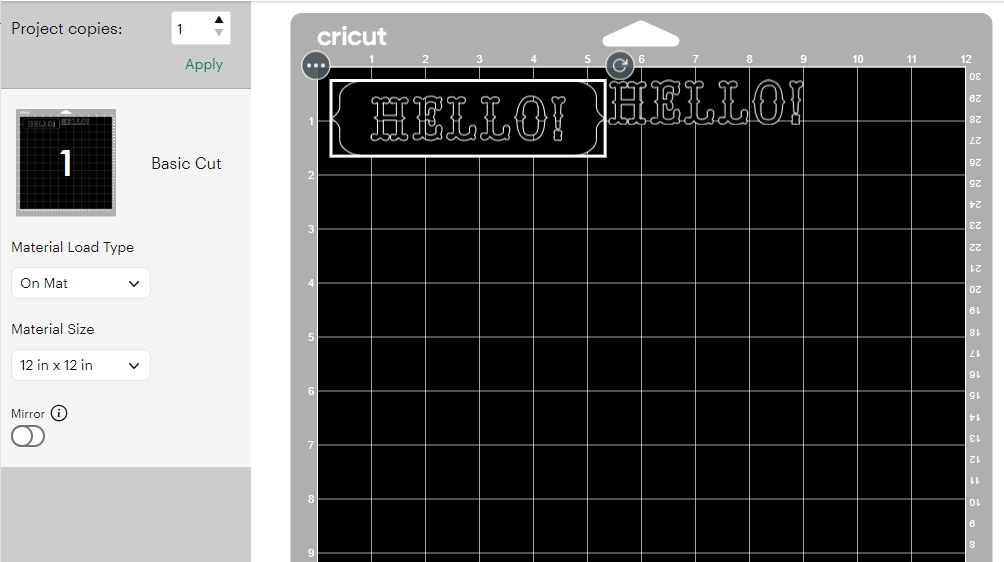
Click the green Continue button. A new window will open, helping you connect to the machine. Make sure that the machine is powered on as indicated by the power button glowing.
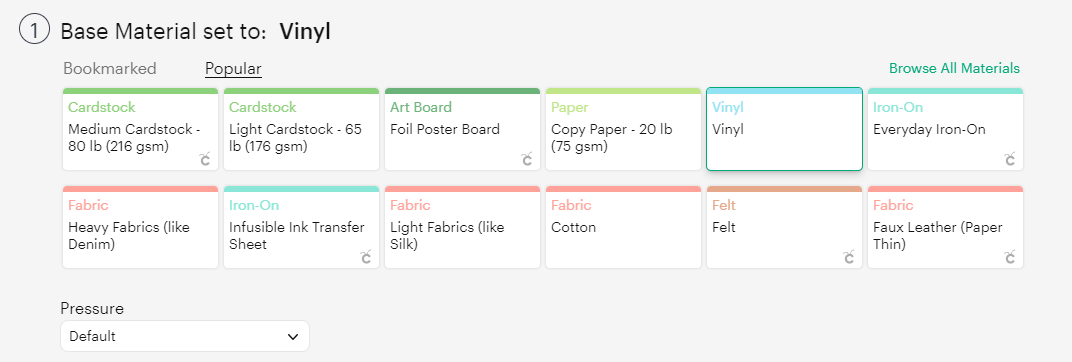
A new window will open, letting you select what material you’re using.
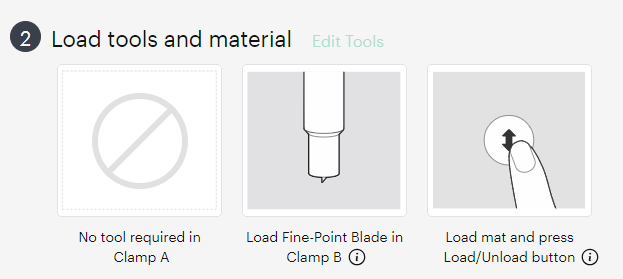
¶ Loading the Tool
There are two tool clamps on the machine. Clamp A (for accessory) on the left and clamp B (for blade) on the right. For this project, you want the fine point cutting tool. If the fine point cutting tool isn’t in the tool clamp in the machine, find it in the machine storage compartment or elsewhere near the machine, and change the tool. If the blade is dull, change the blade in the tool housing.
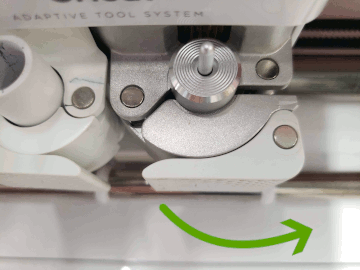
To change the tool in clamp B
- Open the clamp rightward to release the latch.
- Remove the tool
- Replace the tool. Make sure the collar is resting on the clamp.
- Close the clamp leftward, making sure that the clamp grabs the latch.
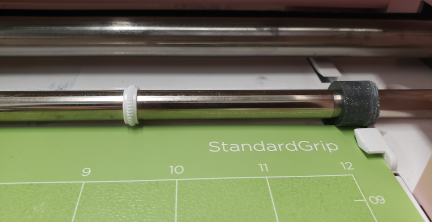
¶ Loading the Mat
To load the mat, align the corners of the mat with the guides and slide it into the machine until it presses against the wheels. Then use the ↕ arrow button on the machine to cause it to load the mat. If the mat loads crooked, use the ↕ button again to eject the mat. Realign and try again.
Warning! Check around the top and sides of the mat for bends and buckles in the mat. This means the mat is crooked. The machine will not notify you of a misalignment and cannot correct this problem on its own.
Then it will prompt you to press the blinking button on the machine to start the job. The machine will pull the mat in further and perform a homing routine in order to locate the cutter head and calibrate the depth of cut.
Stay with the machine while it is cutting the design. If something goes wrong, press the pause button to stop it, then use the load/unload ↕ arrow button to eject the mat.
When the machine is done, it will blink the ↕ button to prompt you to unload the mat. Press that button.
After the machine is done cutting the design, there are a few steps left.
¶ Weeding
Weeding is the process of removing unwanted material from a cut design while leaving the wanted material behind. This step happens after cutting and before transferring the design to its final location. Weeding is made easier by having a sharp cutting tool in the machine as that will make better cuts.
The tools used for weeding are typically:
- Picks or weeding pen, to lift the edges of unwanted material
- Tweezer (needle nose and angled), to grab and remove unwanted material
- Scissors, to cut large pieces down and make them easier to handle
- Craft knife, to cut free any pieces that the machine didn’t get
Being careful to not disturb the pieces that you want to keep, use tweezers and/or picks to lift the edges of unwanted pieces with a scooping or hooking type of motion and remove them.
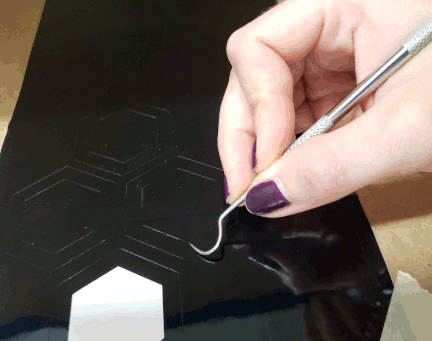
It is important to keep the workpiece flat for the best final product and this is why you should not bend it or use your fingers. It may be helpful to leave the material on the mat while weeding in order to make it sturdier, or to tape it down to the table.
When you are done with the mat, put the clear protective cover sheet back on it before putting it away.
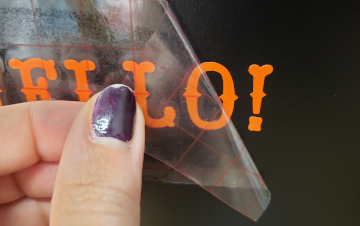
¶ Transferring the design
Apply the transfer tape to the design. Use the transfer tape to peel the design up from the backing material. Be careful not to touch the adhesive on the back of the vinyl.
Prepare the surface that the design will be applied to by cleaning with rubbing alcohol.
Once the design is cut and weeded it needs to be transferred to its final location. This process is done with transfer tape. The transfer tape is just sticky enough to pick up the design from the backing but not so sticky that it won’t let the vinyl go once the design is pressed into place.
- The surface that the design will be applied to may need to be cleaned. Clean it with rubbing alcohol if rubbing alcohol is safe to use on that surface. Otherwise, scrub with clean, dry paper towel or cloth to remove dust, grease, and fingerprints..
- Apply tape over design. Be sure to cover the entire design. Press the transfer tape down well, starting from the center and working outward to avoid distorting the final design.
- Peel up the design. Start on one side and work your way towards the other. If any edges don’t come up with the transfer tape, press that area of the transfer tape back down and try again.
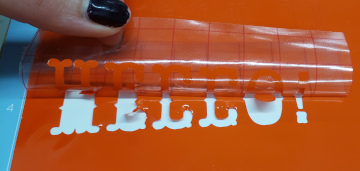
- Once you have the design picked up, be careful not to touch the adhesive of the vinyl.
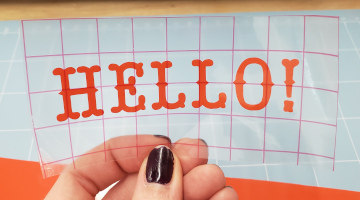
- Align the design with where you want it and place it there. The adhesives of the vinyl and transfer tape should hold it in place for you.
- Press design into place. Work from the center outward to push air bubbles out from under the vinyl.
- Peel off the transfer tape. Start on one side and work your way towards the other. If any edges come up with the transfer tape, press that area of the transfer tape back down and press the vinyl piece extra well before trying again. If the vinyl continues to come up, use a weeding tool to separate the vinyl from the tape and press it onto the surface.
- Discard used transfer tape once it is removed.
- Press the design well using a brayer/roller, spatula, or scraper. Be sure to work from the center outward. Be careful to not scrape up any edges.
¶ Before you go
The Cricut is a shared tool in a shared space. It is important to clean up in order to keep the space and tools functioning their best and to make sure everyone gets the best results possible.
- Remove everything from the Cricut, including scrap pieces. Clean the mats.
- Put mats, tools, and usable scraps away in their designated locations.
- Clean up your workspace on the table. Wipe up any spills.