¶ Running a Job
Make a design
- in vector graphics software. You will have to save your design in the svg format and import it into app.glowforge.com
- in app.glowforge.com
Set process type for each part of the design
- Cut: cuts all the way through the material. Typically uses a vector to define how the machine moves.
- Engrave: removes material but does not cut all the way through. Typically uses a raster image to define how the machine moves.
- Score: Like a cut, but does not go all the way through. Typically uses a vector to define how the machine moves.
- Ignore: for any parts in the design that you don't want in the final product.
Set order of operations
- Engrave and score operations first
- Inner cut operations
- Outer cut operations
Turn on machine and insert material
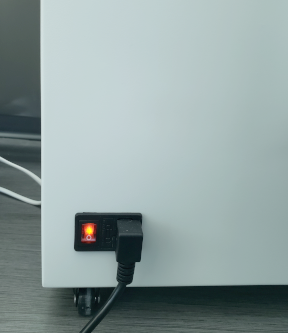
- If the lights in the Glowforge are off, reach around to where the power cord is on the back side and flip the switch to turn it on. If present, also turn on the air filter box. Open lid.
- Make sure that the honeycomb surface doesn't have debris in it. Remove it and shake it out over the trash or vacuum if it does.
- Make sure that the honeycomb surface is level and in place by trying to wiggle it. It will drop into place. It does not move side to side when it’s correctly located.
- Place material with the QR code side up in the center of the honeycomb surface.
- Wait for the machine to scan the QR code and identify the material. If it doesn't, you can manually choose the material.
Start the job
- Make sure cut, score, engrave operations are all set and settings adjusted if needed
- Align cuts to material
- Click Print
- Press blinking button on the glowforge
Finish the job
- Remove everything from the Glowforge
- Clean up any scrap, bits, debris. Empty the crumb tray and return it.
- If you’ll want to make it again, save the design to a personal USB drive or cloud storage account.
¶ Making a Design
There are three main ways of creating a design.

¶ Design in app.glowforge.com
app.glowforge.com provides some design tools. Start with the menu at the top to add shapes (Add Artwork) and text (Insert Text).

Every shape and text that you create will add a new process tile to the left sidebar. Those tiles let you set the process (such as cut or engrave) and the order of operations. When a shape or text is selected, the right sidebar appears with tools and options that can be used on that shape.
¶ Draw design and import
Draw your design on paper. Make sure there is high contrast between the drawing and the paper. For example, use a black marker on white paper.
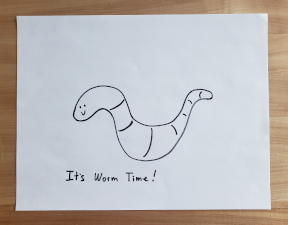
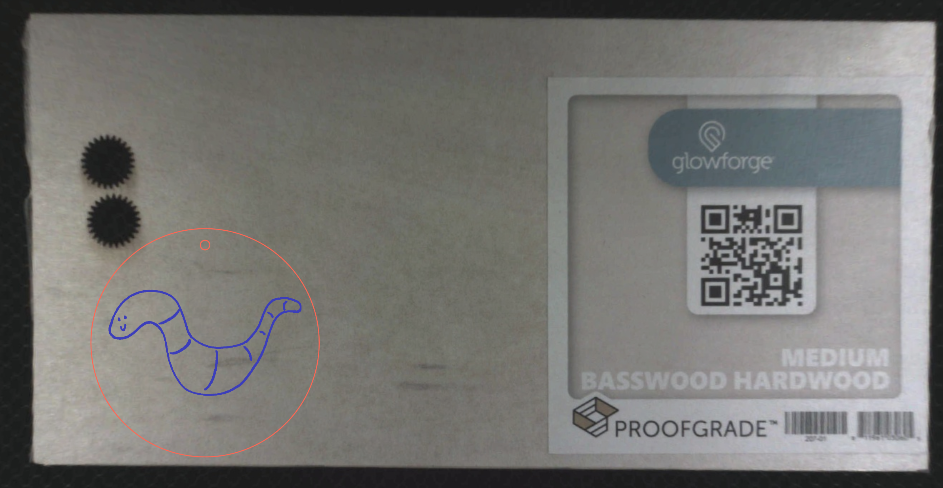
When done, place your drawing on the bed of the Glowforge. The drawing should be facing upwards. app.glowforge.com will provide a view of the drawing.
Then use the Capture from Camera button in the top menu. After a moment it will show your drawing again.

It will ask you to draw a box around the artwork that you want to trace. Click-and-drag to draw a box around the part of the drawing that you want to use in your design. You don’t have to select everything you drew if you don’t want to use all of it.
Then it will ask you to click on the white areas that you want to cut away. This means that if you want to cut out a shape, click outside the outline of the shape. If you want to make an object with a hole in the middle, click the area inside the hole.
Then click the Place Artwork button in the upper right corner.
app.glowforge.com will add the artwork to the design. It will also add process tiles to the left sidebar with recommended processes (cut or engrave). You can change the process types if you like. You can move the artwork around, resize it, and so on.
Once the artwork is placed, remove the drawing from inside the Glowforge.
¶ Design in vector art software and import
If you find app.glowforge.com’s design tools to be limited or difficult to use, drawing the design on paper to be too imprecise, or you want to work on your design at home before you come in to the space, try using a vector art software such as Inkscape (free!) or Adobe Illustrator (available in the Open Works Computer and Digital Media labs).
We can’t provide tutorials for every possible software out there, so doing an internet search for something like “glowforge inkscape tutorials” will get you to the information you’re looking for. That said, there is an Inkscape Crash Course following this to get you started.
Tip: set the path colors to define what operation a path will be once it’s imported to app.glowforge.com
Tip: save the design as an .svg format file
Then use the Upload from File button.

¶ Inkscape Basics
The toolbar on the left will provide most of the tools you will need to get started.
- Select and Transform Objects (S)
- Edit Paths by Nodes (N)
- Create Shapes (Rectangle, Circle, Polygons, Cube, Spiral)
- Drawing tools (Bezier, Freehand, Calligraphy, and Text)
When you select a tool, the toolbar at the top of the window will provide additional options for that tool.

¶ Bezier Tool basics
Use the Bezier tool to draw a path:
- Click icon
- Click on canvas (This sets the starting location of the path)
- Move mouse
- Click on canvas (This places a node on the path)
- Press enter on keyboard (This tells Inkscape that you are done placing nodes on the path. Steps 3 and 4 can be repeated as many times as you want.)
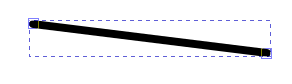
If you have a box that looks like this (no visible line), you will need to set the Stroke property.
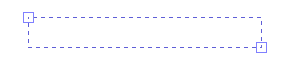
Check the lower left corner of the window to see what properties are set for the selected object.

Right click on any of the color boxes. Select “Set Stroke”.

The line should now look like this (perhaps in another color, thickness, or style).
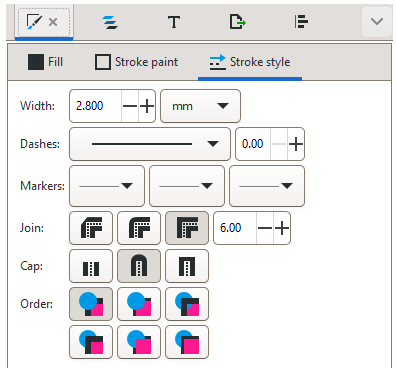
If you don’t like the thickness, color, etc, of the line, there are more options in the Fill and Stroke menu. Right click on the line and select “Fill and Stroke”. This will open a toolbar on the right. Here you can set the Fill, Stroke paint, and Stroke style.
¶ Bending a Bezier Path
Use the Edit Paths by Nodes tool. Click on the path.

Hover over the selected path. Click and drag it. If it fills with a color as you drag it, the Fill property is set. Check the lower left corner to see what properties are set. Right click on the Fill box and select “Unset Fill”.
Click on one of the end points of the path to activate the node handles. Click and drag a handle to adjust the amount of curvature.
¶ Adding a Notch to a Path
Creating a slot or notch in a path is a common technique for connecting two laser cut pieces with or without glue. In order for the pieces to connect well, the size of the slot must closely match the size of the tab. This guide assumes that you already know the dimensions of the tab (thickness of the material and width you’ve chosen).
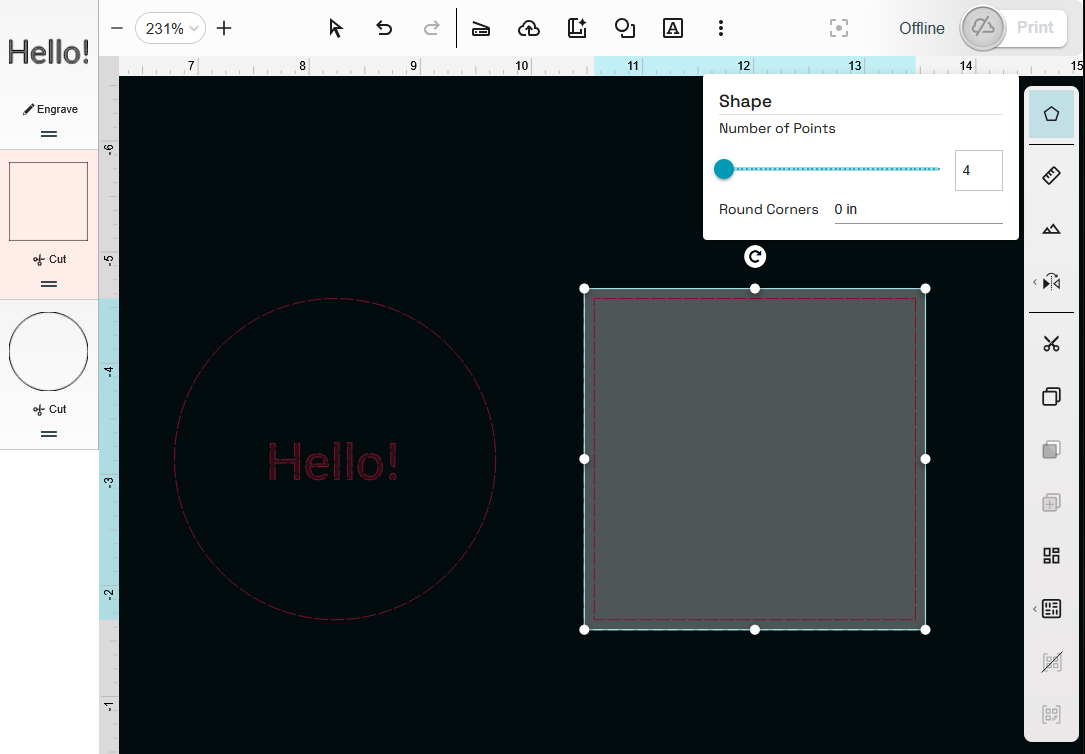
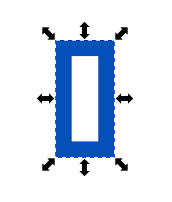
In Inkscape, use the rectangle shape tool to draw a rectangle that is the width you just determined above and ¼ inch deep. Draw the rectangle to any size, then use the toolbar at the top to precisely set the width, height, and amount of corner rounding.

Use the Select and Transform Objects tool to select the rectangle you just created. The selection box will have arrows pointing outwards; if it has curved arrows you’re in rotation mode. Click again to get back to move mode.
Move the rectangle to where you want to place the slot in the design. In order for the Difference tool to work, the path of the rectangle must align perfectly with the path of the design.
- If there is a stroke applied to the path, the path is in the center of the stroke. Aligning the edges of the strokes will not work. If the stroke is giving you problems, set the stroke width to 1 px. Zooming in on the problem area may help.
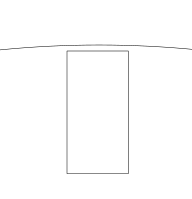
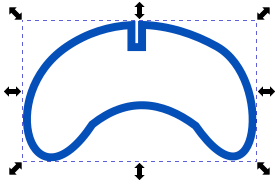
- If the design is curved, the rectangle needs to overlap the curve.
 |
 |
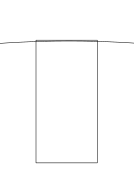 |
| No, slot does not intersect outline. | No, slot does not intersect outline. | Yes, slot overlaps outline. |
Select the design and the rectangle.

Go to the top toolbar and open the Path menu. Select Difference. This will create the slot.
Tip: after this point resizing the design in Inkscape or app.glowforge.com will also resize the slots. This will make them not fit. If you make the design smaller, you can repeat the above process with correctly sized boxes to recreate the slots. If you make the design larger, you’ll have to manually edit the nodes to remove the slots, then repeat the process to add the slots.
¶ Measuring Pieces For Slip Fit and Friction Fit Connections
Connecting laser cut pieces using slip fit connections is a common technique in laser cutting. For slip fit connections to work well, the tabs must not be too large or too small relative to the slots.
Medium Proofgrade material is nominally 1/8th inch (0.125”) thick. If calipers are available, measure multiple places on your material. Remember that there’s a protective film–either peel the edges of the film back before measuring or measure the film and subtract 2x that from the thickness that you measure. Measure in multiple locations and take the average.
Laser cutting is a subtractive process and has kerf. Kerf is the material that is lost to the cutting–typically sawdust, here it is burned away as smoke and filtered out of the air. Laser kerf is small but cannot be ignored, especially when producing friction fit parts. If calipers are available, do a kerf test and measure the kerf. If calipers are not available, estimate the kerf as 0.01” inch.
Tip: a higher power laser setting produces a wider kerf than a lower power setting.
To make the slots fit snugly, the material lost to kerf must be accounted for. For example, if the material is 1/8th inch thick, the slot must be at most 1/8th inch wide after it is cut. So, make the slot 1/8th inch wide, minus two times the kerf.
Tip: after the laser cutting is done, it is much easier to make a too-small hole larger than to make a too-large hole smaller. Err on the side of too small because a craft knife can be used to trim a too-small hole to fit.
¶ Setting Process Types
The process type, or operation type, is what the machine does to the workpiece as it moves. If you were drawing a line, the process type would be whether you were using a pen or pencil or marker or some other tool to create the line.
The available process types are
- Cut: cuts all the way through the material. Typically uses a vector to define how the machine moves.
- Engrave: removes material but does not cut all the way through. Typically uses a raster image to define how the machine moves.
- Score: Like a cut, but does not go all the way through. Typically uses a vector to define how the machine moves.
- Ignore: for any parts in the design that you don't want in the final product.
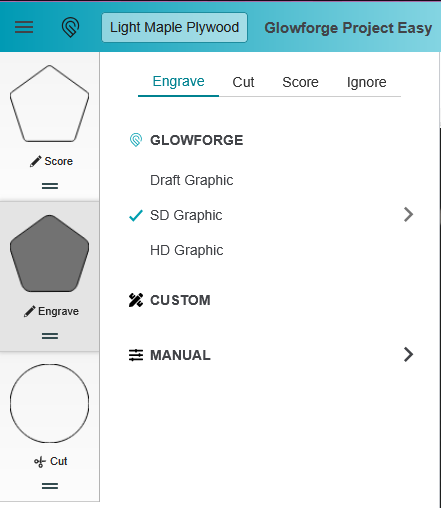
The process types are set using the sidebar on the left. Each tile in the sidebar represents the shape and process type.
- Click on the tile. More options will appear.
- Select the process type from Engrave, Cut, Score, or Ignore.
- Some processes have additional options. For example, Engrave has Draft Graphic, SD Graphic, and HD Graphic. These options describe how fast the machine moves and how much power the machine uses while engraving.
¶ Setting Order of Operations
Setting the order of operations is an important part of finalizing your design. The order is important because cut operations create kerf, space caused by burning away material, which can cause the workpiece to move when additional operations are applied.
The recommended order of operations is:
- Engrave and score operations first
- Inner cut operations
- Outer cut operations
This order leaves the workpiece as intact as possible for as long as possible in order to reduce the chances of pieces moving around. This order applies even when cutting multiples of the same piece; do all of the engraving first and cut all of the pieces out last.
The order of operations is set using the sidebar on the left.
- Each tile represents the shape and process type.
- The two lines underneath the process type are used to move the tile around.
- Click-and-drag the two lines to move the tile. Drag up or down. Release the click when the tile is in the desired position relative to the other tiles.
- Operations at the top of the list will be done first and operations at the bottom will be done last.
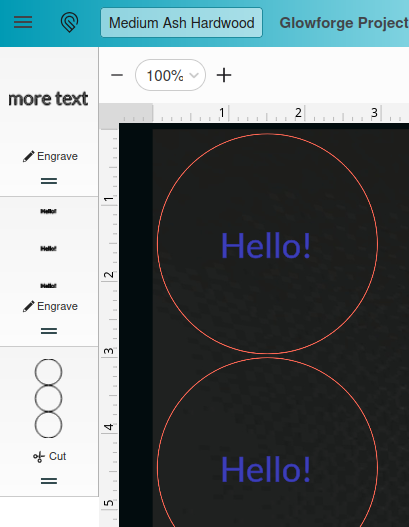
Tip: if you duplicate a design with multiple process types, app.glowforge.com will gather each process type together. For example, to the right you can see how the circles that will be cut out are all treated as one shape and the text that will be engraved are all treated as another shape.
¶ Turning on the Glowforge and Filter Box
¶ Glowforge
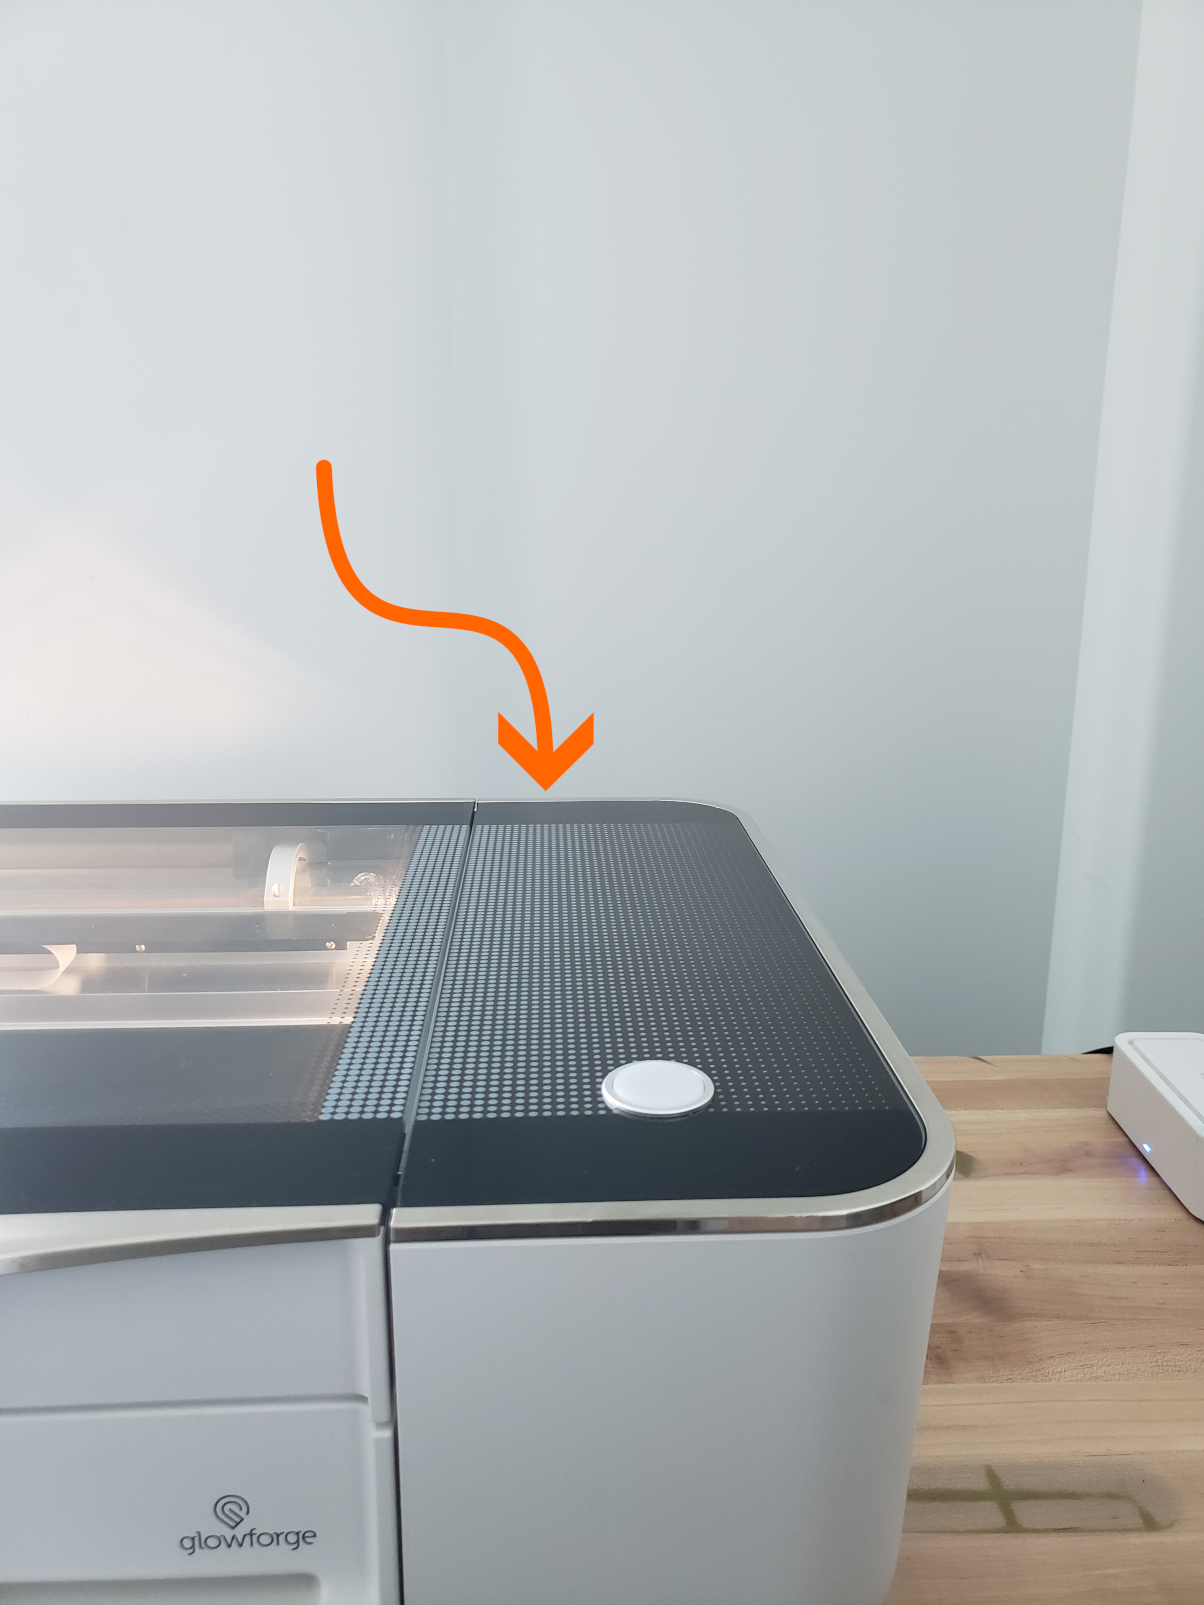
If the lights inside the Glowforge are dark, flip the switch on the back near where the power cord goes in. The Glowforge will light up and spend a few minutes performing some self calibration and system checks.
¶ Filter Box
If the filter box is present, it is essential to turn it on as well. The filter box protects you and any other users of the space from fumes created during the laser cutting process. It also helps the laser cutter perform better. If there is no filter box present, omit this step. The workspace is handling fume extraction some other way.
The filter box has two switches on it.
- Make sure that the switch on the side or back of the box near where the power cord goes in is turned on.
- If the fan is not already on, turn the knob on the front or opposite side of the box until the fan comes on.
Tip: To extend the lifespan of the filter, there is no need to turn the knob further once the fan has come on–it doesn’t filter better, it just makes the fan louder.
¶ Cleaning and Positioning Honeycomb Surface
The surface on which the machine does its work is called the crumb tray. It is composed of two parts; a tray with feet on it and a raised honeycomb surface. The purpose of the crumb tray is to hold the material while the laser works and to collect any small bits that may fall out of the material when it’s done.
¶ Cleaning the crumb tray
Before you put your material into the machine, make sure that there is no debris in the crumb tray. A clean tray will hold your material better and reduce the risk of fire.
- Open the lid.
- Open the front by gripping the top edge and pulling towards yourself.
- Lift the tray by the handle on the front.
- Shake it out into the trash.
- If that doesn’t get everything, use a vacuum cleaner to get any remaining bits out.
- Also make sure that there’s nothing in the bottom of the Glowforge. If there is anything in the bottom of the Glowforge, it could cause the tray to become misaligned and cause the laser cutter to do a bad job or be damaged.
¶ Positioning the crumb tray
It is important that the crumb tray is positioned correctly. If it is not level the laser cutter will do a very bad job and possibly be damaged.
The tray has feet on it which align with divots in the bottom of the Glowforge.
- Place the crumb tray back into the bottom of the Glowforge.
- Gently wiggle and slide it around until it drops into place.
Tip: once the tray is in place, it will not move side to side more than a millimeter and it will have to be lifted to get it back out.
¶ Aligning Cuts to Material
The Glowforge has a camera in the lid that lets you position the design on the material without having to align the material to the machine or taking any measurements.
At the Glowforge
- Place material QR code side up in the center of the honeycomb surface.
- Close lid.
- Wait for the interface to update with the internal view of the machine
- Click design and move it where you want it
- If you have multiple designs, try the Smartfit tool available in the righthand toolbar. It will arrange the designs to conserve material.

Tip: If the pieces of your design come apart or move independently, make sure they are grouped together, using the Group tool.
Tip: place the design to conserve material so that you can get more designs out of one piece. Start in the corner opposite from the QR code and work towards the QR code.