¶ Description
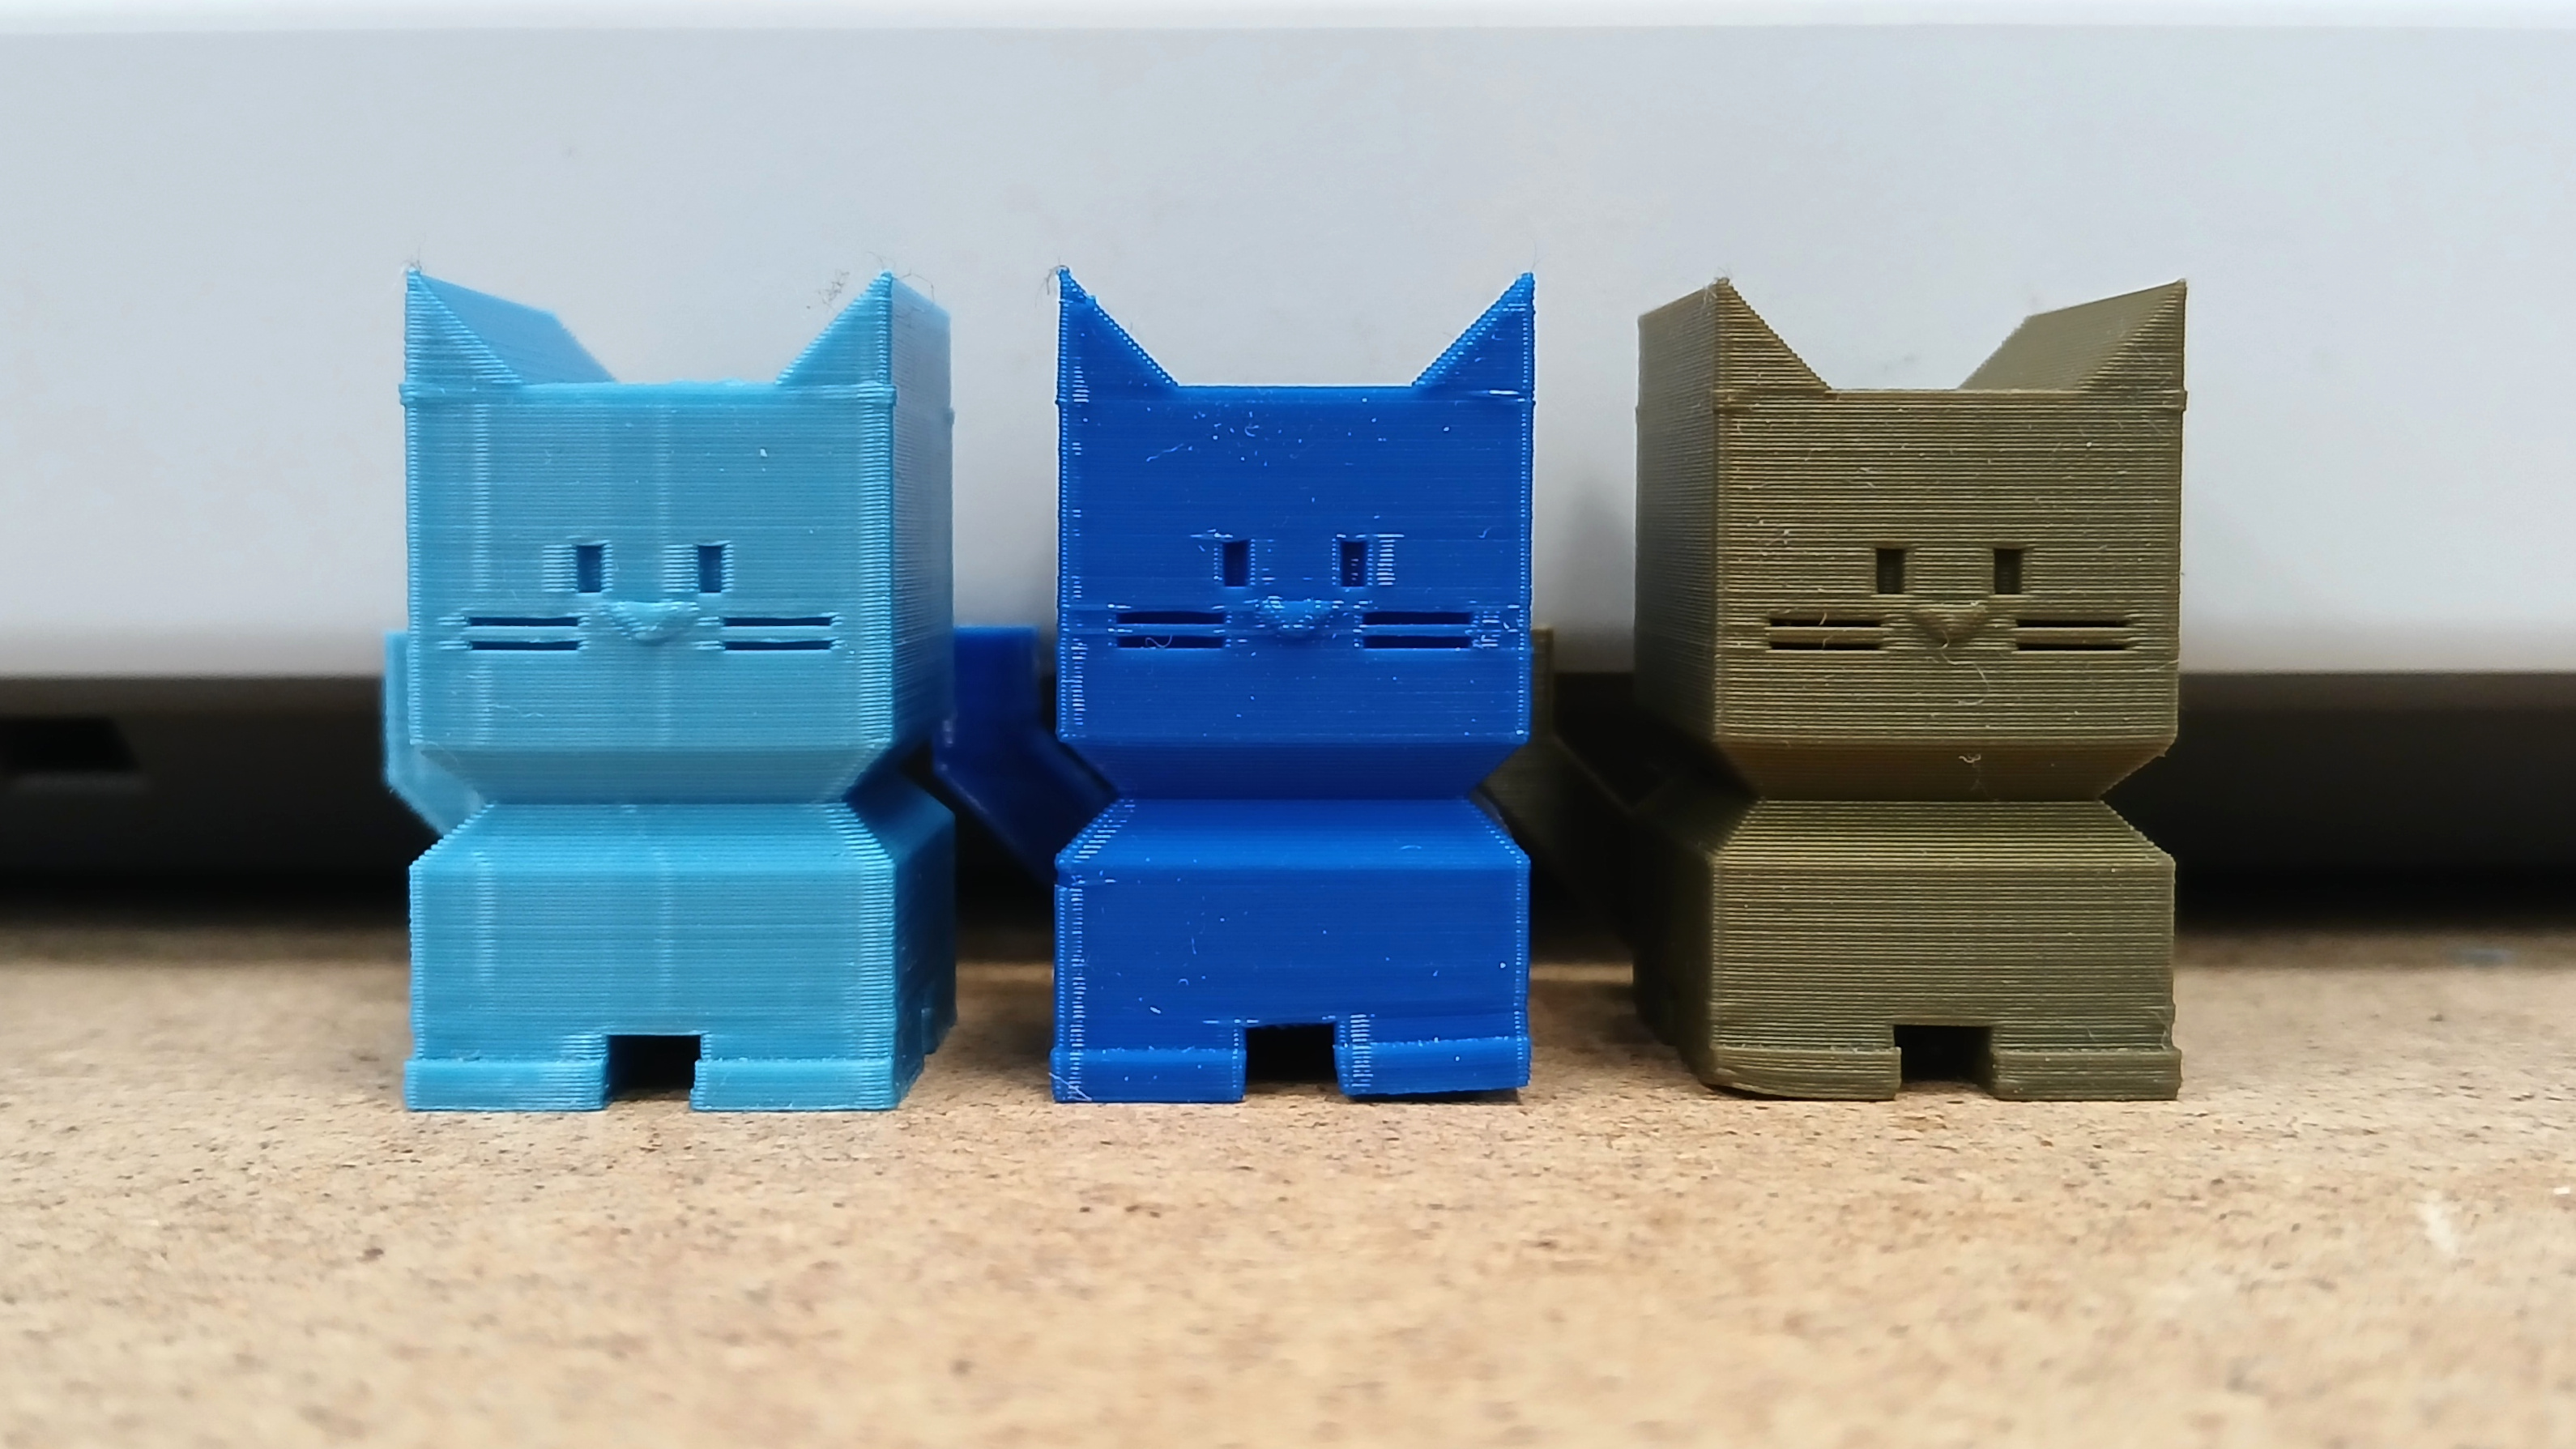
In this project you will use the CaliCat (Calibration Cat) model to explore the options and tools provided by the slicer program. These slicer options change how the object is printed and influence properties such as surface finish, amount of time used to print, and the amount of filament used. At the end, you will choose some settings and print the CaliCat to take home with you.
¶ Materials and Tools
The Calicat:
- https://www.thingiverse.com/thing:1545913
- https://www.printables.com/model/1252907-cali-cat-the-calibration-cat
Slicer: Orca or Bambu Studio
Filament: PLA or PETG
3D printer
¶ Prior Knowledge
Going into this project, you’re expected to know how to download model files from a model library, unzip the downloaded files, and import them into the slicer. You’ll also need to know how to adjust slicing settings in the slicer. If you need more help with those steps or want a refresher, review the prior projects or check out the Quick Guides.
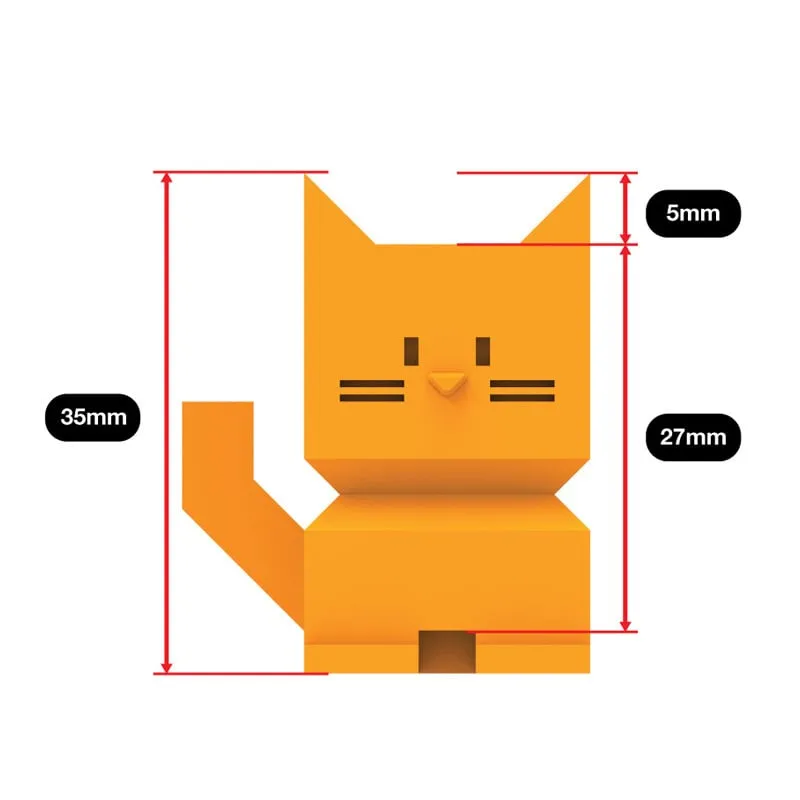
¶ Obtain the Model
From the CaliCat’s description:
“Cali Cat is designed to be the purrfect initial calibration and benchmarking print. It is a simple, standard test to ensure you have the basics down before proceeding to advanced prints. Cali Cat is the alternative to boring calibration cubes. It's a test print you can enjoy keeping.”
The CaliCat model is designed to print perfectly without any supports, brims, or special slicer settings of any sort. This makes it a good model for playing with in order to see what those settings do, when they need to be used, and what they look like. In order to explore and understand the options, the goal is to make an interesting CaliCat, not a good CaliCat.
¶ Slice the Model
Open the slicer program. On Open Works computers, this will be Orca or Bambu Studio.
Go to the “Prepare” tab. Click on the cube with a "+" sign icon on the top left to add your 3D model or File -> Import -> Import 3MF/STL/… Find the model file and open it.
Verify that everything is set appropriately for the printer and filament:
- Make and Model of the printer. Open Works uses Bambu A1 or Creality Ender-3 V3 printers at most locations.
- Type of build plate. Open Works provides a Textured PEI build plate.
- Nozzle diameter. Open Works typically uses 0.4mm nozzles, which is the most common nozzle size.
- Filament type. Check the label on the reel of filament that you intend to print with for the filament type.
- Process/Layer Thickness. Use the default/standard or 0.2 mm.
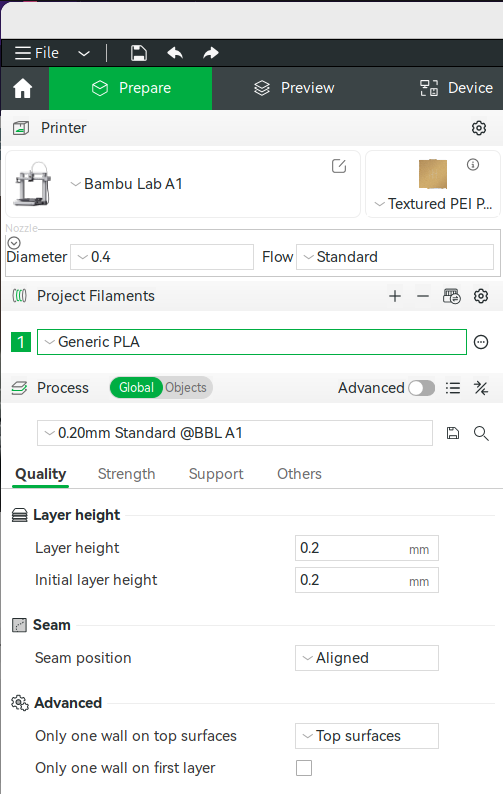
Switch from the Prepare tab to the Preview tab. This will slice the model.
Tip: Switch back and forth between Prepare and Preview to refresh the Preview tab.
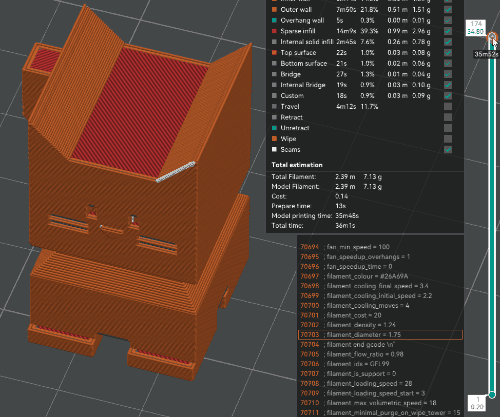
Check the info box that appears on the right side of the window for information about the print. Right now, make note of the Model printing time.
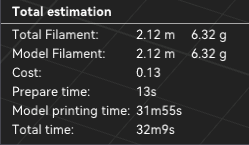
Now we will change some parameters and observe how the model printing time changes.
- Change the Process type/Layer height from 0.2 mm to 0.16 mm. Check the Model printing time and observe the model for any changes. Changes will be most visible around the ears and the overhangs at the neck area. Change it to 0.24 mm. Check the Model printing time and the overhangs. Change it back to 0.2 mm.
Tip: click the circular arrow next to changed values to quickly revert them.

-
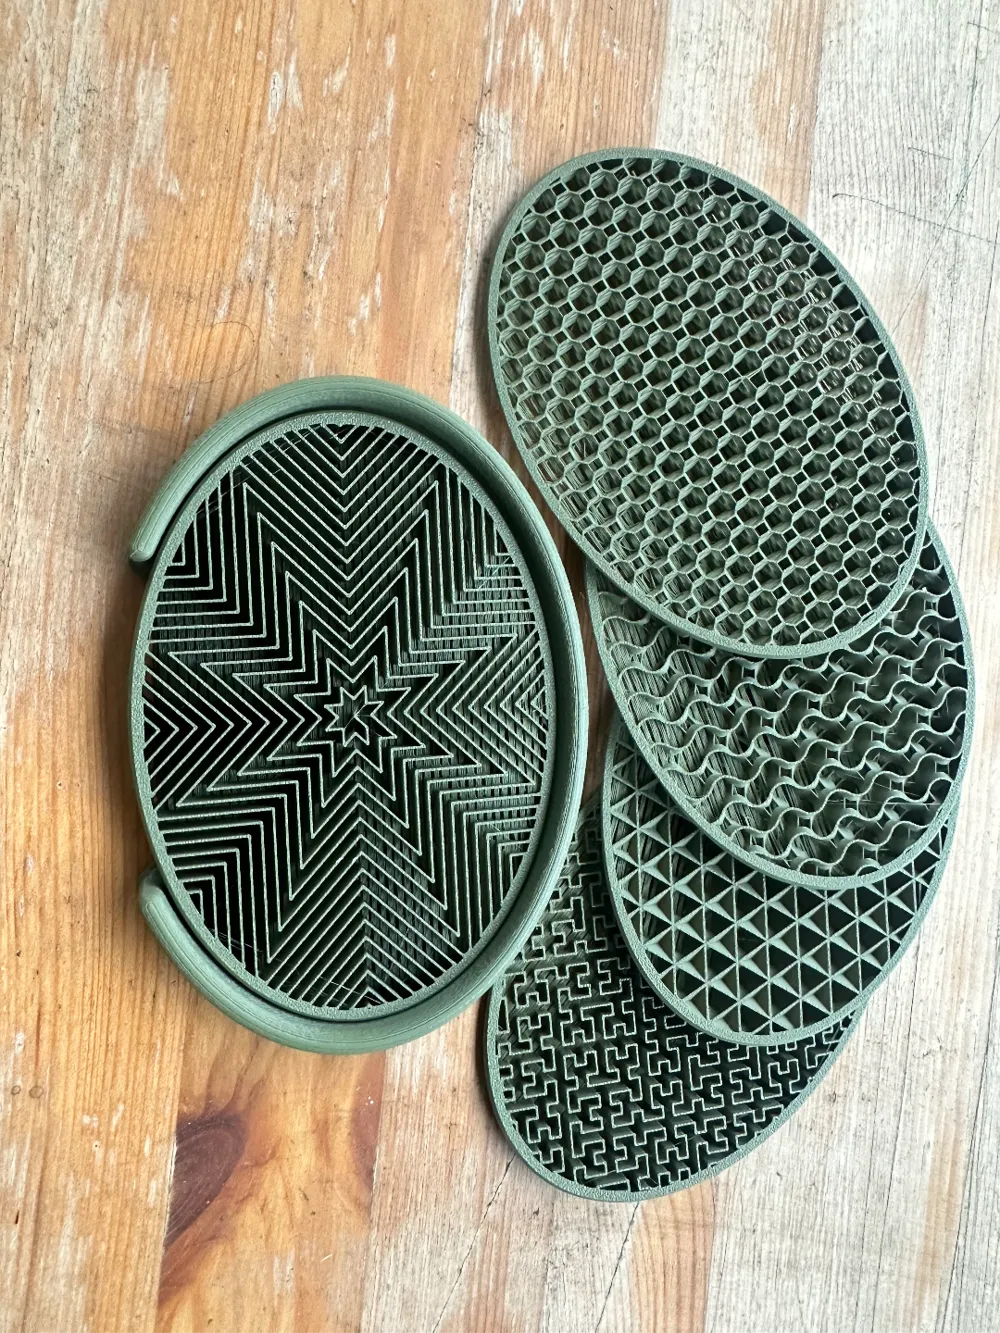
Go to the Strength options tab and change the Sparse Infill pattern. Try one pattern at a time and check the Model printing time each time. Also, scroll through the layers to see how the infill pattern changes and supports (or does not support!) the shells of the model.
-
Bonus: find and change the settings for the number of bottom or top layers, or the number of walls. Top and bottom layers may also be called shells and walls may be called perimeters.
-
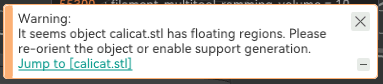
Now, in the Prepare tab, use the Rotate tool in the top toolbar to rotate the model. Slice it again.
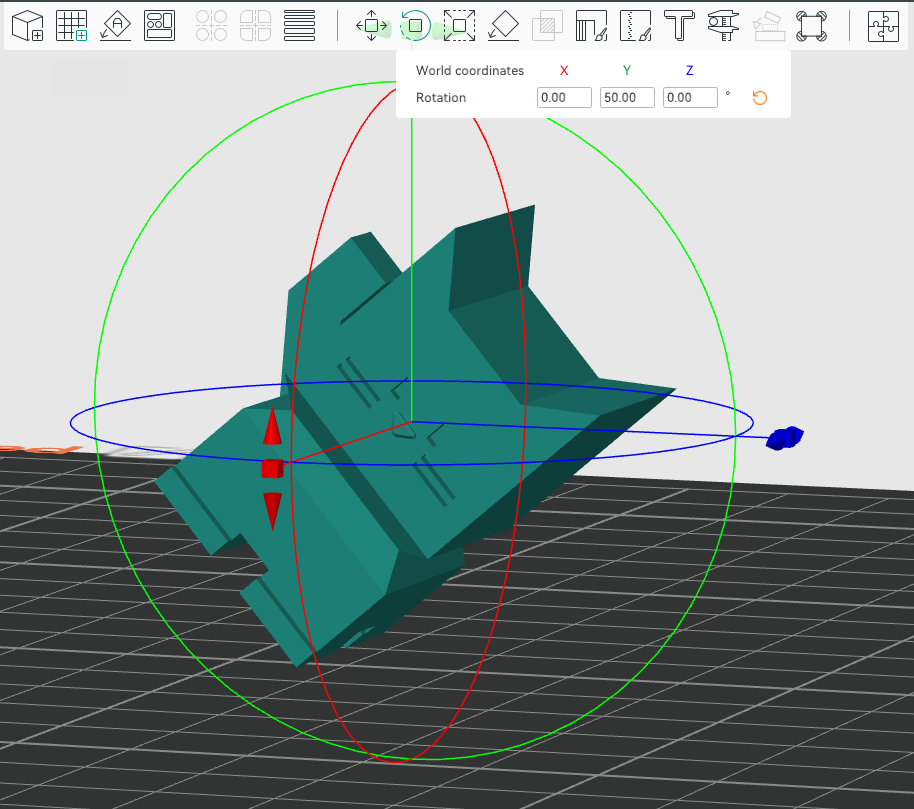
- You should get a warning like this
¶ A Quick Introduction to Support
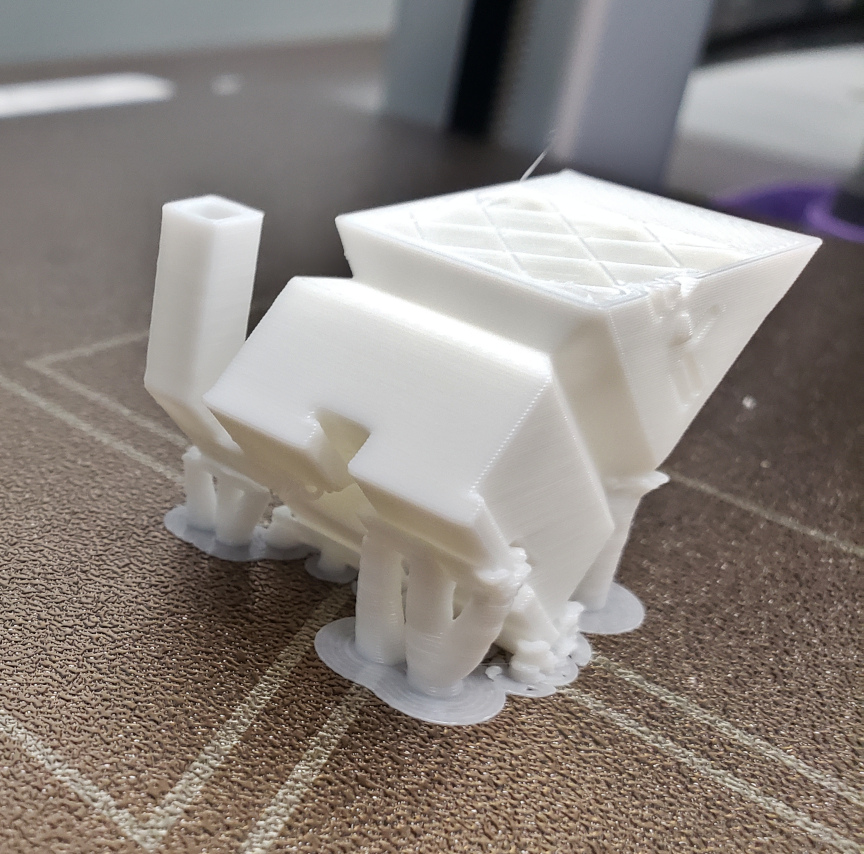
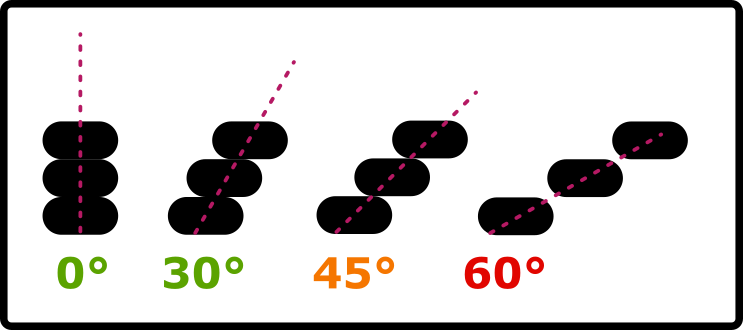
Support is used in 3D printing to improve print quality when there are areas of the model that overhang too much for the next layer of the print to catch on or adhere to the previous layer.
The diagram below represents the outermost threads in three layers. As the overhang increases, the overlap with the thread in the previous layer decreases until it is no longer supported. Unsupported threads can fall off the bottom of the feature. This causes distortions, bad print quality, and can even cause the print to fail.
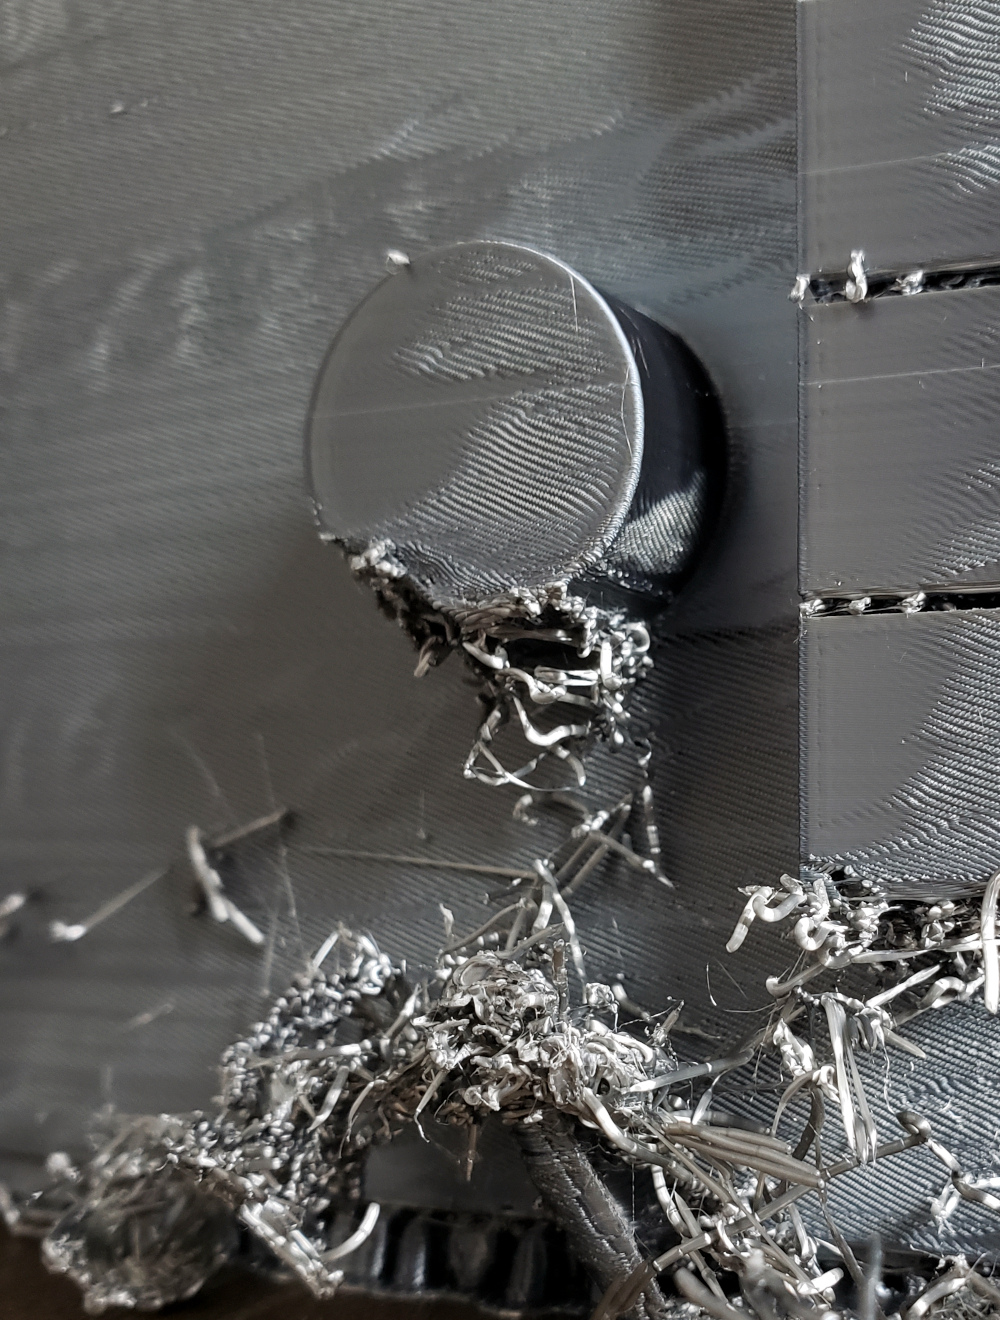
For example, the image below shows a cylindrical protrusion that was printed without support. The print eventually recovered because enough layers built up to create support, but the overall quality of the print is very low.
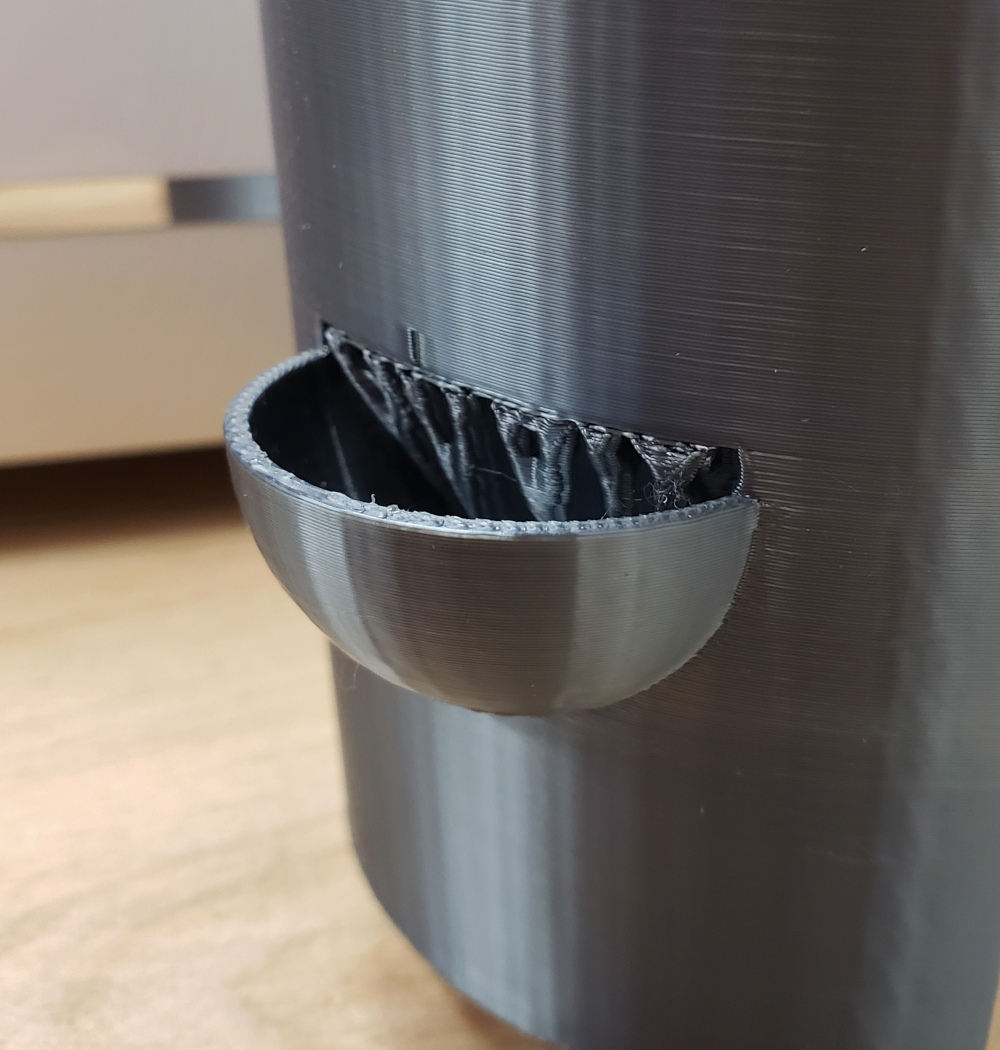
Meanwhile, the image below shows a spherical bump that was printed without support. The first layer of the sphere is very small and protrudes only a little bit, so it doesn’t fall far enough to disrupt the rest of the print. There is support holding the opening above in place.
¶ Enabling Support Generation
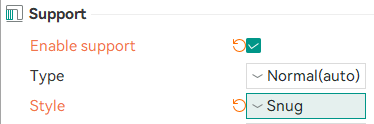
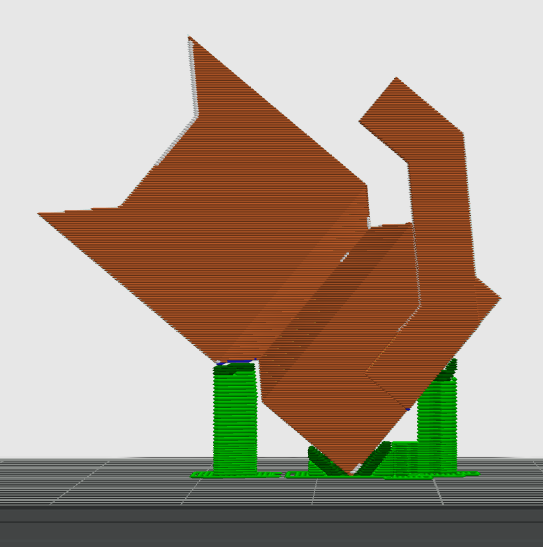
Go to the Support options tab and click Enable Support. Slice the model again.
Scroll through the layers to check out how the model and the support connect.
Try out the Tree/organic support style as well and compare printing time to the Normal/Grid style.
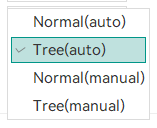
Bonus: Enable Advanced Settings and try out some different Type and Style combinations.

Bonus: really mess with the slicing parameters.
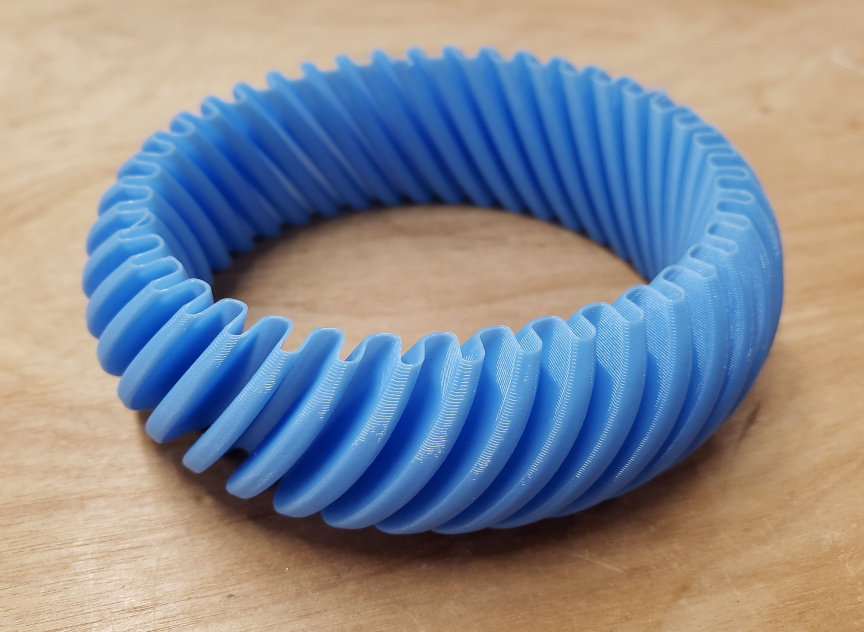
Slicing parameters can be adjusted to their extremes to produce interesting effects. A common one is called “Vase Mode” or “Spiral Vase Mode”, which prints just the outermost perimeter of an object. Find “Spiral Vase” under the “Others” tool tab in Orca.
It doesn’t work well with the CaliCat, but it works really well with objects designed to take advantage of this feature, such as this bracelet.
The opposite, all infill with no perimeters or solid layers, can also be used to create interesting effects, such as foliage for model trees. (Image and design credit: https://www.printables.com/@TheJollyRedBe_253058)
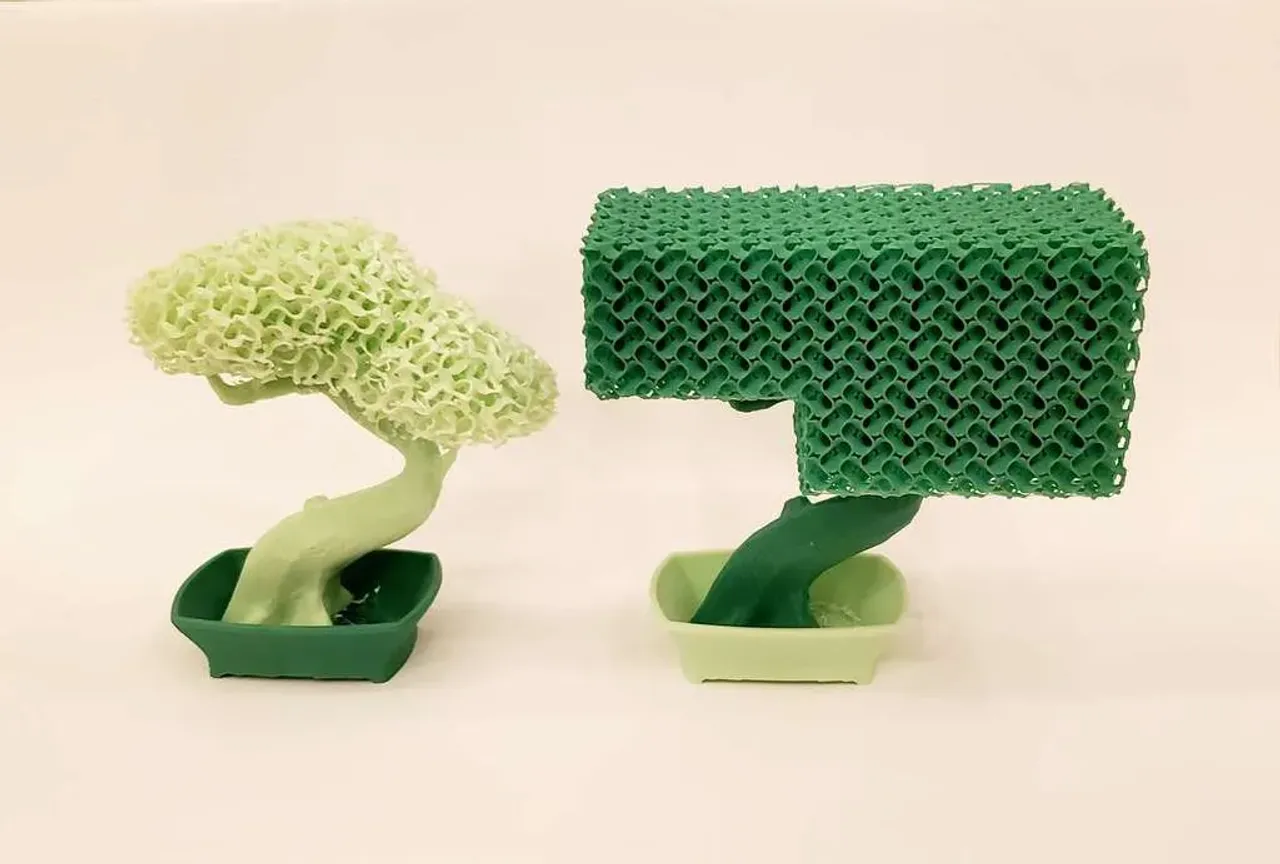
In between those, perimeters and infill and solid bottom layers can be used to create soap dishes and other items that benefit from drainage. (Image and design credit: https://makerworld.com/en/@frameworks)
The purpose of this project is not to make a good CaliCat but to make an interesting one. Change some slicer settings and/or use the slicer’s model manipulation tools such as rotate or scale to change how the CaliCat will print away from the defaults.
¶ Starting the Print
| ↙ From the Slicer to the Printer ↘ | |
|---|---|
| Bambu A1 | Creality Ender-3 V3 |
| 1. Choose the printer from the dropdown in the window that pops up 2. Verify that the filament material shown on the printer’s controller matches the one on the spindle. Tap Filament, then Edit if it needs to be updated. |
1. Export G-code to SD card 2. Insert SD card into printer 3. Select “Print” menu option, click knob, select file, click knob, select “confirm”, click knob |
You need to make sure there’s enough filament and that the build plate is clean. When instructed to start printing the model, the printer will take care of heating the extruder and build plate. The Bambu A1 and Creality Ender3-V3 take care of calibrating the build plate for flatness, but other printers may not.
¶ Finishing the Print
After the print is done, be safe and wait a few minutes for it to cool.
- The hot end, build plate, and object may be hot enough to burn you.
- The plastic may still be soft and could be deformed by the force used to remove it from the build plate.
- The object will be easier to remove from the build plate after it has cooled because the plastic shrinks slightly as it cools.
Wait longer for smaller parts because they are more influenced by the heat from the build platform. Large prints can be grabbed and popped off. Smaller prints may require removing the build plate and bending it to pop them off, and small prints may require using a scraper to pry them off. If you removed the build plate, return it to the printer.
Remove any support material from the object. It should be removable using your fingers but tweezers, needle nose pliers, or a craft knife to trim off thread ends may help.
And that’s it! Enjoy your new object!