¶ Introduction
Open Works has a variety of jigs and templates available. You must complete Wood Shop 1 before using any of the machines that use these jig sand templates.
¶ Shop Access
A membership or day pass is required to access the Wood Shop. The following Shop Safety Class is required to access the hand tools
¶ Step by Step Guides
¶ Table Saw Sleds
A table saw sled is used to make repeatable cuts easily. They are especially useful safely and quicly for creating angled cuts.
A table saw sled rides on the tracks in the table of the saw. These tracks are perfectly parallel to the blade and a well constructed sled will then be perpendicular to the blade.
Open Works has a large collection of sleds stored near the table saws. There may be one in there that solves your problem.
¶ Kreig Pocket Hole Jig
The pocket hole jig helps create a hole for a screw that goes at an angle through two pieces of material to create an extremely strong joint. Product page
Here's a video tutorial + Kreig propaganda on setting up and using the pocket hole jig.
In short:
- It requires a special drill bit with a depth setting collar.
- Using the slot in the side of the tool, put the tip of the drillbit at the thickness of the wood you will be drilling, then set the collar on the notch and tighten it in place with the hex key.
- Put the drill bit in a handheld drill.
- Clamp the material into the jig.
- Slide the tip of the bit into jig, start the drill spinning, and drill the wood until the collar hits the jig.
¶ Kreig Concealed Hinge Jig
The concealed hinge jig helps create the holes for concealed hinges, which are typically installed in cabinets. Product Page
Here's a video tutorial from Kreig on setting up and using the concealed hinge jig.
In short:
- According to the instructions for the hinge, set the offset using the two cams.
- Position the jig on the door using the scale on the side of it.
- Clamp it in place.
- Fit the bit in the guide to a handheld drill.
- Fit the guide to the jig. It twists to lock into place.
- Drill the hole.
- Remove the guide from the jig and the bit from the drill.
- Chuck up a 1/16th inch bit in the drill and use the guides in the jig to drill the screw holes.
- Do the other hinge hole the same way.
¶ Porter Cable Omnijig
Here's a video tutorial for using the jig. Here's another video about it.
The omnijig is designed to perfectly align dovetail cuts every time. For it to work, there is some simple but fiddly and extremely necessary setup. Here is the manual for it.
¶ Miter Guide
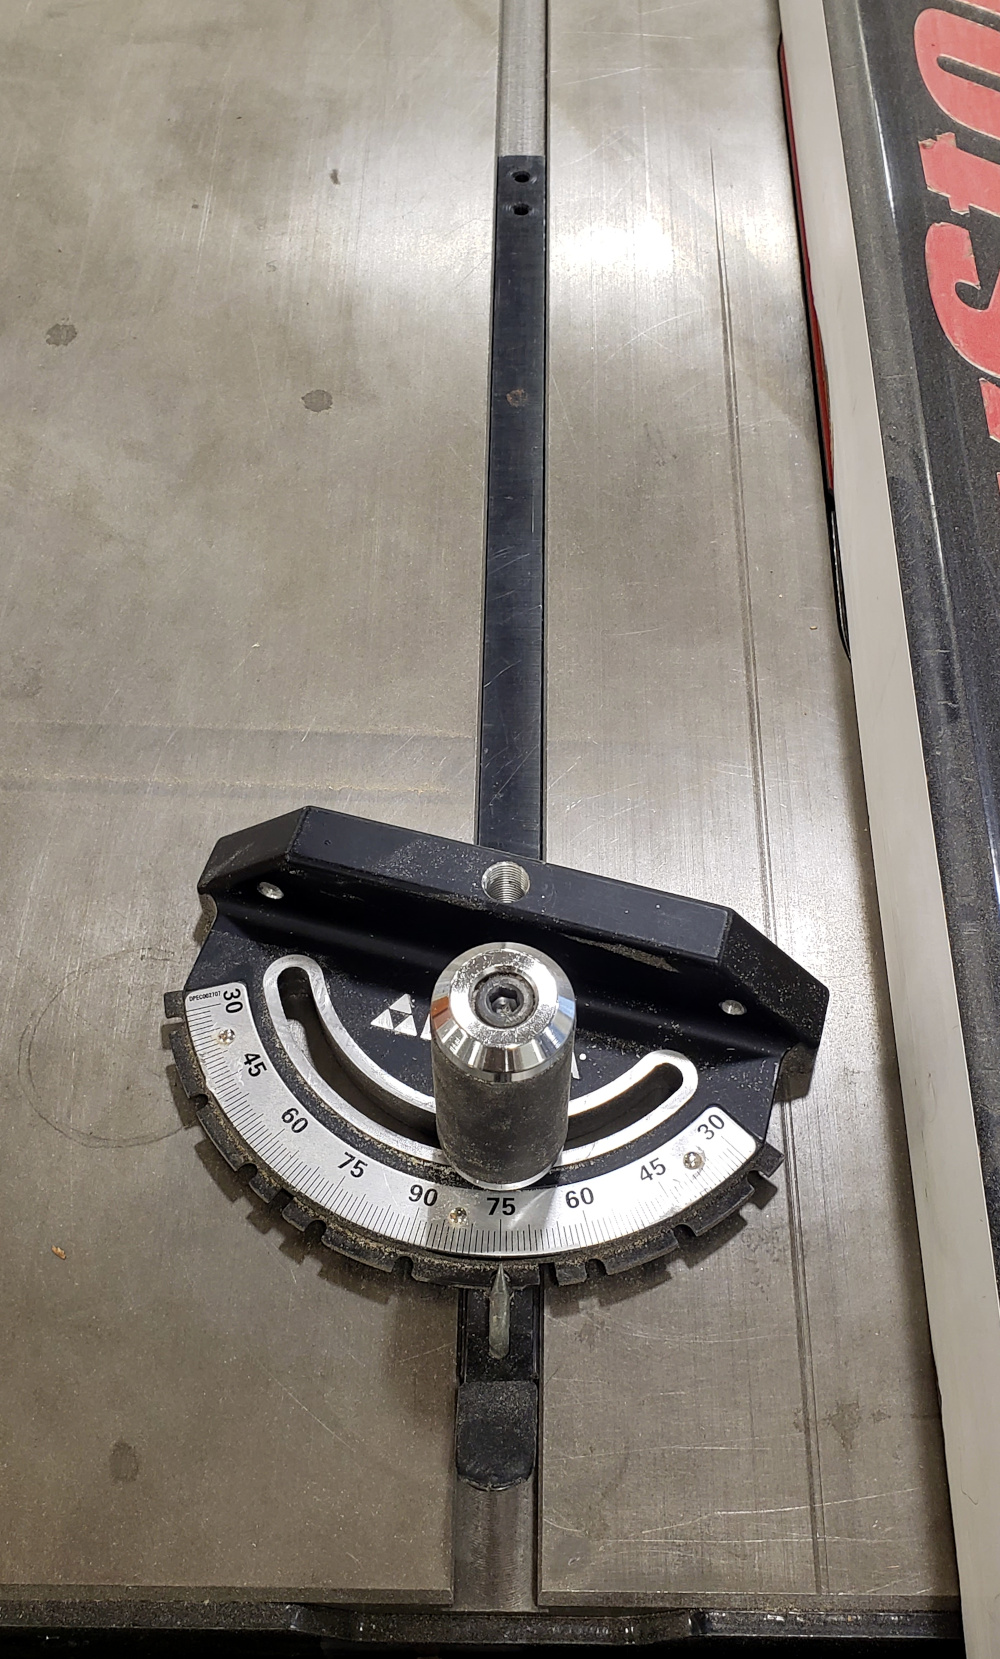
Miter Guides come with a lot of different machines and they usually look a lot like this.

Many machines in the woodshop can use miter guides. You can identify which ones by looking for the characteristic slot in the table on the machine. The miter guide drops into that slot.
- Place the bar of the guide into the track/slot on the machine.
- Turn the handle counter clock wise to loosen it.
- Press in tab to release the lock.
- Turn the body of the tool to change the angle.
- Release the tab and tighten the handle by turning it clockwise.
¶ Templates, patterns, and jigs for Routers
Router templates are used to easily make repeatable shapes. Here is an overview from Woodsmith.
In short:
- Select your bit, typically a flush cut bit (bearing at the tip of the bit) or a pattern bit (bearing above the flutes of the bit).
- Depending on where the bearing is on the bit, secure the template to the top or underside of the material. If the pattern and bearing are on the underside of the material and you're using a handheld router, elevate the material so that the router has room to work.
- Install the bit into the tool, being sure to adjust the cut depth to align the bearing with the template and the cutting edges of the bit with the material.
- Make the cut.
¶ Making your own jig or template
This overview mentioned above also covers making your own templates.
In short:
- Cardboard, corrugated or otherwise will not support a router bearing adequately to produce a good cut.
- Use hardboard, MDF, scrap wood, acrylic, or some other hard material that will keep an edge to create the template. Generally the material should be 1/8th to 3/8th inch thick.
- Sketch the desired shape onto the material. Cut it out using the band saw or other tools, and smooth the edges with sanding. This is the time to get the template shape correct.
- tada!
¶ References
¶ Video Walkthroughs
¶ Glossary
%%TERM
%%definition/description of term