¶ Introduction
Open Works has a Frame Cutter. You must complete Wood Shop 1 before using the machine.
¶ Machine Overview
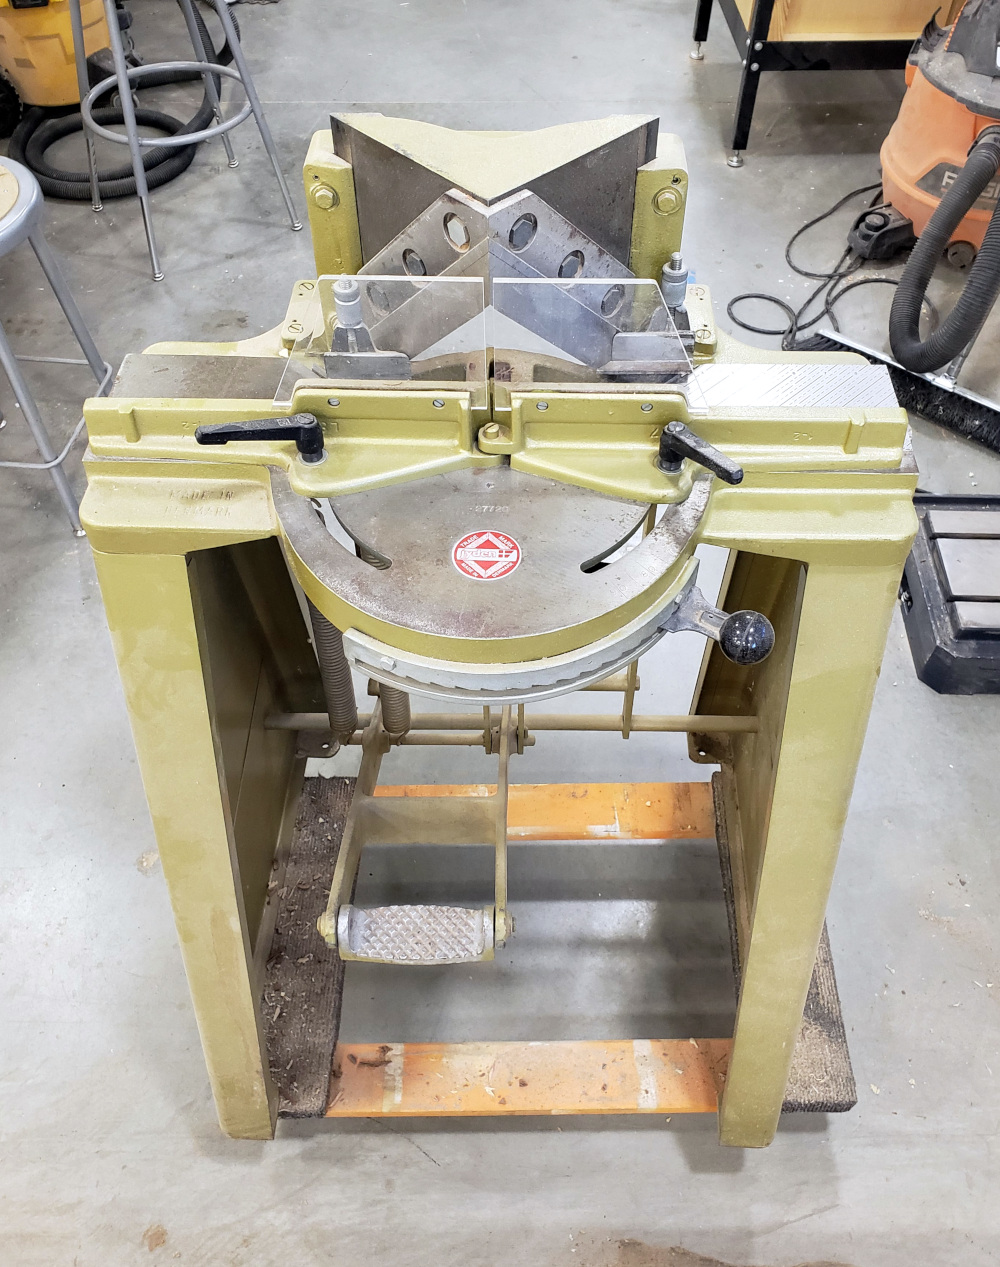
The frame cutter, also known as a miter trimmer, is great for cutting identical angles many times with very little blowout or splintering. It is a quiet machine with a variety of adjustments.
It has two drawbacks:
- it is foot powered and the force of the cut is limited by the weight of the user.
- which means that the material thickness is also limited by the weight of the user.
- The author is about 130 lbs and could cut 1/2" pine and 3/8" hardwood with some effort.
The blades of the machine are at a fixed 90° and this cannot be changed. However, the angle of the guides can be changed, so with a little bit of geometry, almost any angle can be cut.
¶ Machine Comparison
| Tool | pros | cons |
|---|---|---|
| frame cutter | very precise cuts, little to no tear out, almost no kerf | maximum size of work piece is pretty small due to the physical effort required to cutter larger/thicker pieces |
| miter saw | good at big and thick pieces | tear out and harder to make a precise cut repeatedly |
¶ Parts of the Machine
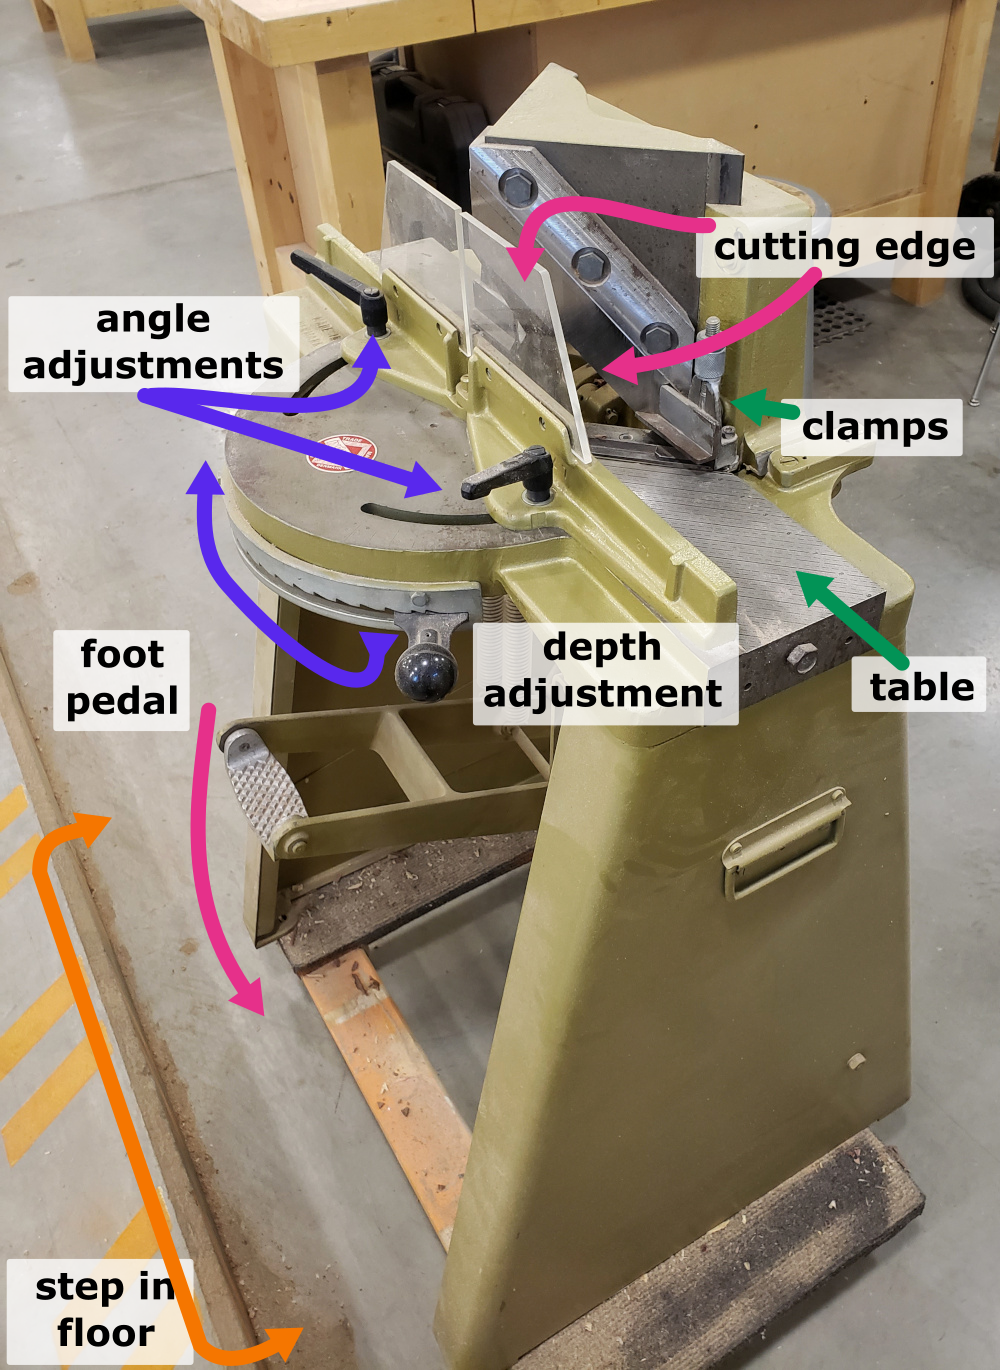
Click to see a diagram of the machine!

¶ Machine Reservations
- A machine reservation is not required.
¶ Material Considerations
¶ Acceptable Materials:
Hardwoods.
Softwoods.
Plywood.
Formaldehyde-free MDF.
Hardboard.
Formaldehyde-free OBS.
Particle board.
¶ Use with Caution and Proper Technique:
Always check moisture levels with the moisture meter and look for nails with the metal detector.
Reclaimed lumber.
Logs.
Slabs.
Green wood.
Wooden dowel rods.
¶ FORBIDDEN MATERIALS:
DO NOT, under any circumstances, cut the following materials on the table saw:
Pressure treated wood.
Materials containing or coated with lead or lead-based paint.
Materials treated with formaldehyde.
Any pre-finished woods (for example: finished flooring, old bar tops, etc.).
Metal.
Glass.
¶ Safety and Setup
Safety Check:
Sturdy, close-toed shoes must be worn at all times.
Long hair, jewelry, and loose clothing must be tied back.
Safety glasses and earmuffs must be worn while machines are running.
A dust mask or a NIOSH certified respirator is recommended.
For more information on shop safety visit Wood Shop under "Safety."
Watch your fingers around the blade.
¶ Before You Begin
¶ Setting Up the Machine
The frame cutter is stored on a cart beside the drill press.
- Roll it out so that there is room to work.
- Lining it up with the step in the floor can give you more leverage on the foot pedal of the machine. See the machine diagram above for recommended placement in the wood shop.
The cart does not have locking casters, so it is possible for the cart and machine to scoot away from you when stepping on the foot pedal. The machine can be put on the floor- ask for assistance with picking it up and moving it.
¶ Adjustments you can make
¶ Angle
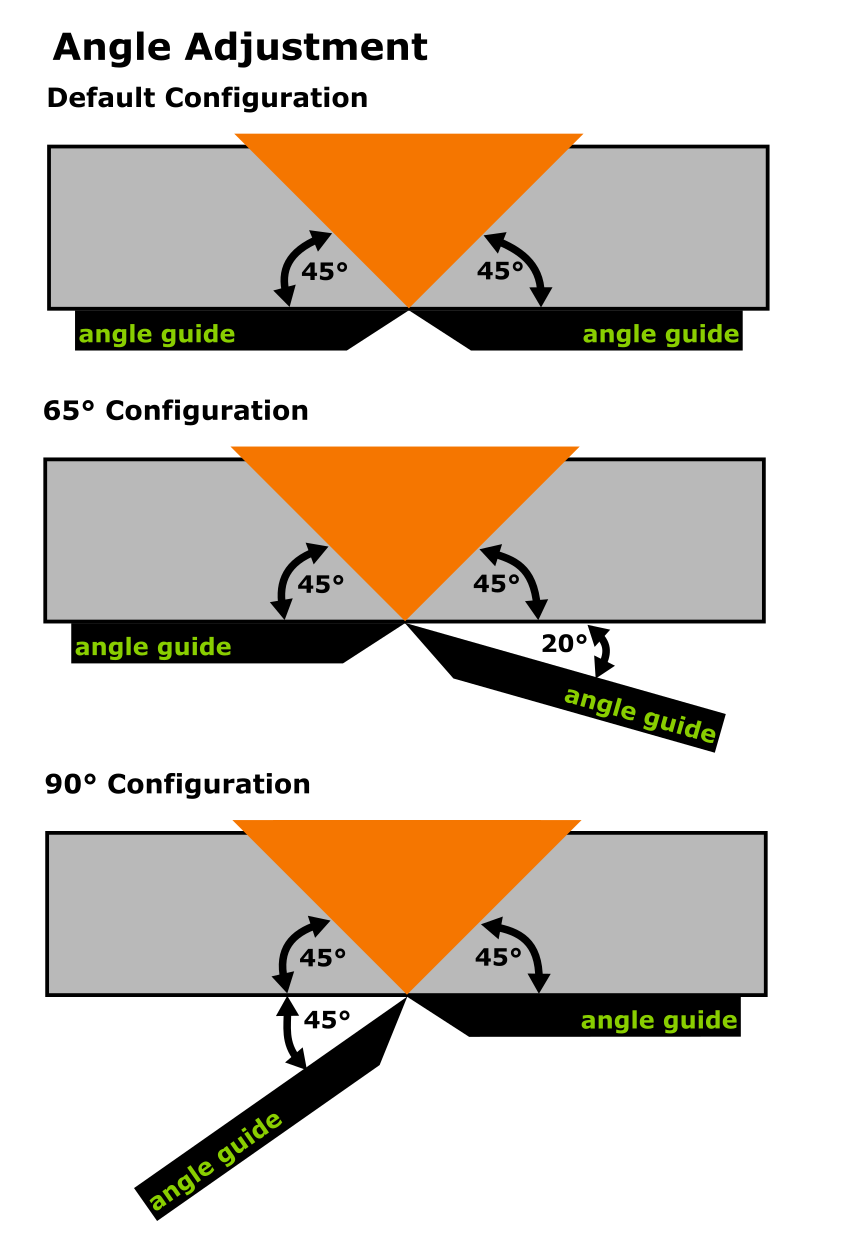
The angle is adjusted using the the levers on the guides. Rotate them counterclockwise to loosen and clockwise to tighten. Only the guides can be adjusted; the angle of the cutters is fixed. The angle adjustment is relative to the cutters.

|
This diagram shows the default configuration of the machine followed by two example configurations. The 65° configuration shows the right angle guide moved to create a total of 65° between the guide and the blade. Working with stock that has a square (90°) end on it, this would cut 25° off of the stock inserted from right to left. The 90° configuration shows the left angle guide moved to create a total of 90° between the angle guide and the blade. This would square off the end of any stock inserted left to right. |
¶ Depth
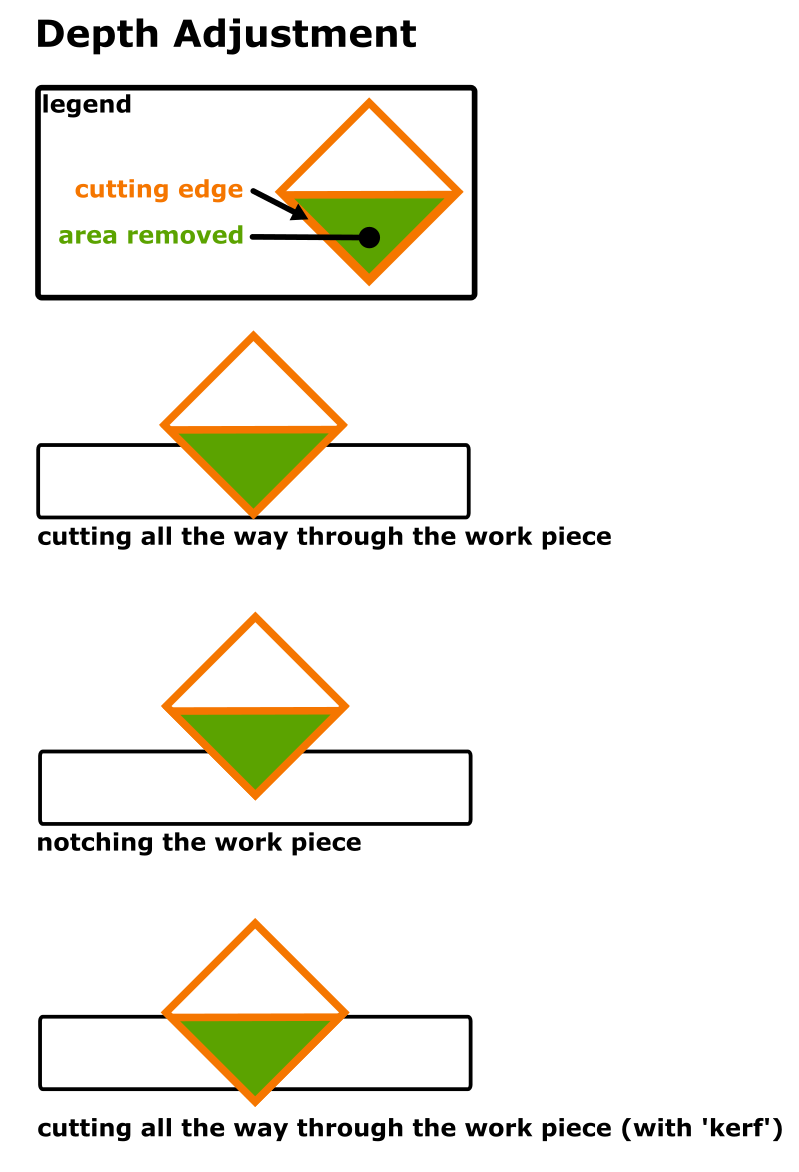
The depth is adjusted using the round knob on the front/right of the machine. Press down to unlock and move it.

¶ Using the Machine
- Get the material aligned.
- Hold the material against the angle guides with your hands. This secures the material, keeps your hands out of the way of the blade, and helps you brace yourself for stepping on the pedal.
- Step on that pedal until it goes all the way down.
- The waste will fall out the bottom of the machine. Do not expect to receive useful pieces from the waste.