¶ Introduction
Welding is a fabrication process that joins metals by using high temperatures to melt the parts together and allowing them to cool, causing fusion.
Metal welding is distinct from lower temperature bonding techniques such as brazing and soldering, which do not melt the base metal (parent metal) and instead require flowing a filler metal to solidify their bonds.
In addition to melting the base metal in welding, a filler material is typically added to the joint to form a pool of molten material (the weld pool) that cools to form a joint that can be stronger than the base material. Welding also requires a form of shield to protect the filler metals or melted metals from being contaminated or oxidized.
Welding is a hazardous undertaking and precautions are required to avoid burns, electric shock, vision damage, inhalation of poisonous gases and fumes, and exposure to intense ultraviolet radiation.
¶ Shop Access
A membership or day pass is required to access the Metal Shop.
The Shop Safety Class Metal 1 is required before using the Metal Shop.
The Shop Safety Class Metal 3: MIG Welding is required before using the Lincoln Power MIG 210 MP multi-process welders.
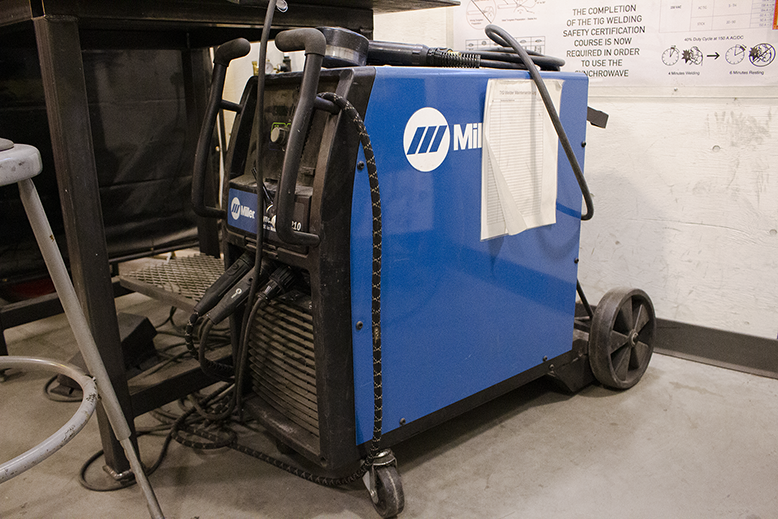
The Shop Safety Class Metal 4: TIG Welding is required before using the Syncrowave 210 AC/DC arc welder.
¶ Processes Available
- TIG Welding
- MIG Welding: MIG stands for Metal Inert Gas. At Open Works, an inert gas mixture of Argon and CO2 (75% Argon, 25% CO2) is used as a shield to create an ideal atmosphere to produce an arc, and protect the weld components from contamination. A continuous solid wire electrode is fed through a welding gun and into the weld pool, joining the two base materials together. MIG welding is an approachable way to fuse mild steel and create strong connections.
The four Lincoln Power MIG 210 MP (K3963-1) multi-process welders are set up for MIG welding by default, but each one can be reconfigured for TIG and stick welding.
- Stick Welding
¶ Machine Comparison Chart
| Tool | Info | Name |
|---|---|---|
 |
The Syncrowave 210 AC/DC arc welder is available on a first-come, first-serve basis. | |
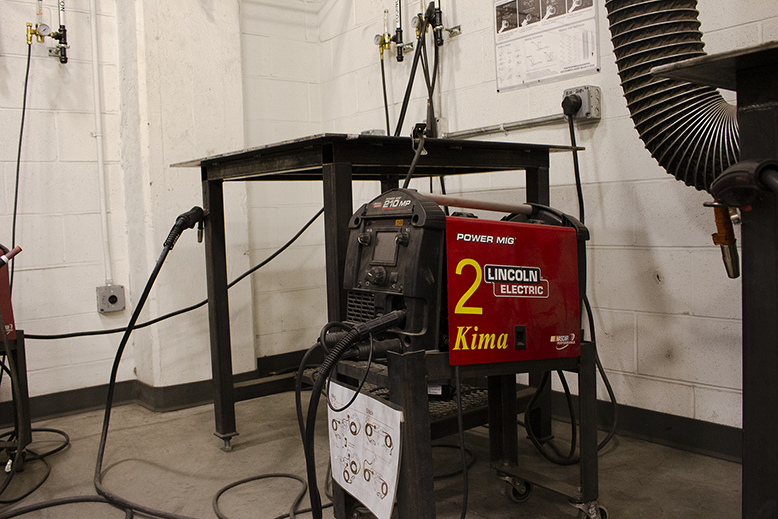 |
There are four Lincoln Power MIG 210 MP (K3963-1) multi-process welders available for use. | 1. Snoop. 2. Kima. 3. Avon. 4. Bubbles. |
| Tool | Processes | Num Available | Reservation Required? | Class Required | Best for | Worst for |
|---|---|---|---|---|---|---|
| Syncrowave 210 AC/DC arc welder | MIG, TIG, Stick | 1 | No | Metal 4 | aluminum | |
| Power MIG 210 MP | MIG, TIG, Stick | 4 | No | Metal 3 | Beginners | |
| Oxy/Acetylene Torch | Oxy-fuel | 1 | No, but permission and prior experience is required. Check out key from front desk. | No class available | Beginners | |
| Plasma Cutter | plasma cutting | 1 | N/A | N/A | freehand cutting through sheet metal | |
| CNC Plasma Cutter | plasma cutting | 1 | Yes | CNC Plasma Cutter | controlled cutting through sheet metal |
The Power MIG 210 MP has been discontinued by Lincoln Electric and replaced with the Power MIG 215 MPi (K4876-1).
Open Works is committed to preserving and maintaining discontinued techonology.
¶ Machine Reservations
The Syncrowave 210 AC/DC arc welder and the Power MIG 210 MP multi-process welders do not require a reservation and are available on a first-come first-serve basis.
¶ Parts of the Machine
This will be described for each tool individually.
¶ Material Considerations
¶ Acceptable Materials:
Mild steel.
¶ Use With Caution:
Aluminum (only compatible with TIG welding).
¶ Forbidden Materials:
Stainless steel.
¶ Safety
Personal Protective Equipment (PPE):
Open Works recommends wearing earmuffs or silicone ear plugs when other machines in the Metal Shop are in use.
¶ Welding Process
The steps to welding are similar no matter what process or material you are using. There are four basic steps:
- Material preparation
- Setting up the tools and workspace for welding
- Welding basics/techniques
- Cleaning up
There will be some differences based on process or material and those will be called out where appropriate.
¶ 1. Material Preparation
In order to achieve a good weld, the material must be clean and the pieces must meet neatly with no more than a small gap. For example, this butt joint:

Contaminants can include mill scale (the flakey dark grey/black surface on steel), paints or other films on the surface, chemicals, and/or surface oxidization.
To clean material
- grind off mill scale off of steel with a sander or angle grinder, leaving a nice bright and shiny surface.
- grind surface oxidization off of aluminum with a sander or angle grinder. It won't visually be much different but a gritty powder will come off.
- It is also possible to remove mill scale and surface oxidization with wire brushes. Keeping a brush at the welding station is useful because it lets you prepare each join right before welding it.
Use stainless steel brushes for aluminum and mild steel brushes for steel. Do not cross contaminate the brushes.
- Material that has been painted or coated in other chemicals is not allowed in the metal shop due to the hazards that heating paints and other chemicals can produce. These hazards include fire, explosion, and toxic gases. If you must use material that's been painted or coated in other chemicals or materials, clean it at home and don't tell us about it.
- Chemical cleaning, using acetone. Wipe the material with acetone. Acetone is not provided and do not bring acetone into the welding area. Do not leave containers open in the shop. Acetone is highly flamable and can cause vapor explosions.
¶ 2. Setting up the tools and workspace
Welding requires a good electrical circuit through the workpiece, shielding gas, and good workholding. If even one of these is shaky, it can degrade the weld.
The welding machine needs the correct settings and it is also essential to have good air circulation to prevent asphyxiation of the operator.
Electrical circuit: The electrical circuit passes from the welding machine to the electrode in the welding gun, through a small gap to the workpiece to create the welding arc, then through the ground lead back to the welding machine. If the circuit is intermittant, the welding arc won't form and the weld won't form.
Shielding gas: shielding gas prevents atmospheric contaminants from effecting the weld. In MIG and TIG, shielding gasses come from tanks and out through the welding gun. In stick, the gasses are created through the consumption of the stick during welding.
Good workholding: you can't hold the workpiece by hand because it's too hot and you need both hands to hold the gun steady. The force of the arc or a too high wire feed rate can push the workpiece away. Use a clamp or vice to hold the workpiece in place.
Welding machine settings: the welding machine needs to provide enough voltage, current, and wire feed (MIG only) in order to create a successful weld.
Air Circulation: Argon and CO2 are hazardous to breath in even moderate concentrations. The fumes that welding produces, especially while welding aluminum, are hazardous. It is essential to set up the air circulation hood near your workpiece and in such a way as to draw fresh air towards you and fumes away from you.
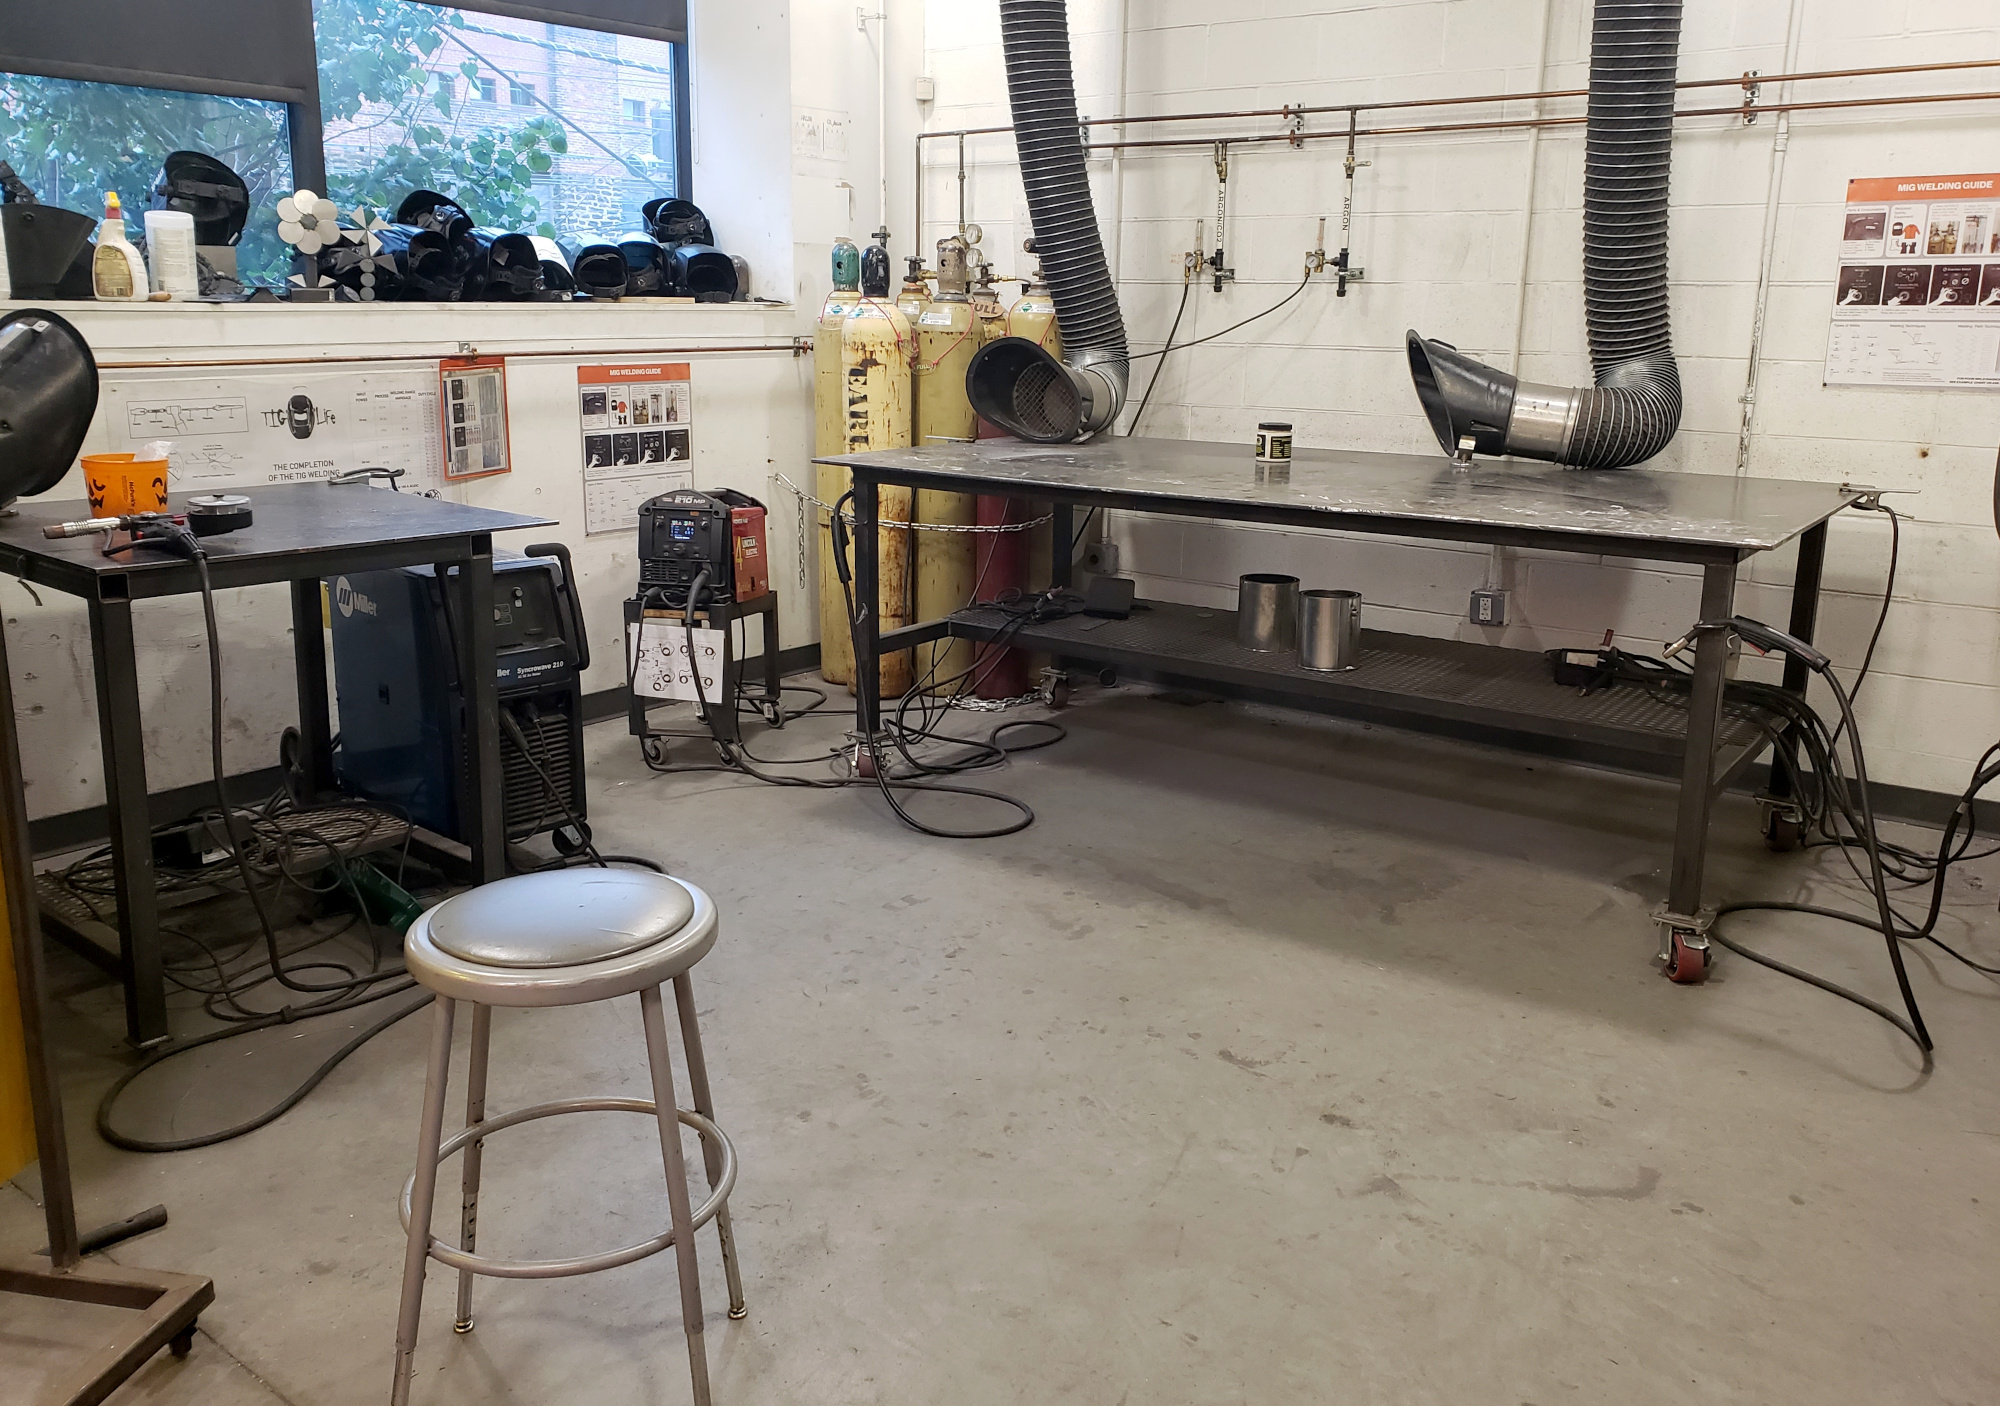
¶ Workstation and workholding
By default, each workstation is set up with the ground lead attached to the table, which is conductive. Securely clamping the workpiece to the table will add it to the circuit and hold it in place. If it cannot be clamped, attach the ground lead to the workpiece itself.
Each workstation also has a ventilation duct provided. It is secured to the table with a magnet and should be moved to pull air across the workpiece.
¶ Configuring the machines for different processes
See the diagrams attached to each machine for the specific process configurations.
¶ Machine Settings
- Turn on the machine using the power switch in the center below the screen.
- The machine will guide you to select C25 for MIG processes or C100 for TIG processes.
The maximum thickness you can effectively weld is 5/16”
- The next screen reminds you of the set up.
¶ MIG
Use DCEP (Direct Current Electrode Positive). The work lead should be in the “-” port, locked in place by turning slightly. The plug attached to the MIG gun should be in the “+” port.
¶ TIG
Use DCEN (Direct Current Electrode Negative). The work lead should be in the “+” port, locked in place by turning slightly. The plug attached to the TIG gun should be in the “-” port.
- Choose wire diameter, typically 0.035"
- Select material thickness.
- It will provide recommended voltage and wire feed rate settings, which you can then adjust using the menu button. The range of recommended settings is indicated by a green bar for each. Make minor adjustments and run test welds to see what is most comfortable for you. Record what settings work best for your personal records!
Wire speed controls amperage as well as the amount of weld penetration. The thickness of the welding material will determine the necessary amperage to produce an effective weld. As a guideline, each .001 inch of material thickness requires 1 amp of output: So, if welding steel that is .125” thick will require = 125 amps.
Voltage is a contributing factor to height and width of the bead.
A recommended settings chart is on the inside of the wire spool cover of the machine.
¶ Turning on the gas to a workstation
| Step | MIG | TIG |
|---|---|---|
| Identify which cylinders/tanks have the gas combination you need in them | look for tank labled Argon/CO2 or attached to a pipe labled Argon/CO2 | look for tank labled Argon only or attached to a pipe labled Argon |
| Turn on the gas to the system | Turn the knob at the top of the tank. Listen for the system to pressurize with a hiss. There's no need to turn the knob any further. | Turn the knob at the top of the tank. Listen for the system to pressurize with a hiss. There's no need to turn the knob any further. |
| Turn on the gas to the welding station | Identify the piping that goes to the welding machine you will be using. Turn the valve on the Argon/CO2 piping so that it is parallel with the pipe. | Identify the piping that goes to the welding machine you will be using. Turn the valve on the Argon piping so that it is parallel with the pipe. |
| Check gas pressure. It should be between 15-20 FPM. | There is a gauge attached to the piping for each station. When you turn the gas on, small ball will float up. If the gas has been on, pull the trigger of the gun to make it float up. Read the pressure from where the ball floats. | There is a gauge attached to the piping for each station. When you turn the gas on, small ball will float up. Read the pressure from where the ball floats. |
¶ 3. Welding Basics
Welding is a complex art and is impossible to cover in one wiki article. However, there are some basics that can get you started.
In its simplist form, welding liquifies two pieces of metal in order to join them together. This join is strengthened by adding filler. The liquid metal is called the "pool" or the "puddle". A "bead" is what's left behind as the puddle is moved along the join and mixed with filler. The shield gas protects the puddle from contaminants.
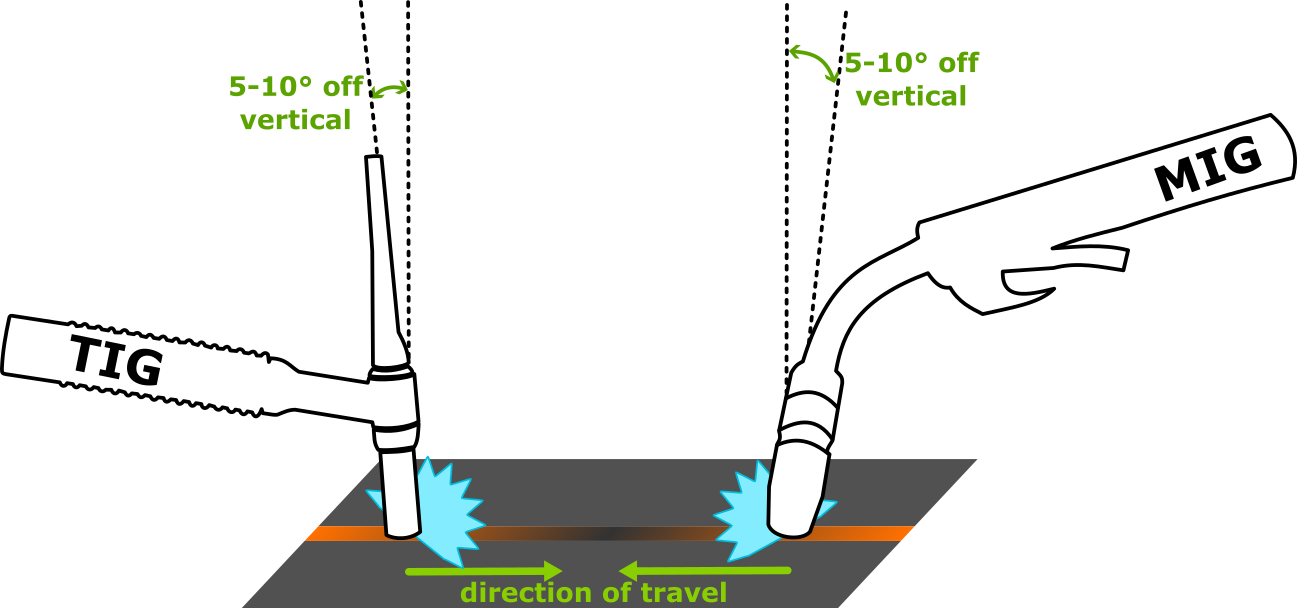
Hold the gun about 5-10° off of vertical. While holding the gun truly perpendicular to the workpiece is best, the slight angle lets you see where you are working and allows the shield gas to move ahead of where you are working. Move in the direction that the gun is pointing at a speed that lets the puddle form as it is moved. Add filler at a rate that does not overrun the electrode.
In the below image, the blue spiky shape represents the arc and the shield gas and the orange represents the part that has already been welded. Note that while TIG and MIG can be worked from any direction, left handed people will prefer to work from left to right, and right handed people will prefer to work from right to left, and that this diagram has been optimized for compactness.
¶ Technique Tips
• Maintain a consistent work angle and a push travel angle, which may change depending on the type of weld and position in which you weld.
• Watch the edges of the molten puddle carefully to learn how to control and maintain well formed, well penetrated welds. When running beads, you can try different “weaving techniques,” moving the electrode in small circles, zigzags, or by “whipping” the gun forward two steps and back a step as you push the weld puddle along. The welds should consist of slightly mounded, evenly spaced and overlapping beads. The edges of the weld should blend into the base metal without undercutting.
¶ Starting the arc
The electrode must have a slight space between the workpiece and the end of the electrode. 1/4 inch is usually the maximum.
Otherwise the the electrode will fuse to the workpiece and become contaminated.
MIG- pulling the trigger on the gun energizes the circuit, starts the flow of shield gas, and starts feeding wire. If the gun is correctly positioned against the workpiece, the arc will start, the puddle will begin to form, and the weld will be started. Start with about 1/4" to 1/2" wire stick out and maintain that as you work.
TIG- pushing the foot pedal energizes the circuit and starts the flow of shield gas. If the gun is correctly positioned against the workpiece, the arc will start and the puddle will begin to form. Wire feed is controlled by the operator, begin feeding now by tapping the wire into the puddle.
¶ 4. Cleaning up
- Turn off the gas at the wall and if nobody else is using it, at the tank.
- Turn off the machine.
- Put away any tools you got out.
- Put scrap in the bin.
- Put away welding jacket, gloves, and helmet. Make sure the helmet is facing the window.
- Sweep up on and around your workstation.
¶ Machine Maintenance
- Table grind down
- Monthly work: Inspect and Replace MIG tips. Clear excessive slag off around the tip and replace the tip if wire is fused to side or it is deformed. Check the wire spools and make sure you cannot see the end of the spool, replace if needed. We use 0.035” steel wire and 0.030” or 0.035” MIG tips.
¶ Troubleshooting
- [Sample Link to Troubleshooting SOP](sample link)
¶ References
Power MIG 210 MP Operator's Manual
Syncrowave 210 Owner's Manual
¶ Video Walkthroughs
Embed videos directly into the Wiki, do not link.
¶ Resupply Form
Click here to report any consumables that need to be replenished!