¶ Introduction
The following guide covers two methods for threading the machine.
¶ Time to complete
- Less than 5 minutes per thread.
¶ Tools Required
- Can of compressed air
- Needle threader (optional)
- Thread wax (optional)
- Scissors
¶ Personal Protective Equipment (PPE):
• Sturdy, close-toed shoes must be worn at all times.
• Long hair, jewelry, and loose clothing must be tied back.
• Ear protection is recommended when two or more machines in the lab are running at once.
For more information on shop safety visit Digital Textiles under "Safety."
Always keep fingers away from moving parts!
¶ Fast Way: Only use this method if the machine is already correctly threaded!
See the next section for images of each step.
- Pull 6 inches or so of thread from the cone, not the machine.
- Snip the thread close to the cone and remove the cone from the holder.
2.1 Wind the excess thread onto the cone and place a thread retaining clip over the end of the thread.
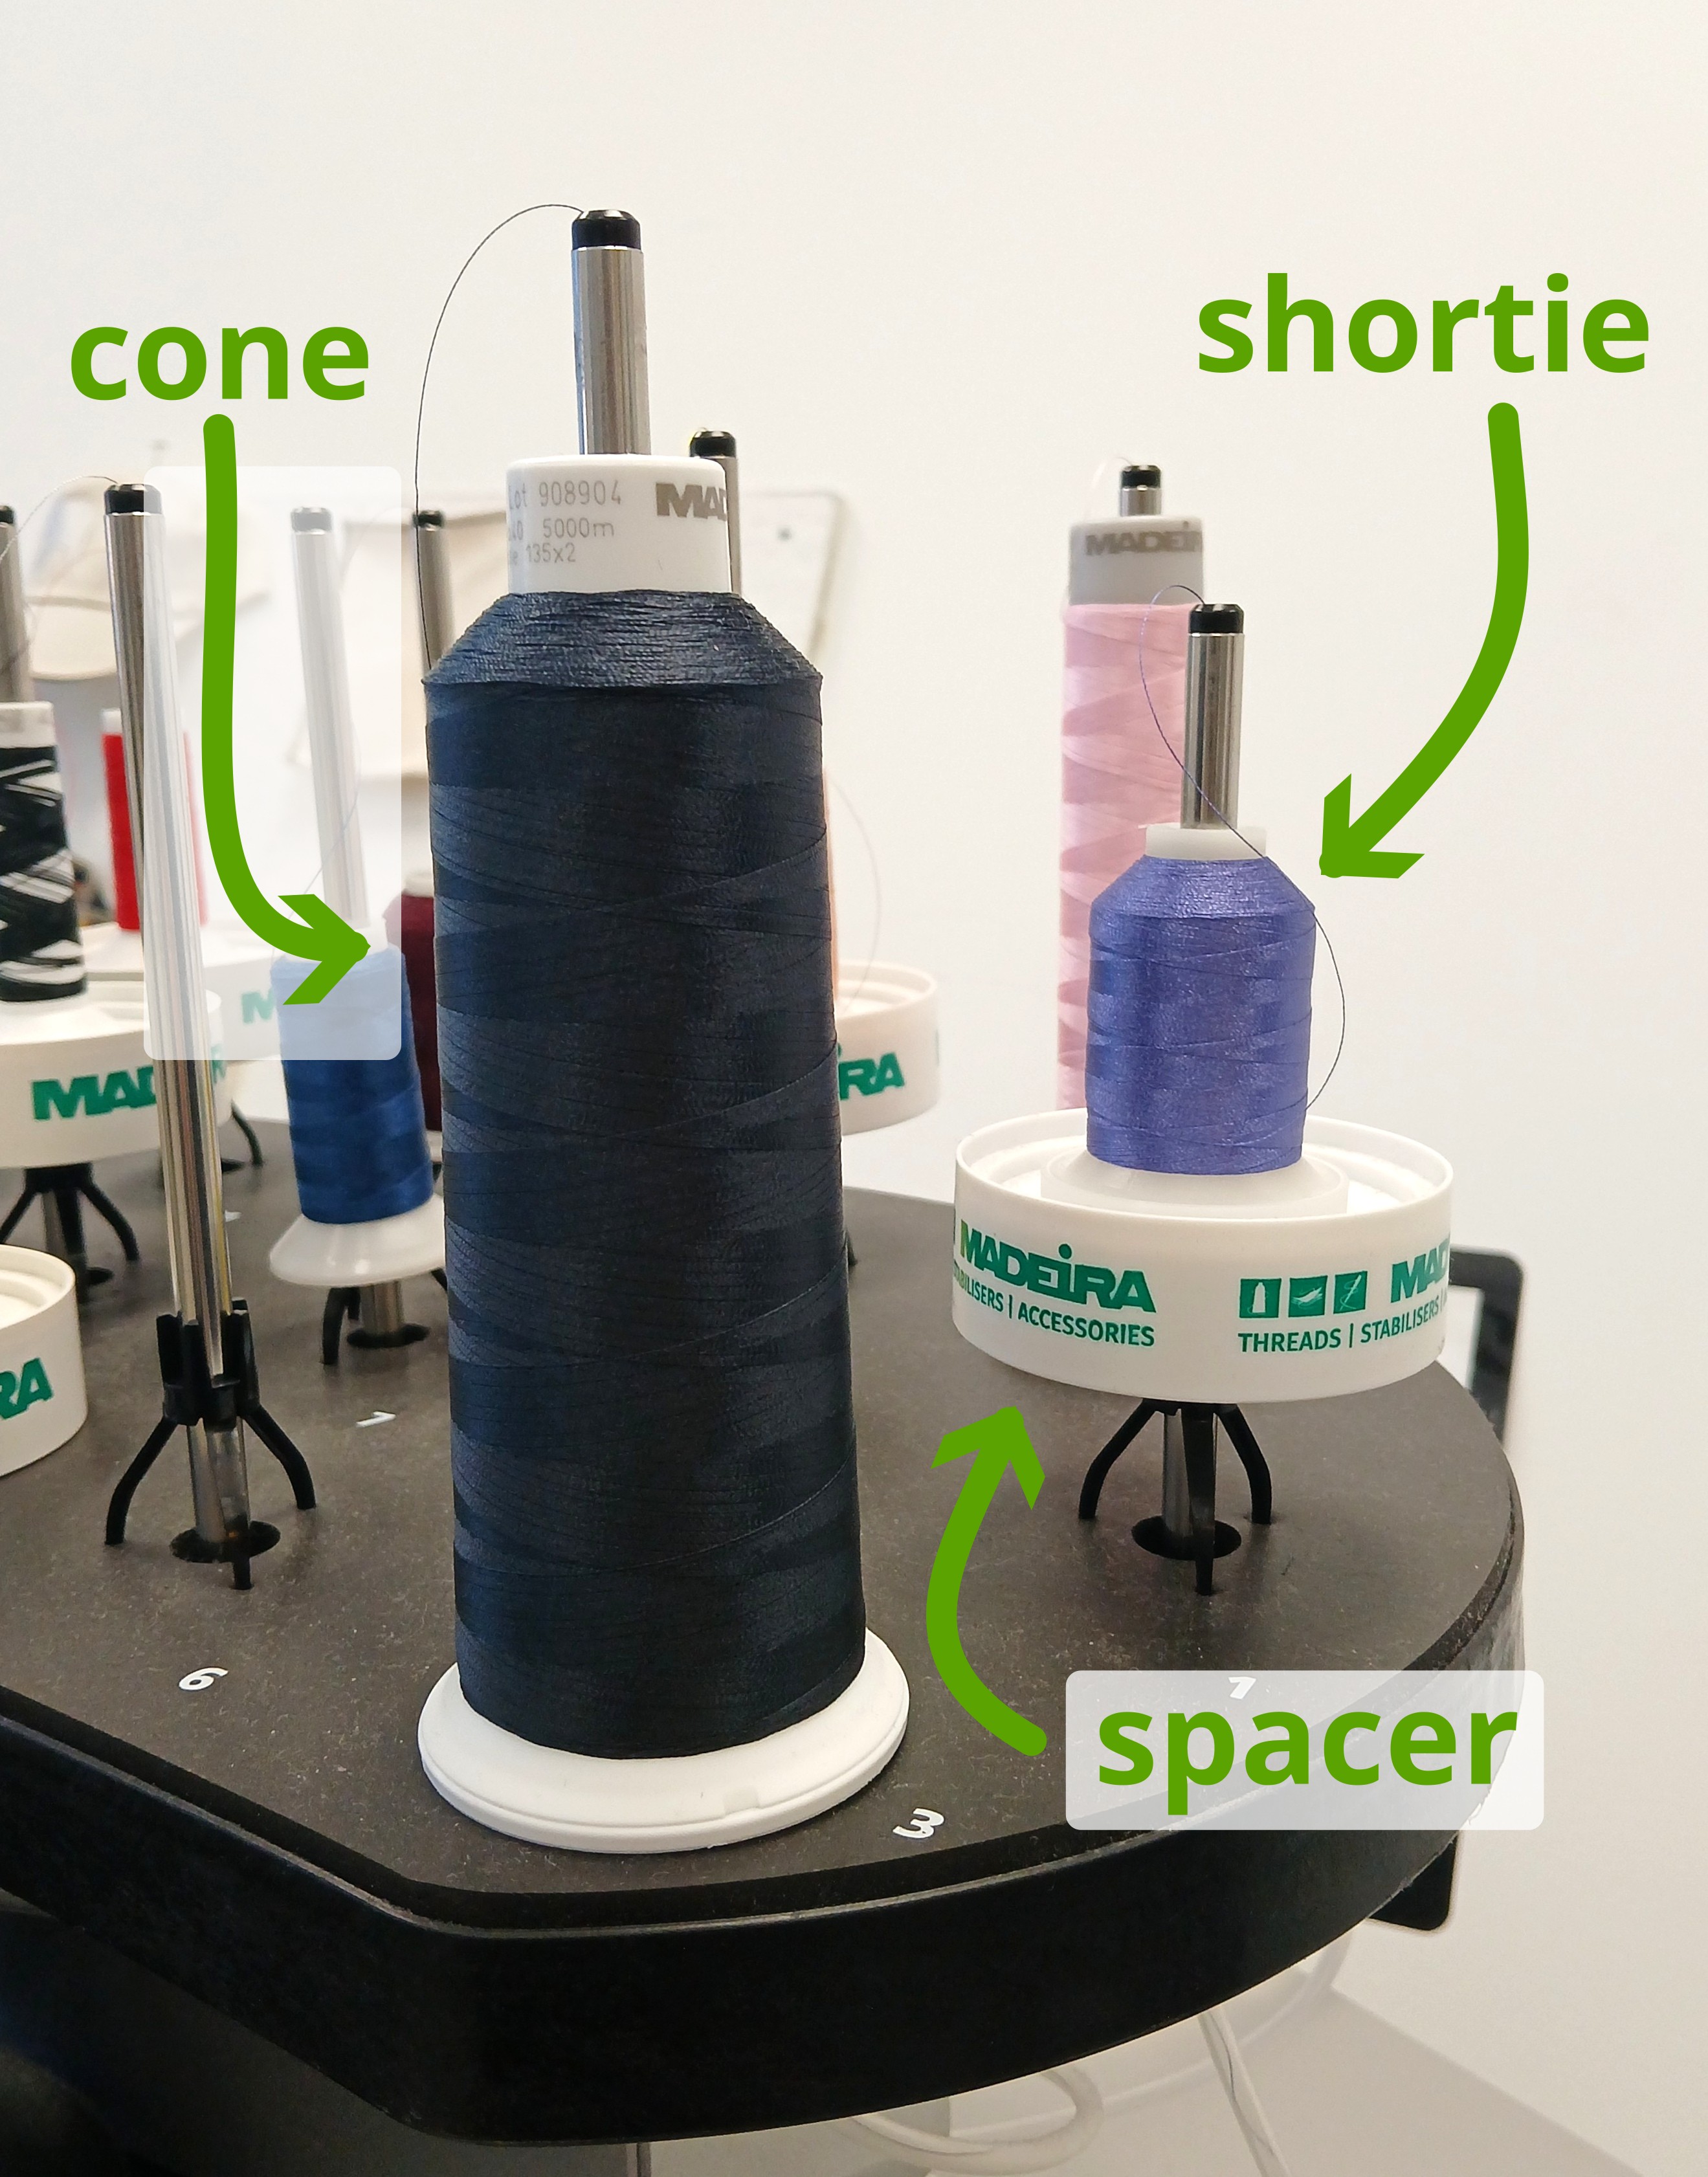
2.2 Put the thread away in the drawer or with your things, if it's your personal thread. - Set the new thread on the holder. If the cone is a shortie, slide a spacer onto the holder before placing the cone on top of it. You may also need a spacer lift (the black three legged thing).
- Bring the end of the old thread up above the end of the new cone. Tie the end of the old thread to the end of the new thread.
- Lift the pressure wheel associated with that thread holder to allow the thread to slide freely.
- From the needle associated with that thread holder, pull the old thread gently until the knot reaches the needle.
- The knot may pass through the needle.
7.1 If it does, pull 4-5 inches of new thread through the needle before snipping off the old thread and knot.
7.2 If the knot doesn't pass through the needle, don't force it. Snip the old thread and knot off, remove the old thread from the needle, then thread the needle front to back with the new thread. Use a needle threader or thread wax on the end of the thread for convenience. - Lower the pressure wheel back into place.
- Toggle the thread grabber to press the thread into the holder.
- Trim excess thread below the grabber.
¶ Slow Way: For all other situations
- Set the new thread on the holder. If the cone is a shortie, slide a spacer onto the holder before placing the cone on top of it. You may also need a spacer lift (the black three legged thing).
- Pull 6 inches or so of thread from the cone.
- Insert the thread into the hole in the center of the holder as far as it will go.
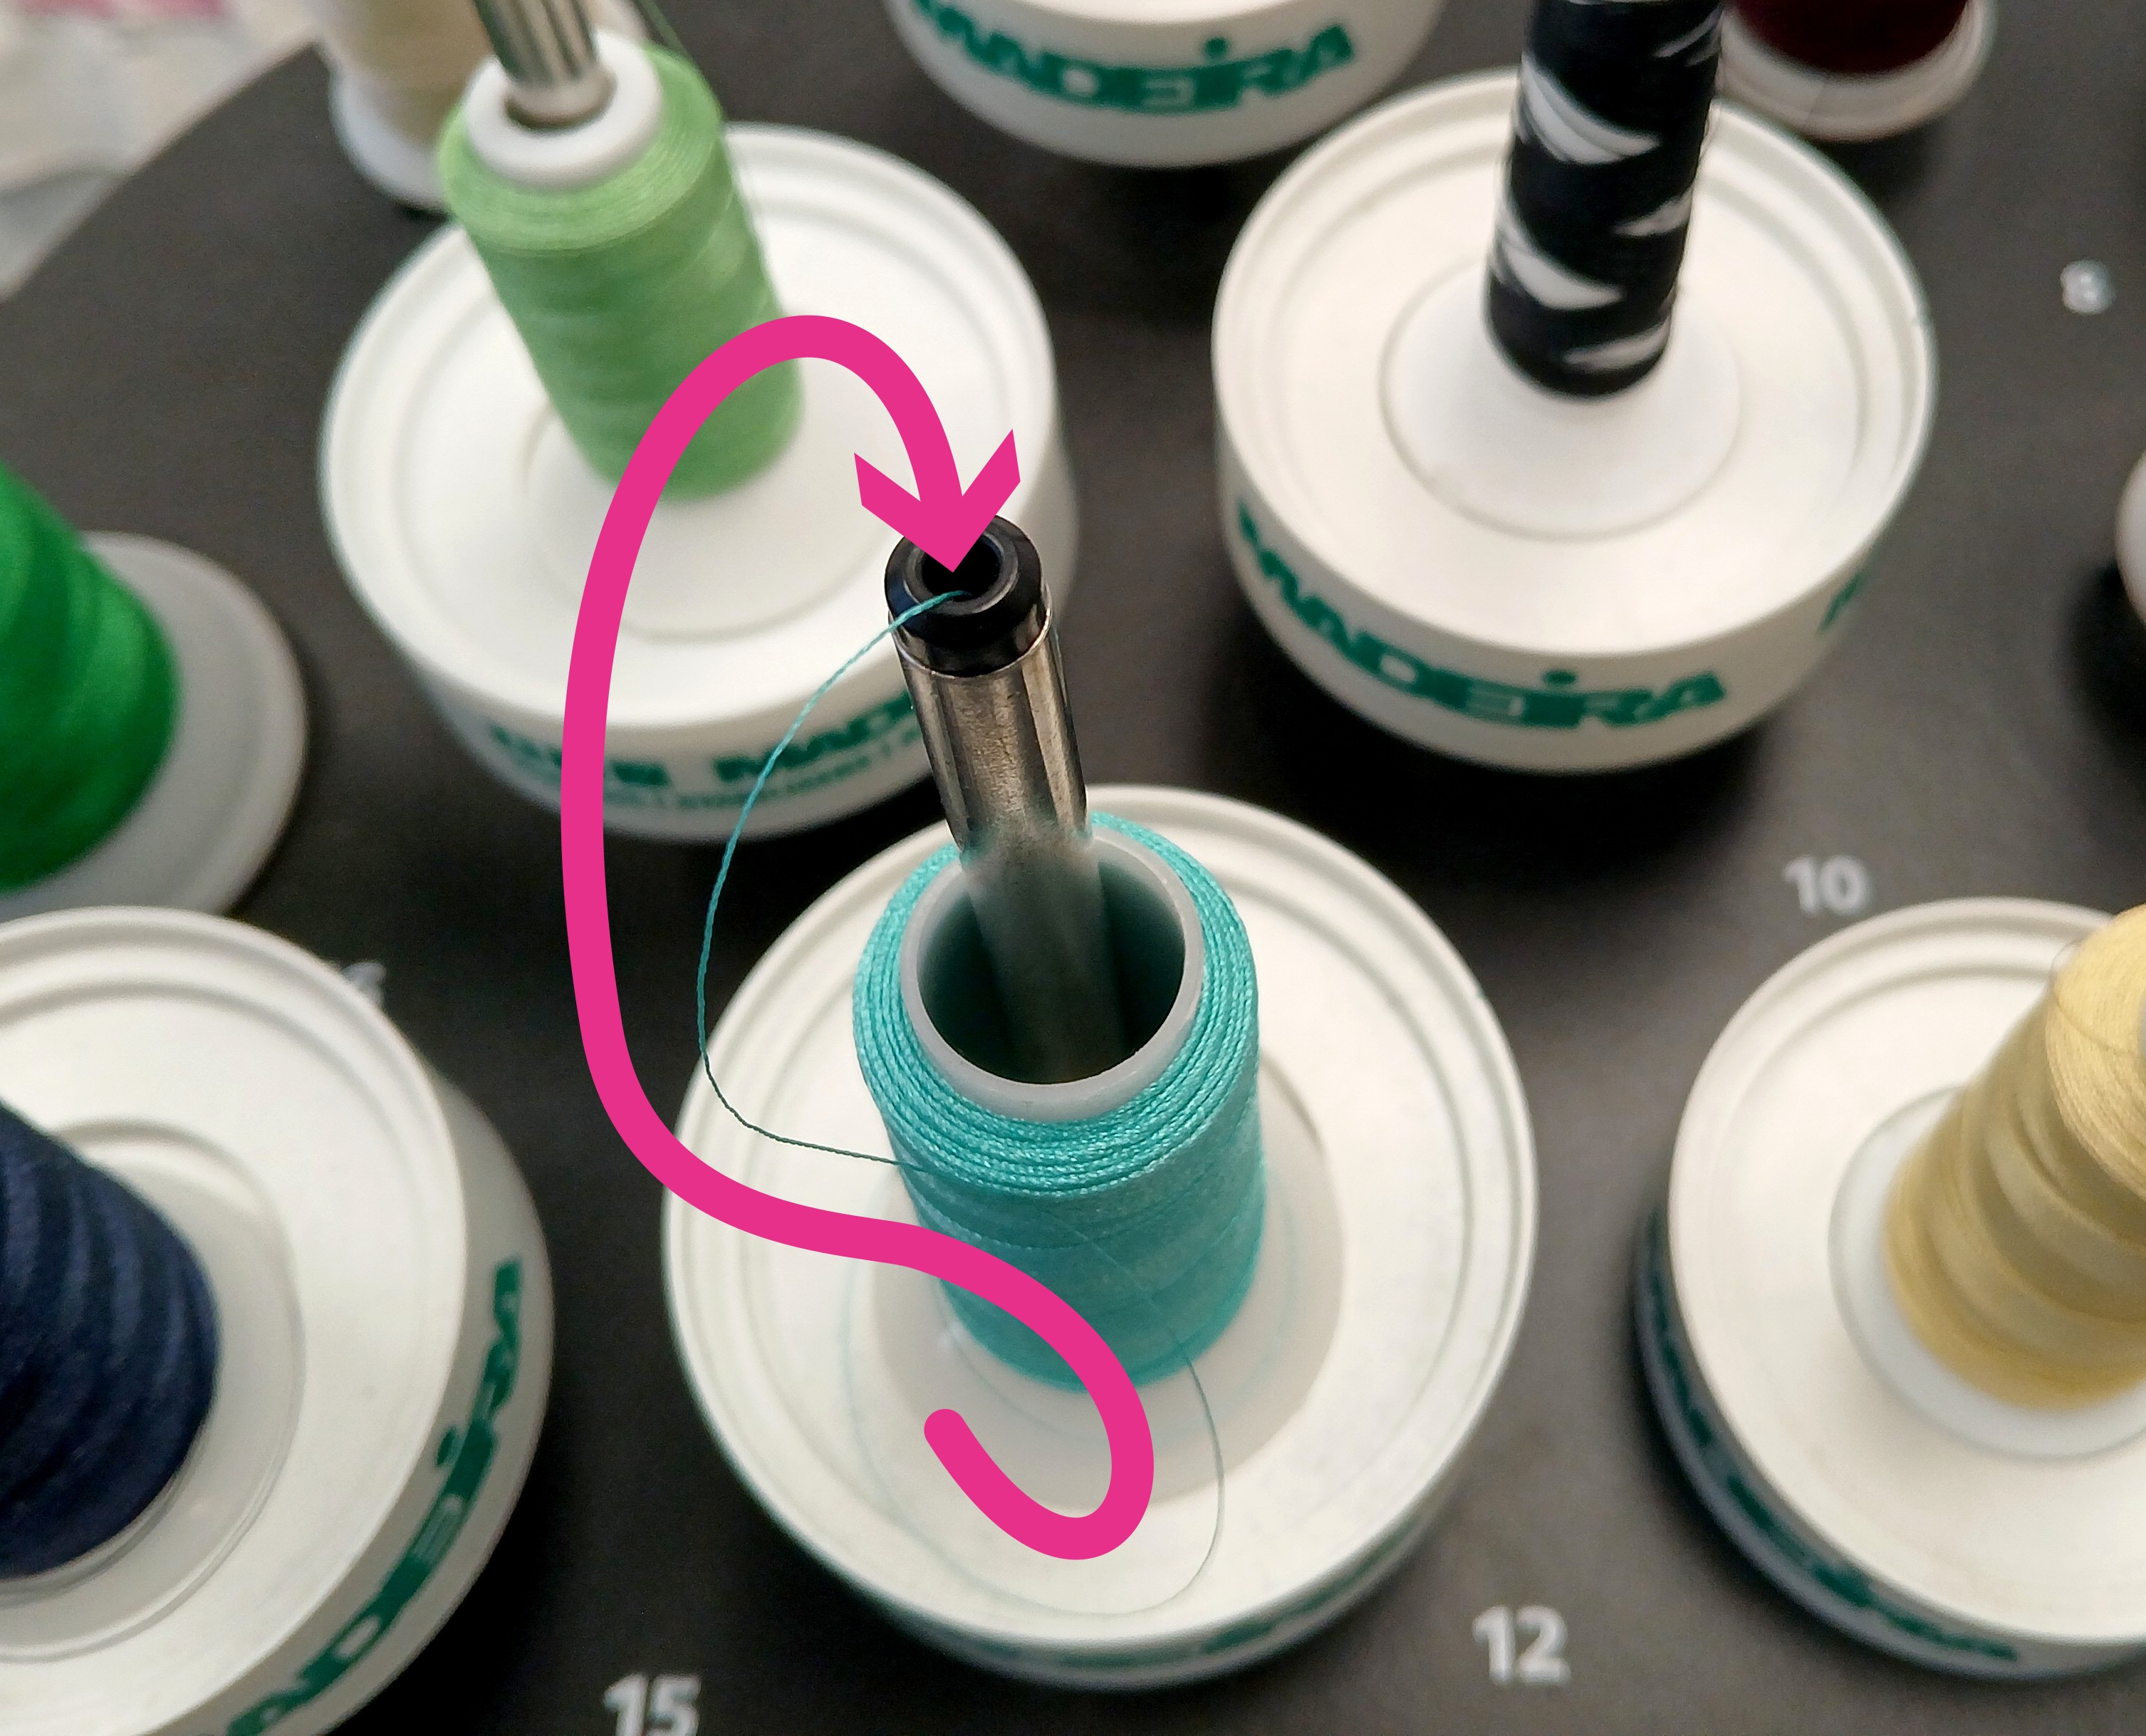
- Insert the tip of the can of compressed air into the hole at the center of the holder. Spray air until the thread appears above the pressure wheel associated with that thread holder.
- Lift the wheel to get the thread underneath it.
- Get the thread into the V behind the wheel, then lay the thread in the groove underneath it. Leave the wheel up until you are done.
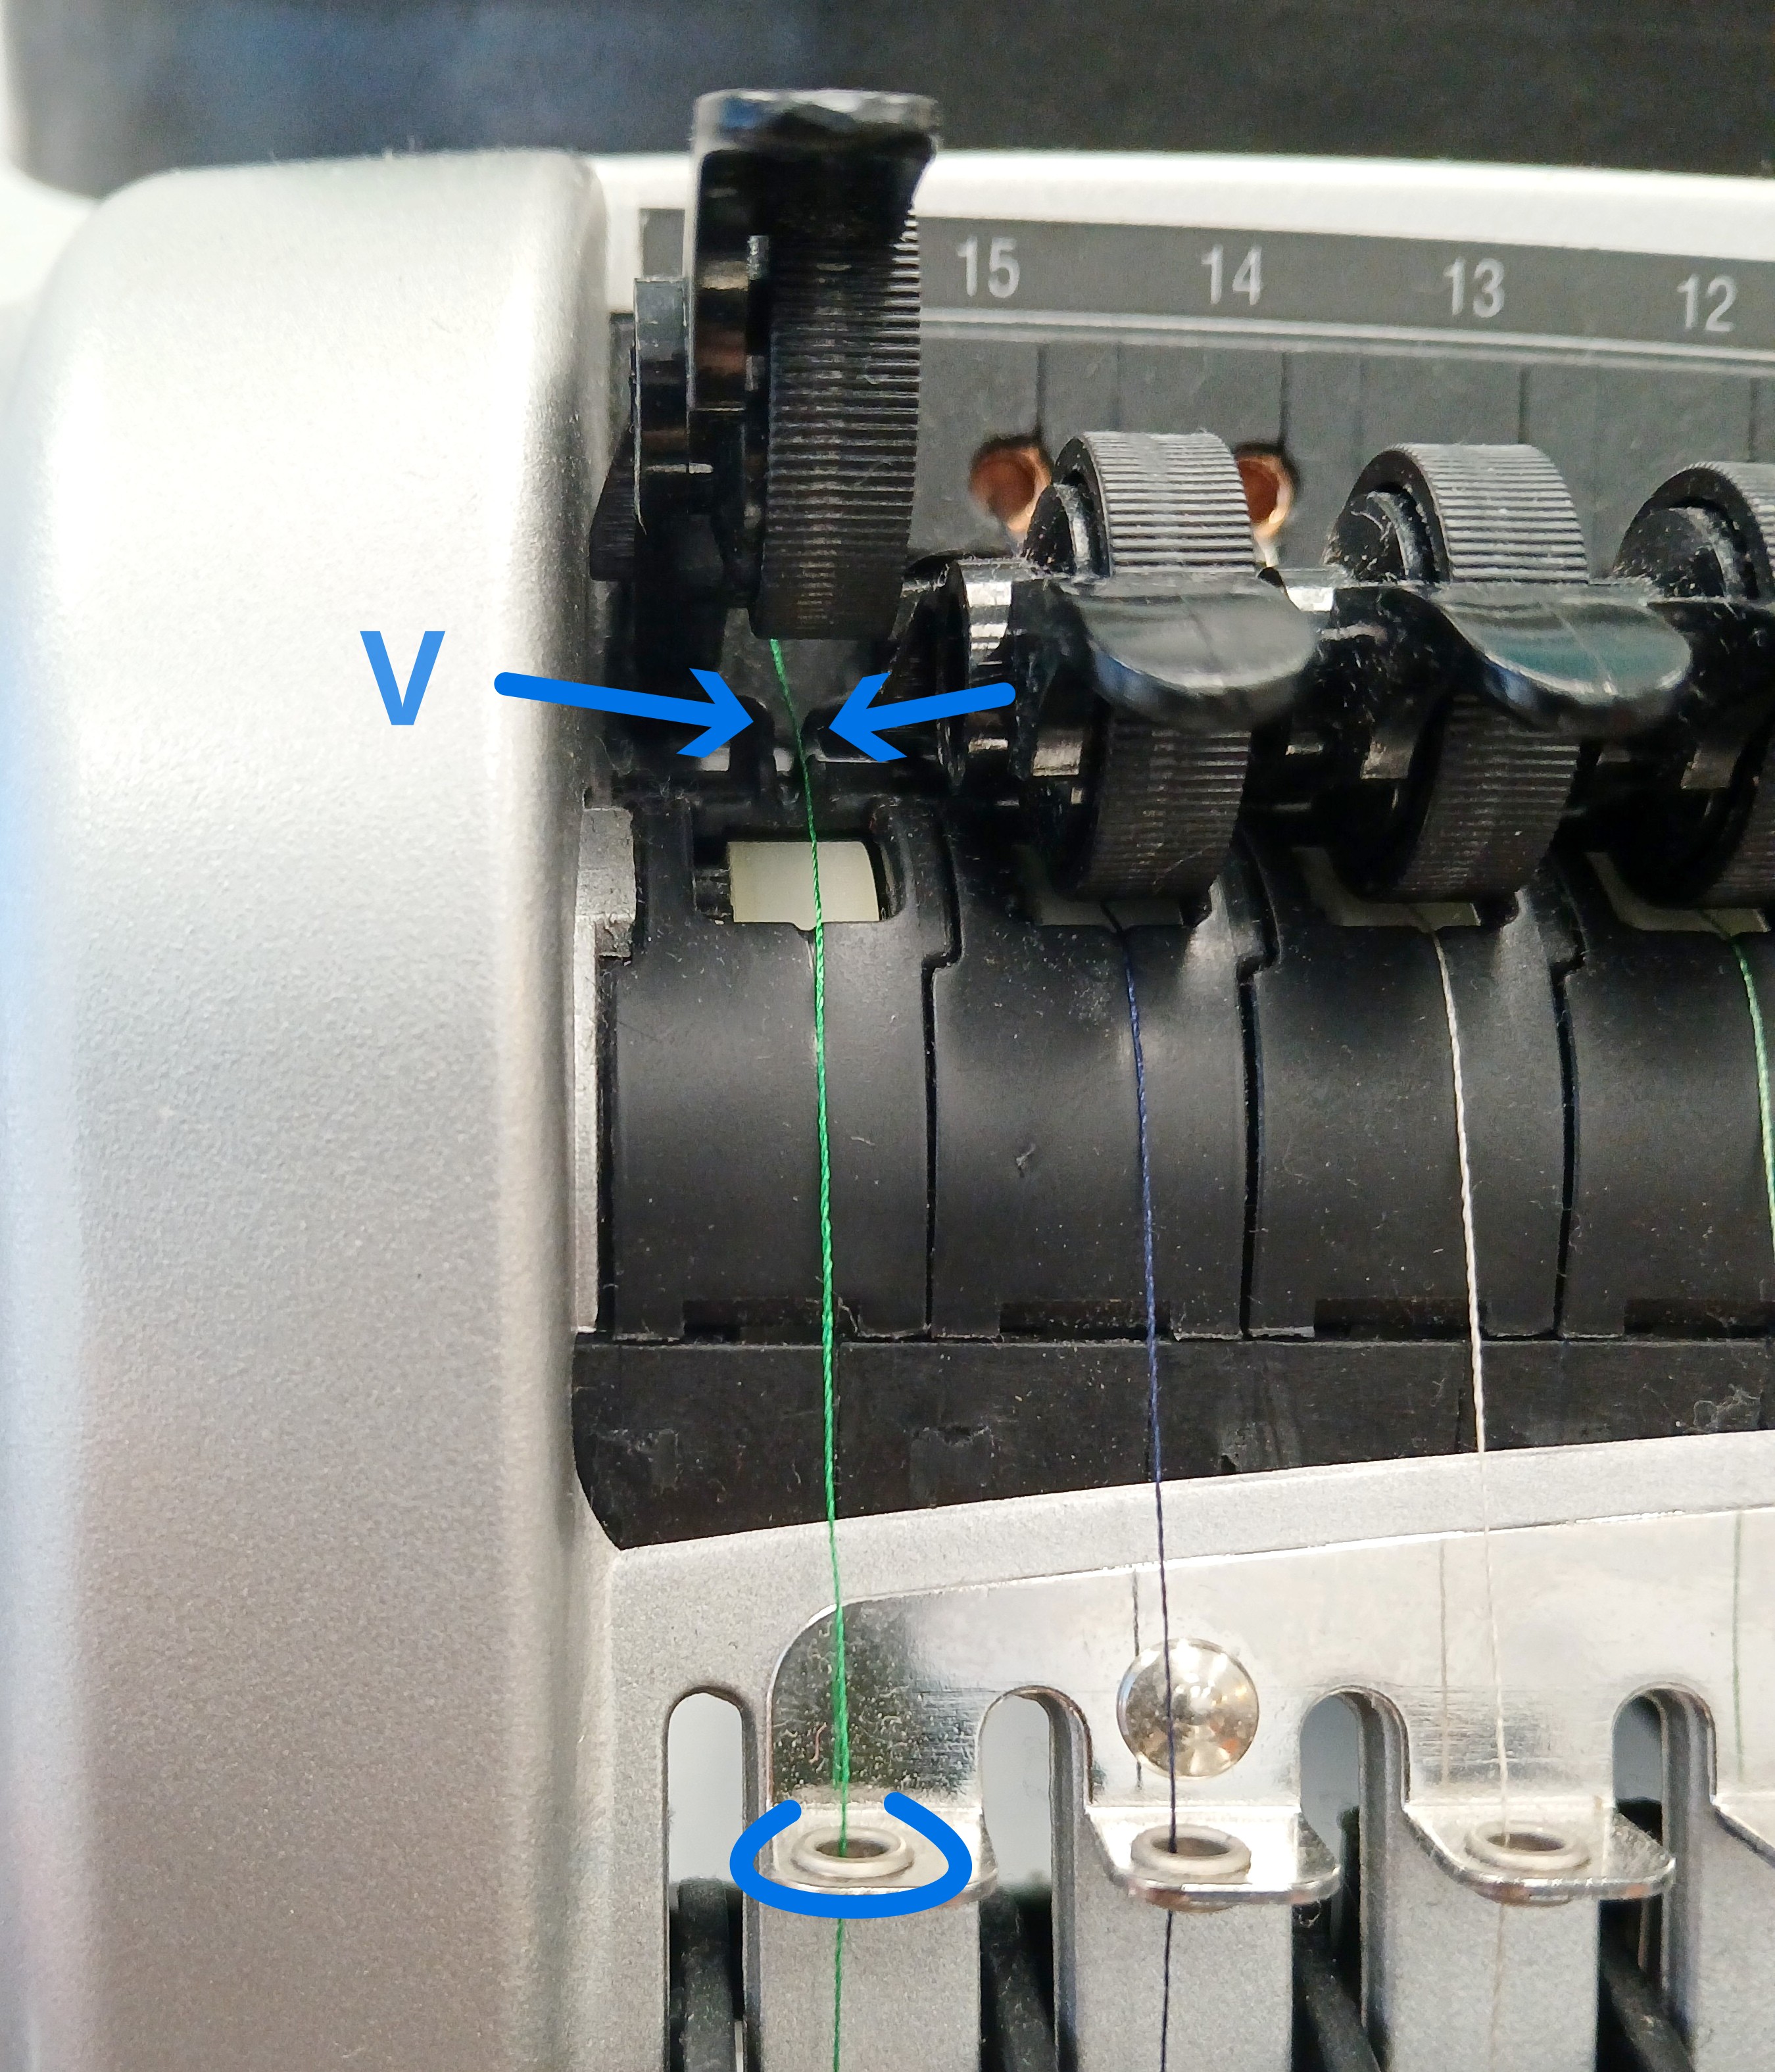
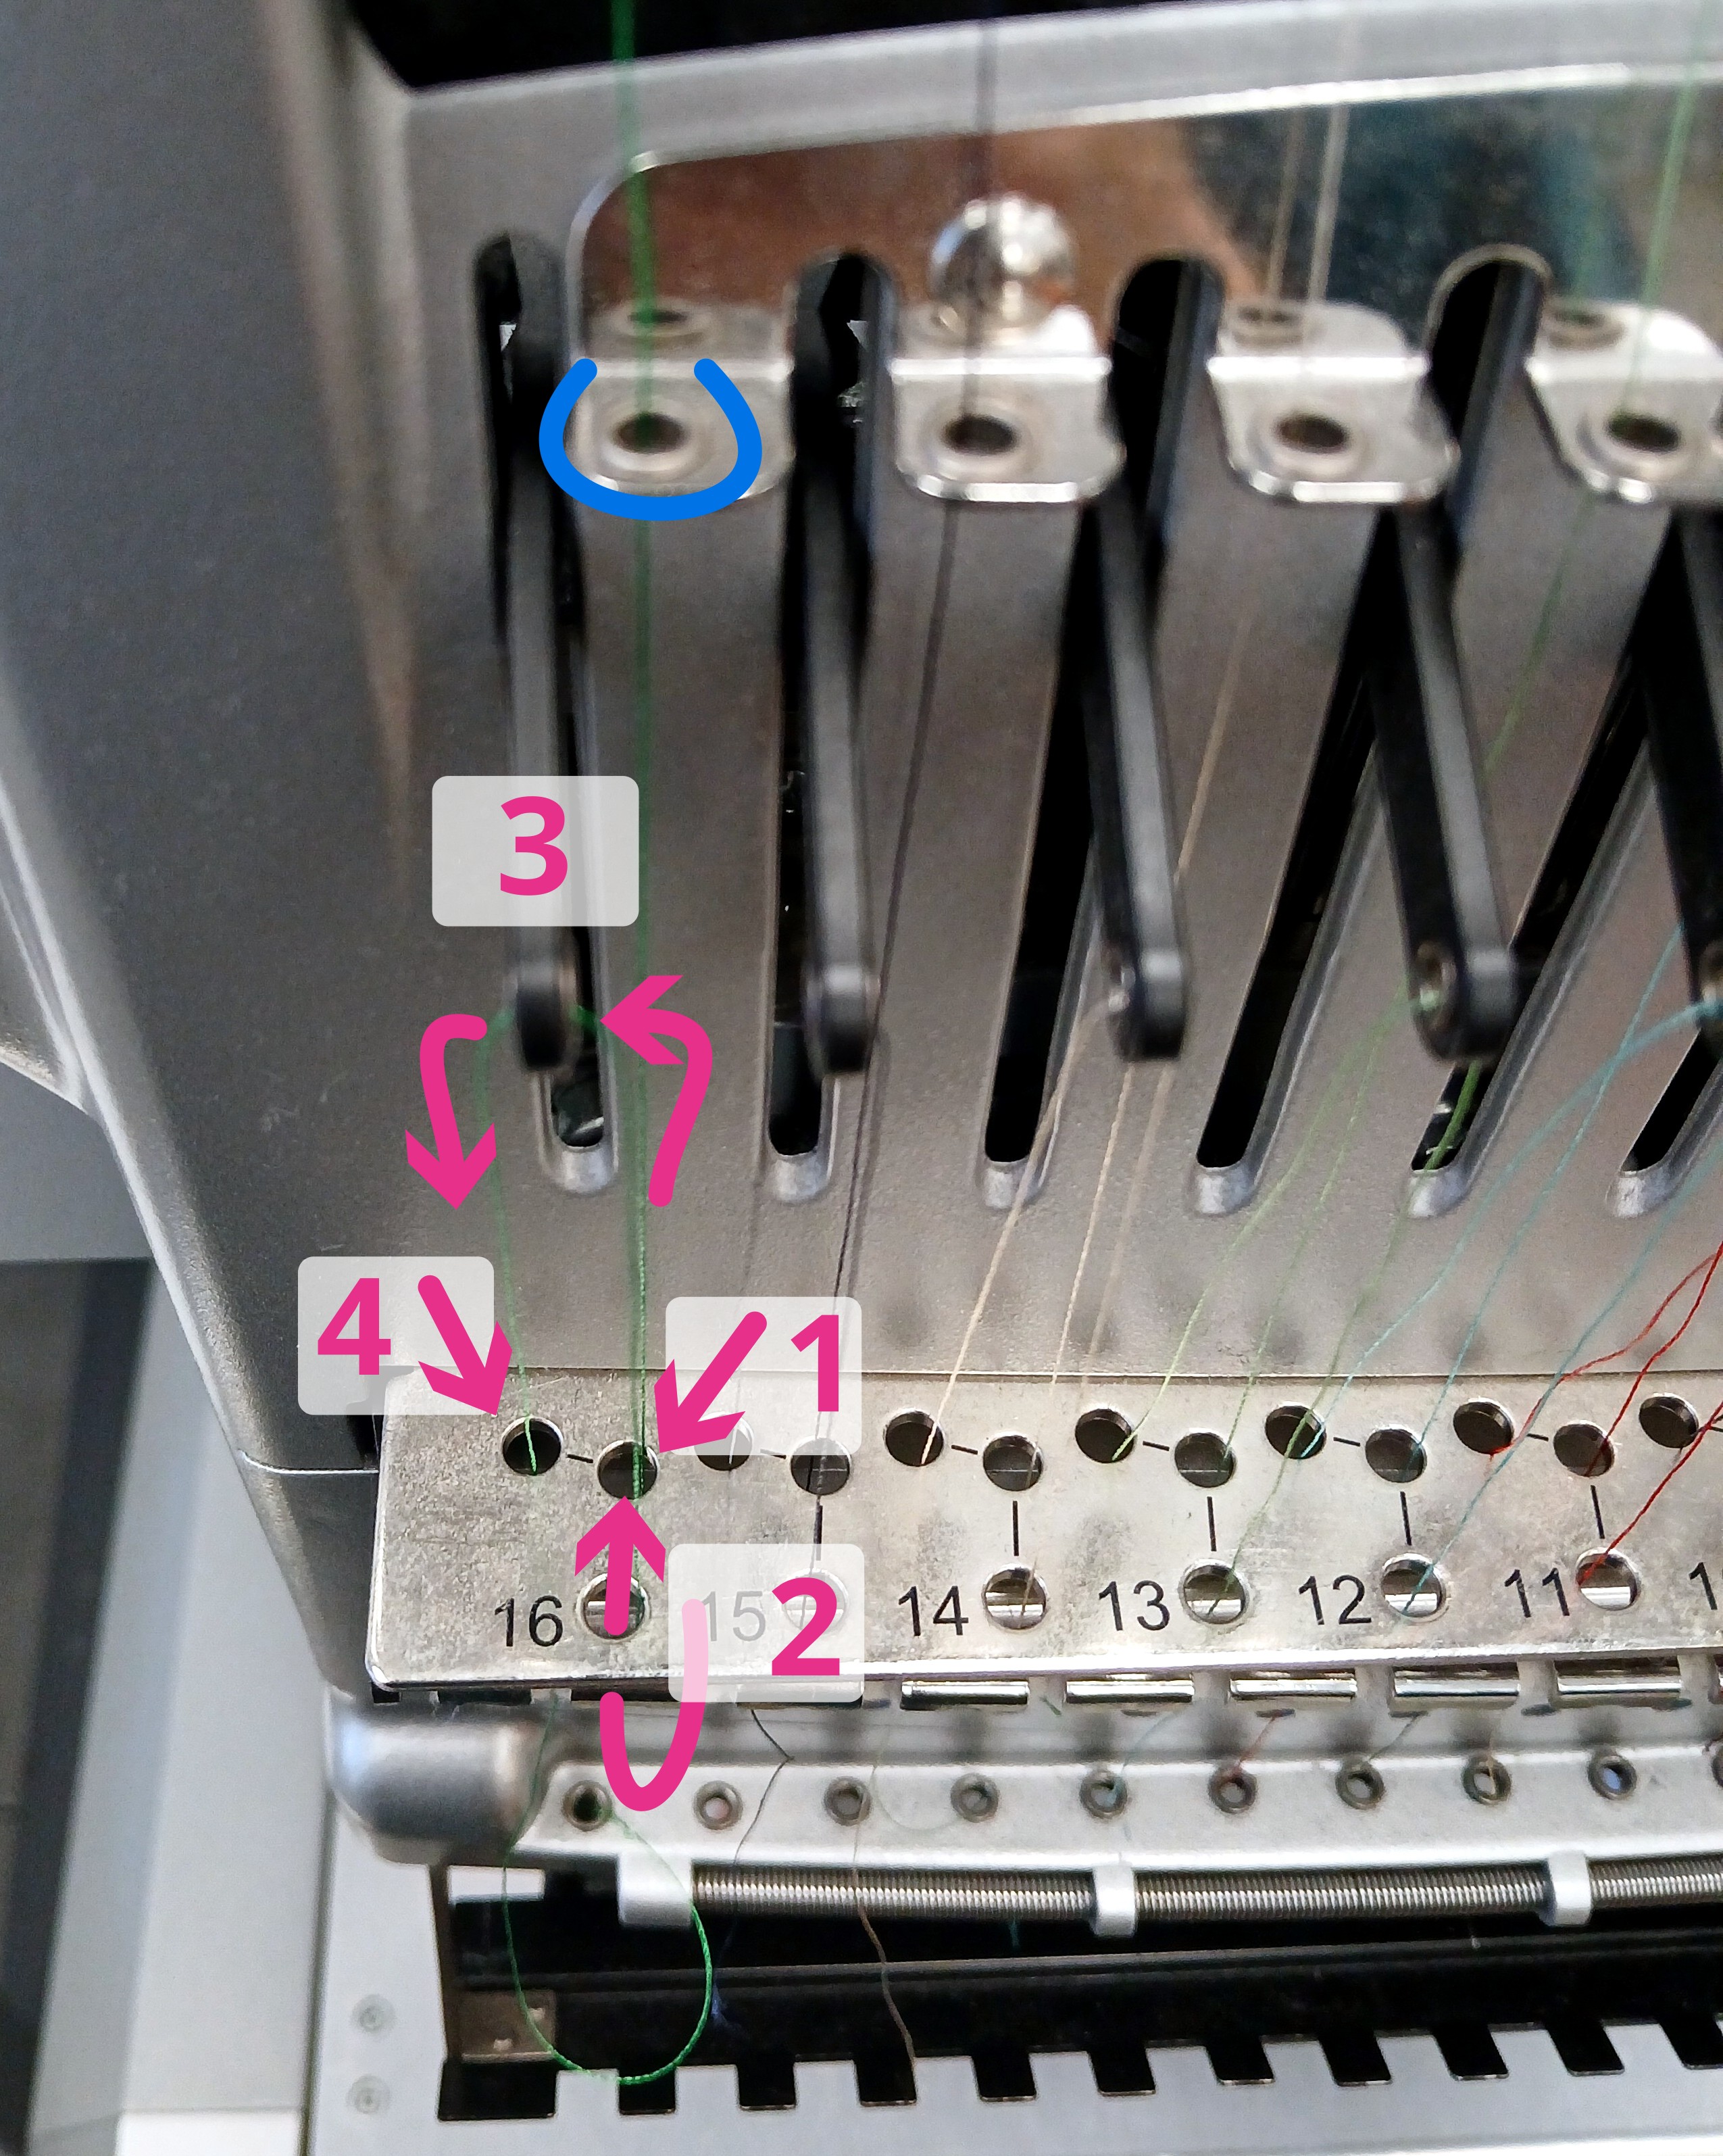
- Bring the thread down through the guide directly below the tension wheel.
- There are three holes in the flat bar below that. Bring the thread down through the midle hole. Then underneath the round bar and back up through hole 2, at the front. Keeping bringing the thread up through the eye in the thread take up lever (marked 3). Then bring the thread down again through the remaining hole in the flat bar (4).
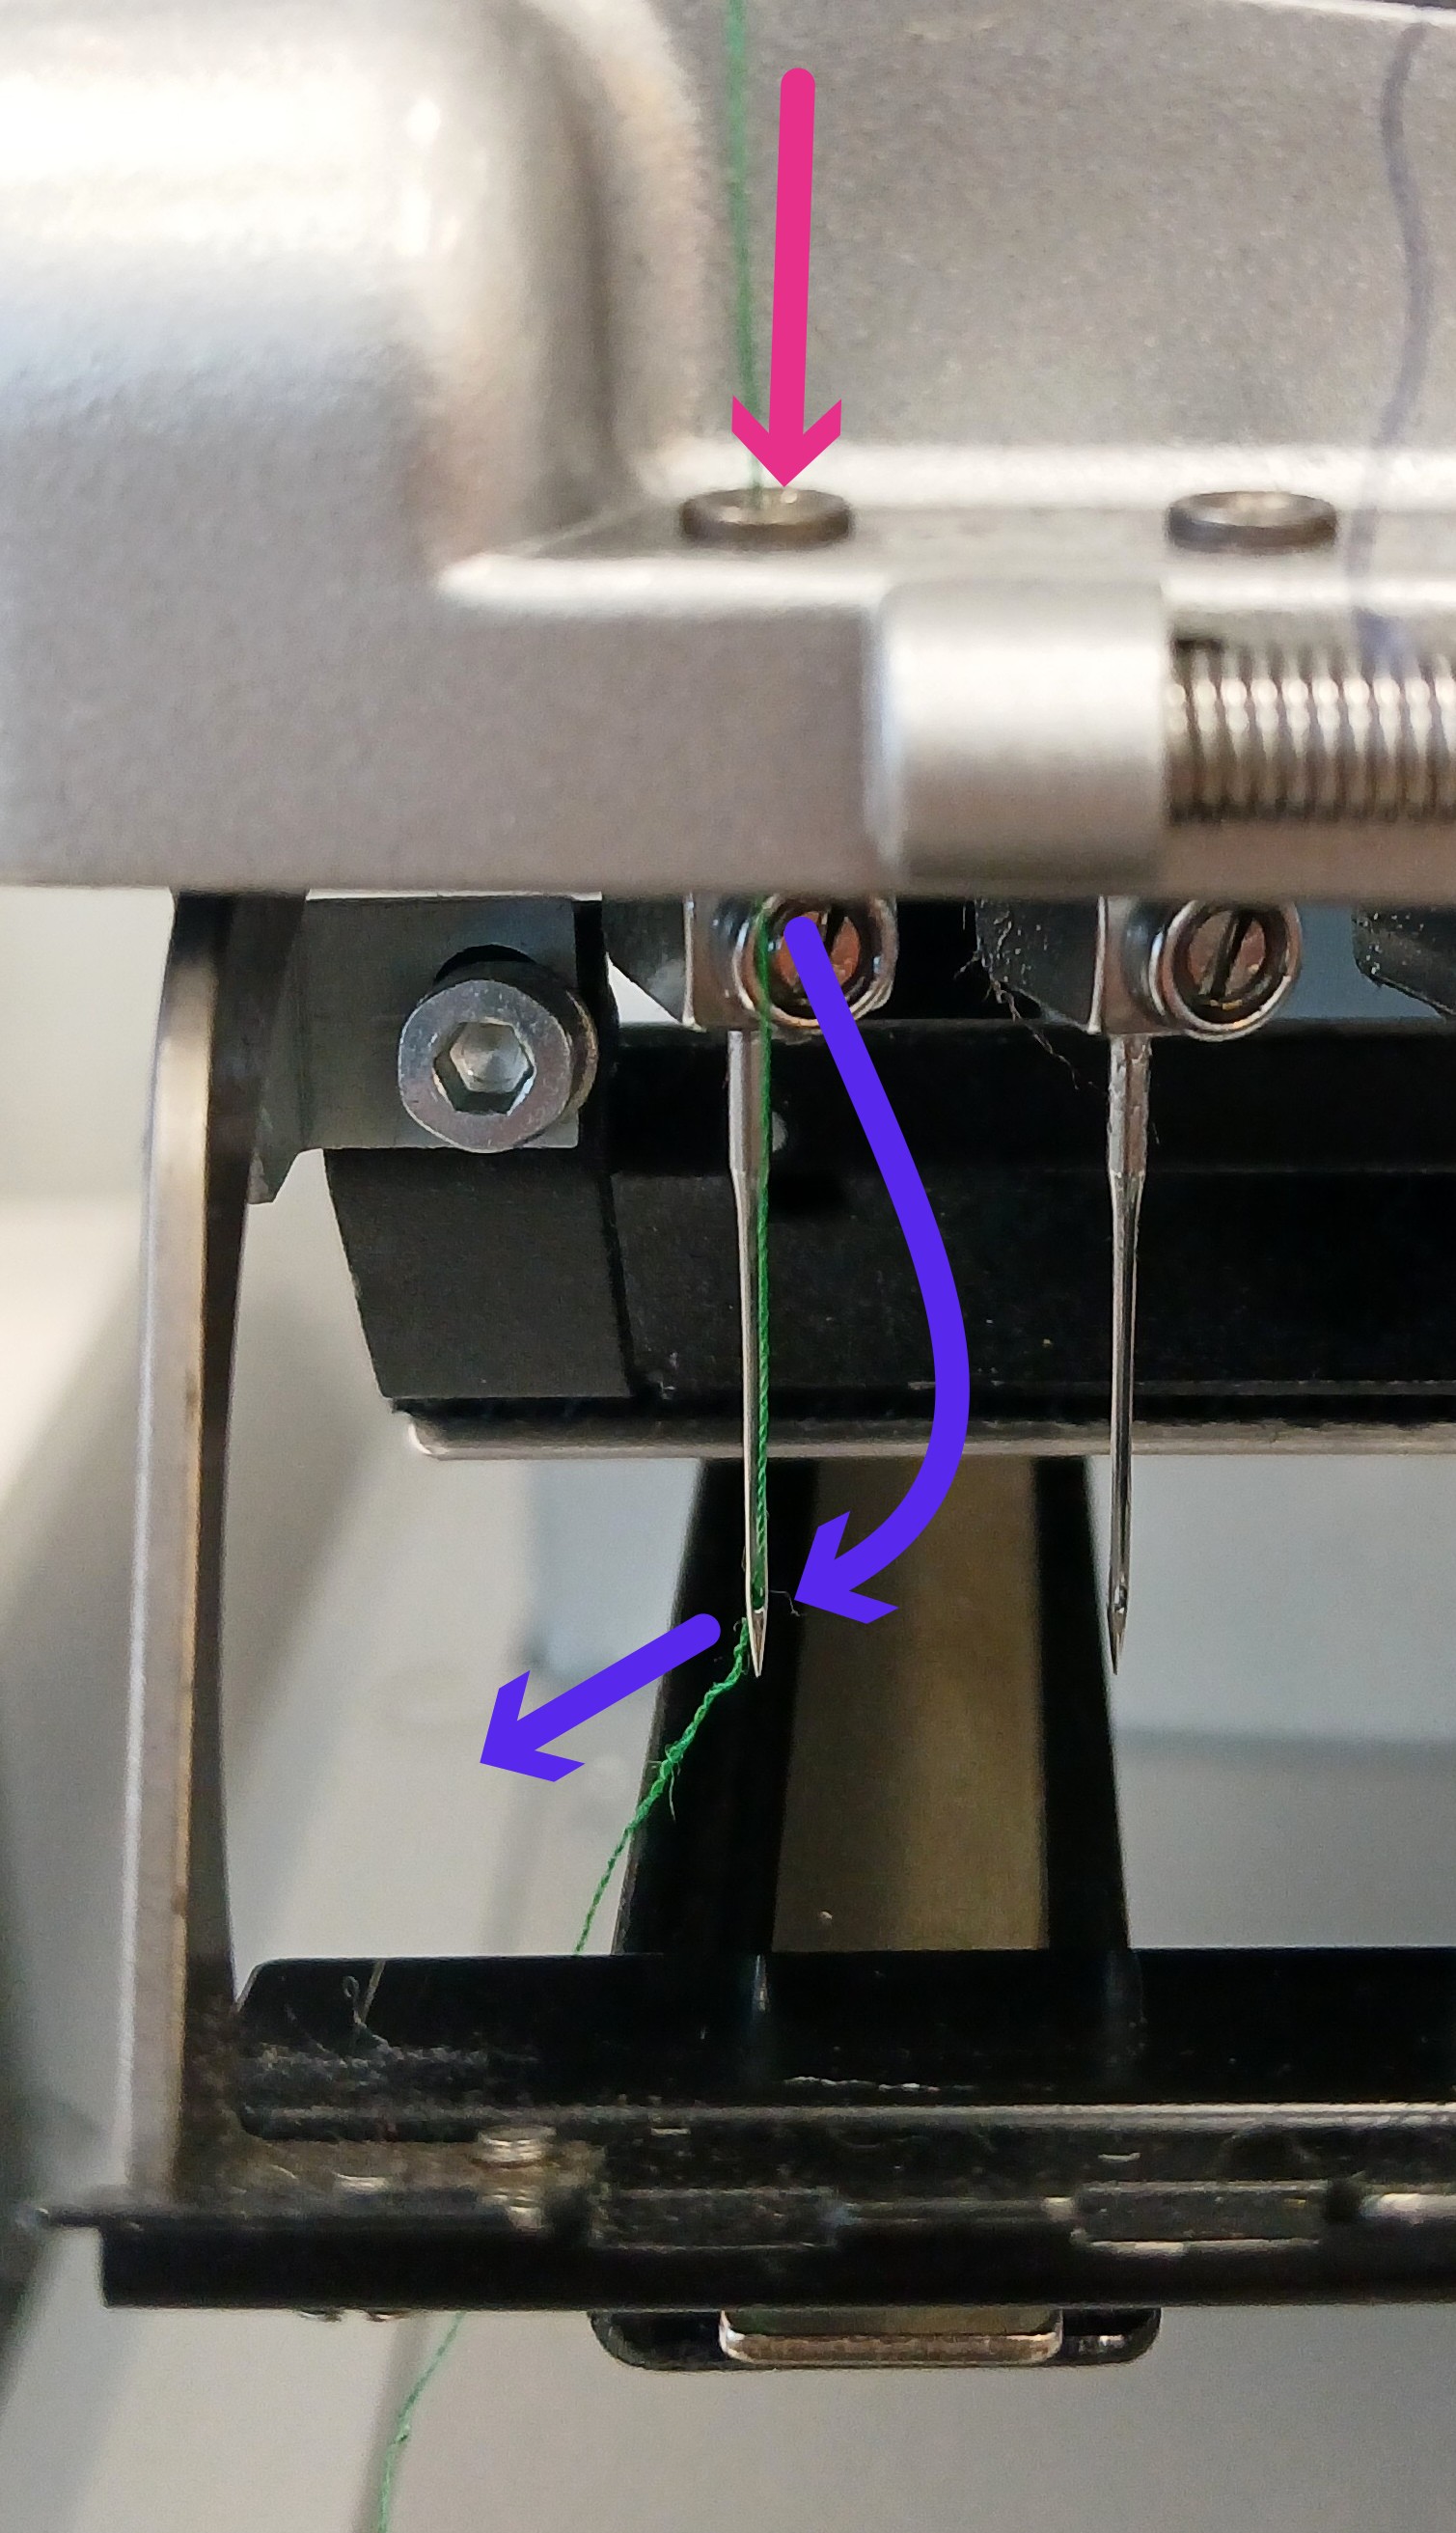
- Press the thread into the felt guide, then thread it down through the hole above the needle.
- Thread the needle front to back. Use a needle threader or thread wax on the end of the thread for convenience.
- Lower the pressure wheel back into place.
- Toggle the thread grabber to press the thread into the holder.
- Trim excess thread below the grabber.