¶ Introduction
This guide goes over how to change needles in the embroidery machine.
Needle type: DBxK5
Default needle size, supplied by Open Works: 75/11 sharp or ball point
You can bring your own needles, but they have to be type DBxK5. If you use your own needles, replace them with the 75/11 needles before you go.
¶ Digital Embroidery Machine Needle Changes
Tools: flathead screwdriver (There should be one in the utensil holder at the Embroidery machine work stations.)
- Unthread the eye of the needle you are changing.
- Insert the screwdriver into the screwhead above the needle. It is angled to the right. Turn the screw counter-clockwise (top to the left) to loosen.
- Pull the needle from its housing. If the needle is damaged, discard it in the sharps box on the tool cabinet. If you plan to reinsert the needle when you are done working, stick it into a scrap piece of fabric or a pin cushion as not to lose it.
- When inserting the needle, start with grooved face pointed toward you and the scarf of the needle toward the body of the machine. Turn the needle slightly to the right (0-5°). You should be able to use the neighboring needles as a reference.
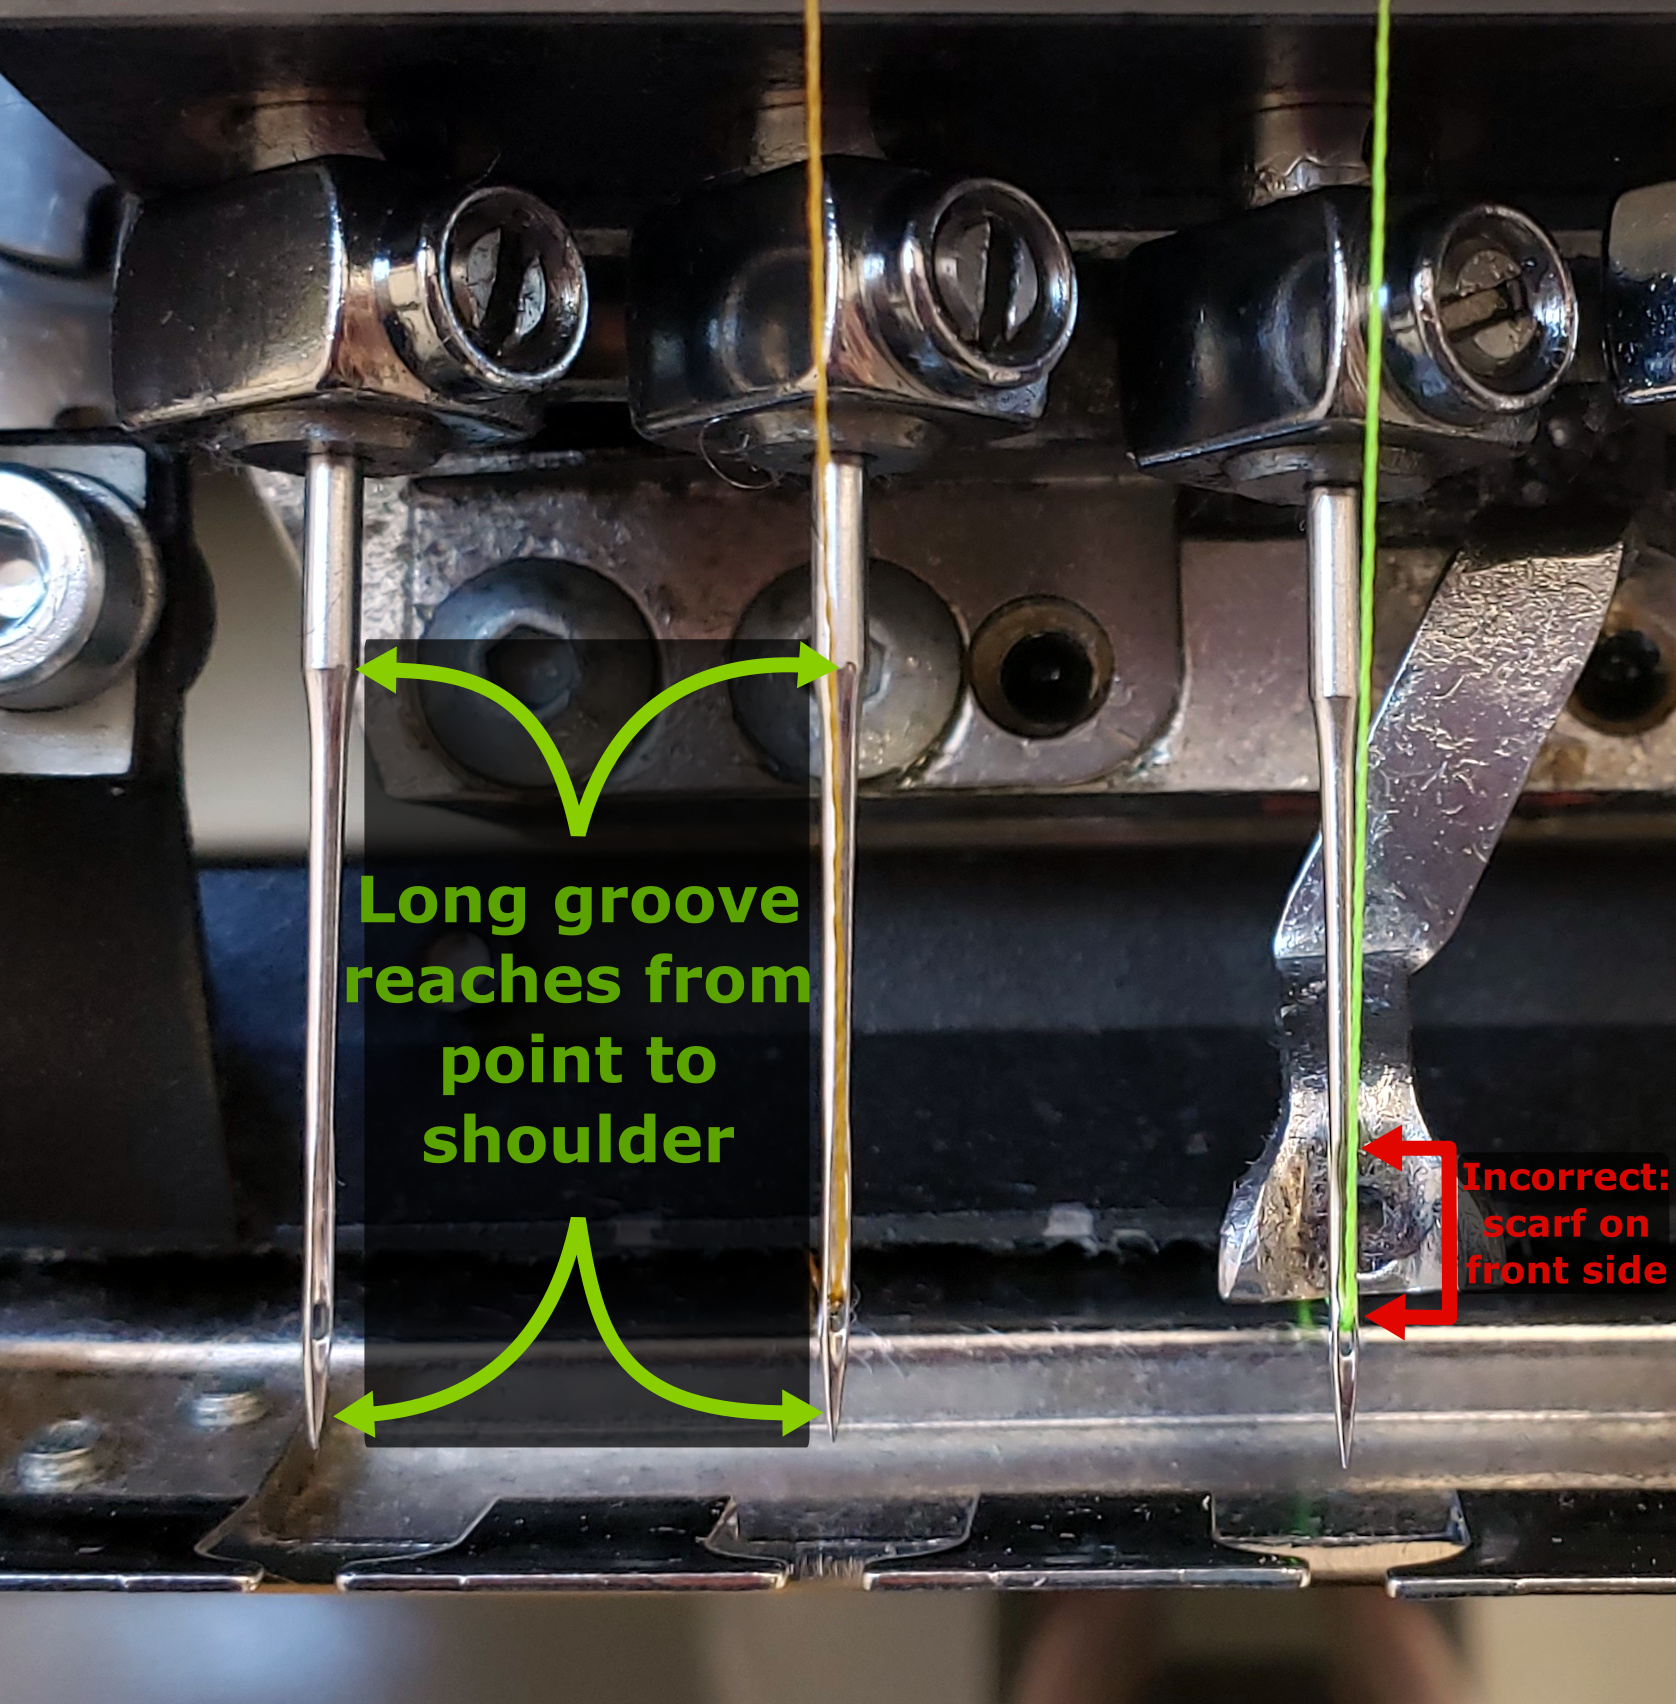
Tip: If you can't see the groove, feel for it with a fingernail. It will catch your nail in a way that the scarf doesn't.
Tip: You can use an alignment magnet to confirm that the needle is oriented correctly. The magnet is found in the upper drawer of the tool chest and will stick to the needle. Make sure it settles on the grooved side of the needle and points 0-5° to the right. If your body is centered on the needle, this will be approximately midway between your center and your right shoulder.
- Check that the needle is fully inserted. It should be level with the other needles. The active needle will be dropped down lower, so if that is the one you are changing, don't be concerned.
- Use the flathead screwdriver to tighten the position of the needle.
- Rethread the needle from front to back.
If you use your own needles, reinsert the 75/11 needles when you are finished.