¶ Multi-Color Printing/AMS Lite Usage
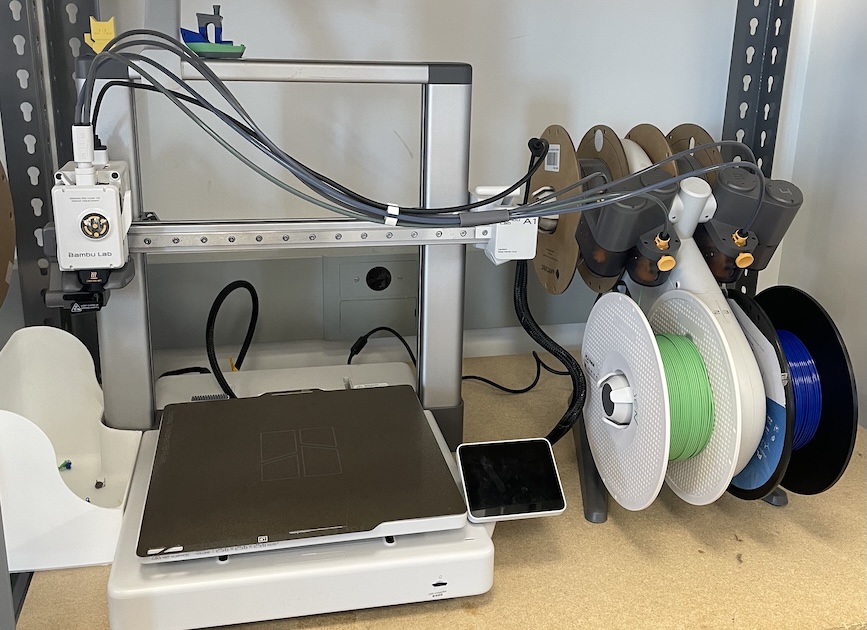
Two of the reservable 3D Printers come equipped with Bambu's Automated Material System (AMS) Lite module. This AMS Lite enables automated multi-color 3D printing.
- Note: Multi-Color printing is possible without use of the AMS Lite, but this module makes color changes programmable and automatic. The benefit of this system is that it relieves the operator of manually programming and completing filament changes on a conventional one spool 3D printer.
¶ What is Multi-Color Printing?
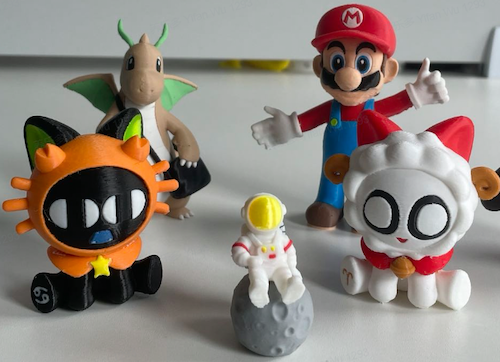
The process of printing a 3D model in two or more colors, specifying different faces, facets, layer ranges, etc. to be printed in different colors.
Note: This is multi-color printing not a multi-material printing process! Only prints using the same type of material will work (i.e. all PLA in different colors).
¶ AMS usage Policies
- AMS Lites should only be reserved for multi-color prints
- Fiber-filled filaments are prohibited on all A1s (Carbon Fiber, Wood, Glitter, etc.)
- Members are charged for weight of print (including supports) and the purged material between color changes at $.03/gram
¶ Loading Filament into the AMS
See the "Video Walkthroughs" section for a video of how to load the AMS Lite module
Step-by-Step Process:
- Load the spools you’ll use onto the open posts on the AMS (one spool per post).
- The open end of the filament spool should be pointing to the center of the AMS.
- Spools on the higher slots of the AMS will look like “d” and spools on the lower slots will look like “b”
- Press the yellow button on the gray block and hold is as you load the filament into the PTFE hole. Once in enough the motor will kick in and continue to feed the filament. You can depress the yellow button and take your hands off the filament.
- Make note of which slot is associated with each post.
- The gray PTFE tube collector blocks have illuminated arrows pointing up and down with the associated number for each AMS slot (1-4).
¶ Defining Filament Colors and Type in AMS
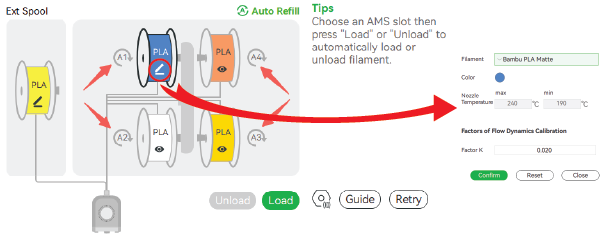
- You must define the filaments being used in each AMS slot (1-4) directly on the printer or via the slicer before printing. Failure to do so may result in damage to the printer.
- When using Bambu filament (highly recommended): the AMS Lite will automatically read the RFID tag in the spool(s) and define the color and material type.
- Bambu filament spools will have an eye icon over the spool icons in the A1 display.
- When using Non-Bambu filament: once you load the filament into an AMS slot you’ll be able to set the color and type either on the printer or in the slicer.
- This filament icon will appear with a pencil icon on it. Clicking on this icon will open the edit screen where you can define filament type and color.
- Nozzle temp is automatically set via the type of filament. Do not adjust the factors of flow dynamics calibration.
¶ Multi-Color Filament Setup in Orca
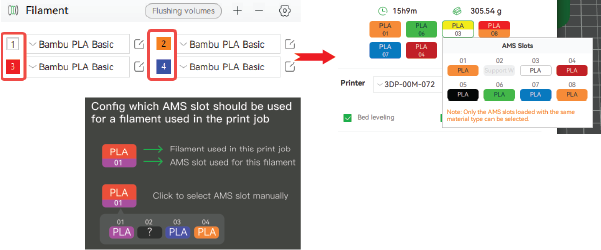
- Add multiple filaments in the “Filament” menu using the “+” sign.
- Note: The number to the left of each Filament type added refers to the order each filament was added to the slicer not the associated AMS slot. You’ll need to do that in the device tab of the slicer.
- You can change the color appearance of the filament in the slicer by clicking on the color square to the left of the filament name and using the color wheel or eyedropper tool.
- Note: the color appearance of filament does not need to match your actual filament color. However, getting the color close can help auto-map similar colors in your slicer settings to the defined colors in the AMS.
- Once you’ve sliced your model and clicked the “print plate" button, you’ll use the dialogue box to assign the AMS Slots with your loaded filaments to the filament colors you’ve added in the slicer.
¶ Applying Colors to Your Model
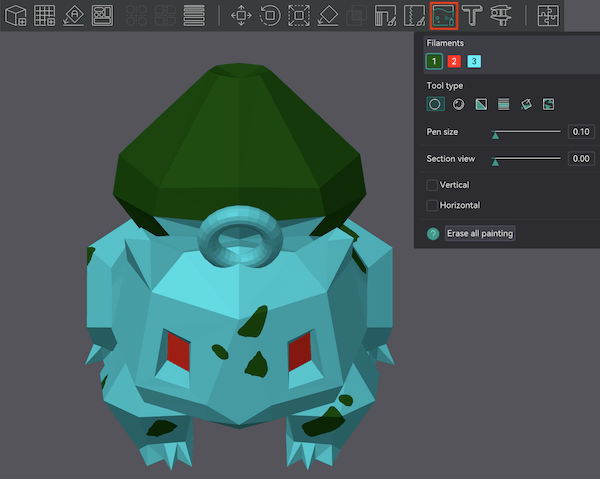
- In the “Prepare” view you can access the Color Painting tool only once you have at least two filaments defined in the slicer settings.
- With the tool selected you’ll be able to select through which of your defined filaments to paint your model with, which tool to apply that filament color and various toggles to modify your application tool.
- Various tools can be used to target specific geometries or parts of your model for color application.
¶ Multi-Color Printing Settings
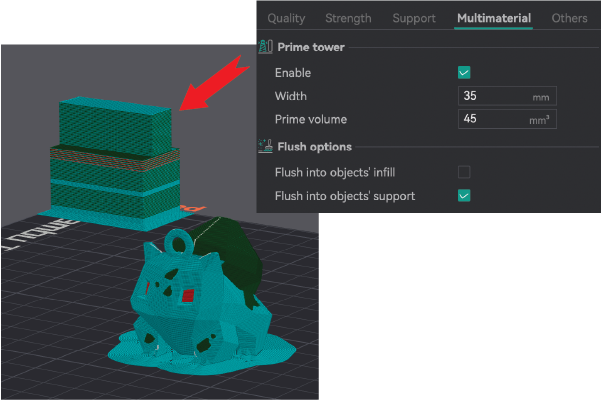
- The “Multimaterial” tab in the Process menu is where you can adjust settings specific to multi-color prints, specifically around flushing filament between color changes.
- Flush Options: “flushing” is the action that the printer must take each time a new filament is switched to. It ensures there is no color bleed. You can control where the transition filament is flushed into (object infill and/or supports)
- Prime Tower: Separate body on the print plate that allows for filament to purge outside of the model. You can control the dimensions of the purge tower as well (width, volume, and brim)
¶ Other Uses for AMS
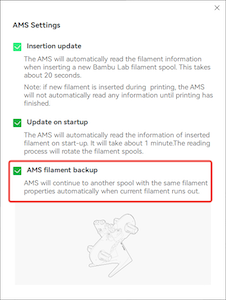
For large prints where you’ll exhaust the supply of 1 spool, the AMS can keep printing with a spool of the same make, color, type, and nozzle temp settings. To use this you’ll need to have two or more of the same type of filament, have defined them as the same in the AMS, and have checked the “AMS filament backup” box.
¶ Troubleshooting
All troubleshooting pages are only accessible to Staff. All troubleshooting is only to be done by Staff.
¶ References
Product Page
Bambu manual
Bambu AMS Lite Wiki
Bambu Multi-Color Printing Wiki
¶ Video Walkthroughs
- Loading Filament into the AMS Lite Module (Youtube | Jonathan Fox)
¶ Resupply Form
Click here to report any consumables needing to be replenished.
¶ Glossary
%%TERM
%%definition/description of term