¶ Description
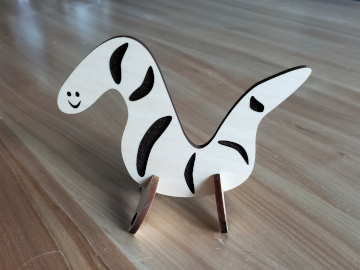
In this project you will design a little creature that stands up on its own. You will create a body and legs that fit together using slots. The slots will be sized based on the material thickness and laser kerf.
¶ Materials and Tools
- Proofgrade medium plywood or acrylic
- Inkscape or other vector art software
- Glowforge
- Ruler or calipers
¶ Prior Knowledge
Going into this project, you’re expected to know how to add shapes and text to the workspace and manipulate them using the basic tools provided. You’ll also need to know how to change process types and operation order. If you need more help with those steps or want a refresher, review Project 1 or check out the Quick Guides.
¶ Prepare the design
There are two main parts of this design: the body and the legs. They will be cut from one piece of material and they will attach to each other using slots that fit together.
Start Inkscape and open a new document. Check out the guide Inkscape Basics for a brief how to use Inkscape and the tools you’ll need to do this project!
Tip: Inkscape has very helpful tooltips for every tool. Hover your mouse over an icon to see what it does. It will also display keyboard control options at the center bottom of the window.
Tip: save your file often. Inkscape does not automatically save your work for you.
¶ Draw the body of your critter
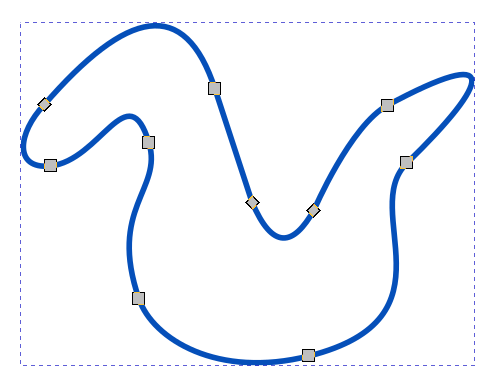
Using the Bezier tool, draw the body of your critter. Close the path by clicking on the first node of the path. There is no need to draw it well. Do not include the legs.

Using the Edit Paths by Nodes tool, smooth it out to the final shape of the critter. You may need to add or delete nodes, and use the node type tools in the top toolbar.


¶ Draw the Legs
Now draw the legs for your critter using the same techniques as for the body. If the front and back legs are different, draw multiple sets of legs.
At this point you should check to make sure that the dimensions of the body and legs are appropriate and do any resizing needed now.
¶ Draw the Assembly Slots
The slots must fit together snugly in order for the critter to stand up and be sturdy.
Medium Proofgrade material is nominally 1/8th inch (0.125”) thick. If calipers are available, measure multiple places on your material. Remember that there’s a protective film–either peel the edges of the film back before measuring or measure the film and subtract 2x that from the thickness that you measure. Measure in multiple locations and take the average.
Laser cutting is a subtractive process and has kerf. Kerf is the material that is lost to the cutting–typically sawdust, here it is burned away as smoke and filtered out of the air. Laser kerf is small but cannot be ignored, especially when producing friction fit parts. If calipers are available, do a kerf test and measure the kerf. If calipers are not available, estimate the kerf as 0.01” inch.
Tip: a higher power laser setting produces a wider kerf than a lower power setting.
To make the slots fit snugly, the material lost to kerf must be accounted for. For example, if the material is 1/8th inch thick, the slot must be at most 1/8th inch wide after it is cut. So, make the slot 1/8th inch wide, minus two times the kerf.
Tip: after the laser cutting is done, it is much easier to make a too-small hole larger than to make a too-large hole smaller. Err on the side of too small because a craft knife can be used to trim a too-small hole to fit.
In Inkscape, use the rectangle shape tool to draw a rectangle that is the width you just determined above and ¼ inch deep. Draw the rectangle to any size, then use the toolbar at the top to precisely set the width, height, and amount of corner rounding.

Use the Select and Transform Objects tool to select the rectangle you just created. The selection box will have arrows pointing outwards; if it has curved arrows you’re in rotation mode. Click again to get back to move mode.
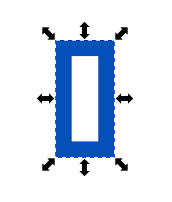
Use Ctrl+C and Ctrl+V to make a bunch of copies of it.
Move a rectangle to where the slot in the legs should go. Select the legs and the rectangle.
Go to the top toolbar and open the Path menu. Select Difference. This will create the slot.
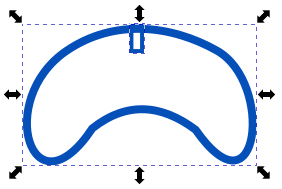
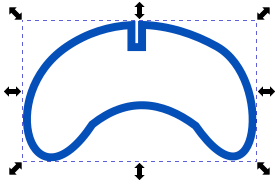
Tip: after this point resizing the design in Inkscape or app.glowforge.com will also resize the slots. This will make them not fit. If you make the design smaller, you can repeat the above process with correctly sized boxes to recreate the slots. If you make the design larger, you’ll have to manually edit the nodes to remove the slots, then repeat the process to add the slots.
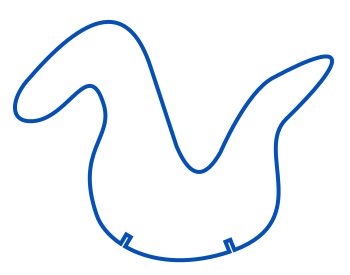
Now do the same in the body for as many pairs of legs as the critter has.
If you want to, you can also make spines, ears, etc in this manner.

¶ Decorate your critter
If you want, you can add decorations, markings, etc to your critter. These decorations have to be created using a shape that can be filled–so not a Bezier curve or another type of line. Try adding a shape, converting the shape to a path (Path menu), and then editing the nodes of that path.
Tip: you can only engrave on one side.
¶ Before you head out (to app.glowforge.com)
Group your legs and any markings together. Do the same for the body.
Save your design as an svg.
Open app.glowforge.com and choose “Create a new design” → “Upload a file” → find and upload your saved file.
¶ Load and Identify Material
Make sure that the Glowforge is connected to the computer by checking the upper right corner of app.glowforge.com. It will say Ready next to the Print button if the Glowforge is ready to go.
Place a piece of Proofgrade material on the bed of the Glowforge with the QR code facing upwards. The QR code tells the Glowforge what the material is. Close the lid and let the Glowforge scan the QR code. If the Glowforge does not successfully identify the material, select it from the library. In the upper left of app.glowforge.com is a button that says something like “Unknown Material”. Click that to get to the library.
¶ Set Process Types and the Order of Operations
The process type, or operation type, is what the machine does to the workpiece as it moves. If you were drawing a line, the process type would be if you were using a pen or pencil or marker or some other tool to create the line.
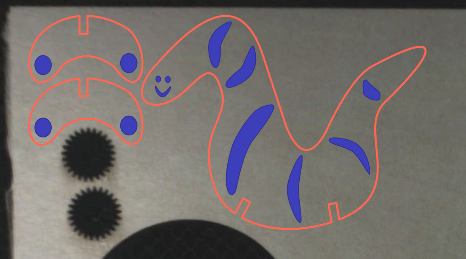
Check the process tiles in the left sidebar to ensure each operation is correct
- Body outline = Cut
- Body decoration = Engrave
- Legs outline = Cut
- Legs decoration = Engrave
If the process type is not correct, click on the process tile and select the process that you want used.
Then set the order of operations. The recommended order of operations is:
- Engrave and score operations first
- Inner cut operations
- Outer cut operations
Use the two lines at the bottom of each process tile to click+drag each tile into the correct order.
¶ Cut the Design
Make sure the filter box ventilation system is running before starting the job.
- Click the “Print” button in app.glowforge.com
- Once the button on Glowforge is flashing, press it to start the job.
- Allow Glowforge to perform all operations.
Tip: stay with it to monitor for problems!
- Allow 1 minute of cool down/exhaust time before opening the lid and removing the pieces.
- Remove your design.
Wait 10 minutes before turning off the filter box to allow adequate time for fume extraction.
¶ Assembly
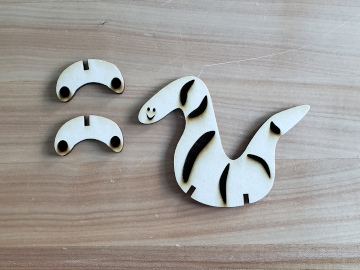
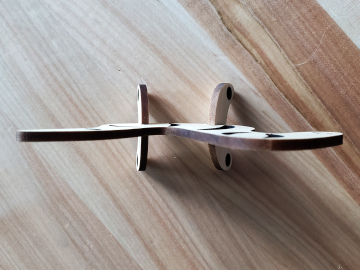
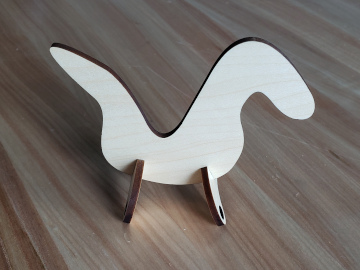
Proofgrade materials have a protective film on the surface which should now be peeled off. Use a weeding tool from the vinyl cutting supplies if needed to pick up the edge of the film. After the film has been removed from both sides of all of the pieces, slot the leg and body pieces together. Now it should stand up on its own!
If the pieces don’t fit together (too snug) use a craft knife, file, or sandpaper to slightly enlarge the slots. It may take as little as scraping the soot off the inside of the slot.
If the pieces don’t fit together (too loose), cut out tiny rectangles of paper and glue them into the slots to take up the slop.
OR: go back to your design in the vector art software, change the size of the slots to fix the problem, and cut out your critter again!

¶ Before you go
The Glowforge is a shared tool in a shared space. It is important to clean up in order to keep the space and tools functioning their best and to make sure everyone gets the best results possible.
- Remove everything from the Glowforge, including scrap pieces.
- Empty the crumb tray and replace it in the machine.
- Clean up your workspace on the table. Put tools back where they came from. Wipe up any spills.
If you’ll want to make it again (or just keep the design for later!), save the design to a personal USB drive or cloud storage account.
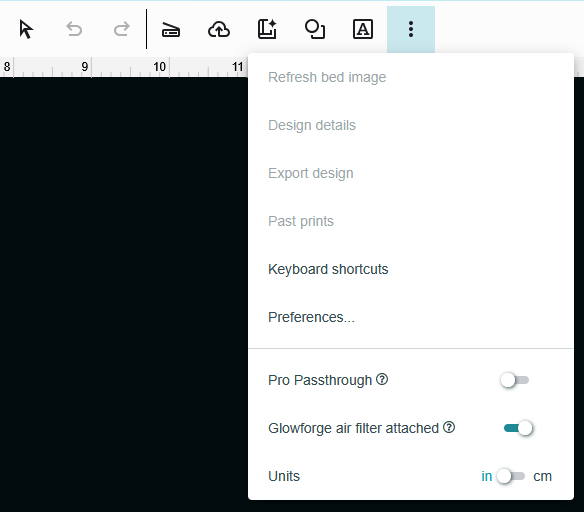
- Go to the center toolbar
- Click the three dots at the end
- Click export design
- The computer will download the design or it will ask you where to save it to.
- Open Works computers are frequently refreshed, meaning that files are deleted from them, and so they are not a good place to store files. Move the downloaded file to a USB key or to a cloud storage account such as Google Drive.
