¶ Description
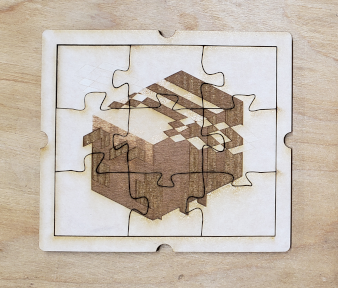
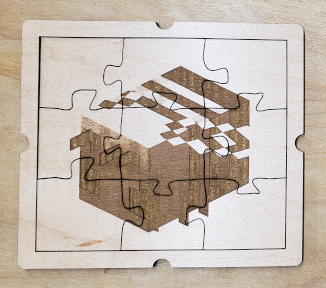
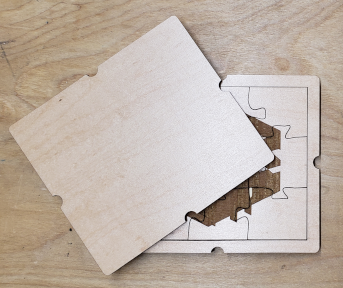
In this project you’ll create a small jigsaw puzzle that fits into a tray for storage and transportation.
¶ Materials and Tools
- Proofgrade Acrylic sheet or Plywood
- Acrylic glue or wood glue (to match your material)
- A raster image to decorate the top of your puzzle
¶ Prior Knowledge
Going into this project, you’re expected to know how to add shapes and text to the workspace and manipulate them using the basic tools provided. You’ll also need to know how to change process types and operation order. If you need more help with those steps or want a refresher, review Project 1 or check out the Quick Guides.
¶ Prepare the design
The puzzle will be about 4 x 4 inches and composed of three layers. The three layers will be the bottom of the tray, the puzzle and the frame of the puzzle, and the top of the tray. The frame of the puzzle will be glued to the bottom of the tray. Notches in the sides of each layer will be used to hold a rubber band to secure the lid of the tray during travel.
¶ Puzzle Layer
Find an image to decorate the top of your puzzle. You can use one of your own photographs or other artwork you’ve made. Or, you can search online for it. Check out the guide “An Introduction to Copyright” for more help!
- The image needs to be as big or bigger than the intended size of the puzzle in order to avoid artifacts from resizing the image, if using a raster image.
- Vector images can be any size.
Download the image, if using one found online.
Now, prepare the image for laser engraving. Use an image editor such as GIMP, Adobe Photoshop, or a tool of your choice.
- It is best for the image to be in black and white or greyscale as laser cutters cannot engrave colors.
- The image should be simplified in order to make it engrave more quickly and be more visually appealing. Simplification can include:
- Removing the background
- Converting it from color to black and white or greyscale
- Reducing the number of grey tones–most images have 256 colors in them but engraved images work best with 8 or fewer grey tones
- Using a ‘Trace’ tool to convert it to a vector image
In the example below, notice that the bee has a limited color palette but those colors include areas that are nearly white to areas that are nearly black. In the next image, the bee has been engraved but the film has not been removed from the material. The really light areas of the bee have engraved into the film but not all the way through. In the third image, the film has been removed, taking the lightly engraved areas with it and removing some of the detail. Also notice that the darkest areas of the bee engraved deeper into the material than areas with mid-tones but they don’t appear darker than the mid-tones, which obscures some detail.
Original, colored image. Engraved image, film not removed. Engraved image, film removed.

Drag and drop image from where you downloaded it into app.glowforge.com. Resize the image to a little bit smaller than you want the total size of the puzzle, about 3 x 3 inches to 4 x 4 inches. It does not have to be square.
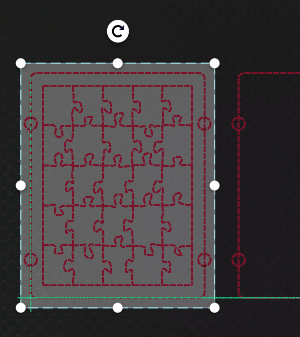
Select the image to get the toolbar on the right side. Use the Template tool  to get the Puzzle Maker tool
  .
.
- Set the number of rows and columns that you want. The number of rows multiplied by number of columns gives the total number of pieces in the puzzle.
- Set padding to however wide you want the frame to be on each side of the puzzle
- Turn on Add Frame
- Make sure that Keep Original Artwork is on
Click Create Puzzle. It will take a little time to generate the puzzle pieces.
Tip: Group the puzzle and image together to prevent them from moving out of alignment.
¶ Tray Top and Bottom
The tray top and bottom are the same size and shape as the puzzle. Circles will be used to create the notches that will guide the rubber band that will hold the stack together. The Reposition and Resize Selected artwork tool will be used to precisely position the circles around the tray top and bottom to ensure that the pieces come out symmetrical.
When the puzzle generated, another rectangle the size of the puzzle should have generated alongside it. If it didn’t, add a rectangle and make it the same size as the puzzle or copy the outline of the frame of the puzzle.
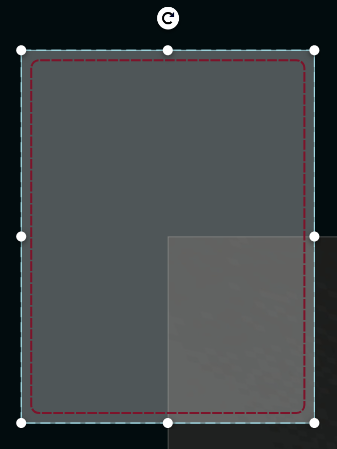
- Use the Reposition and Resize Selected artwork tool to move the rectangle to X = 0, Y = 0.
- This may put it out of view. Use Ctrl+scroll to zoom in and out until you can see it.
Tip: app.glowforge.com uses the center of an object to position it.
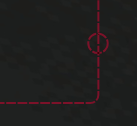
Add a circle. Change its size to 0.25”. Copy and paste it three more times to create a total of four circles.
Now we will position the circles around the rectangle.
- Check the dimensions of the rectangle. Divide the width by 2. Divide the height by 2.
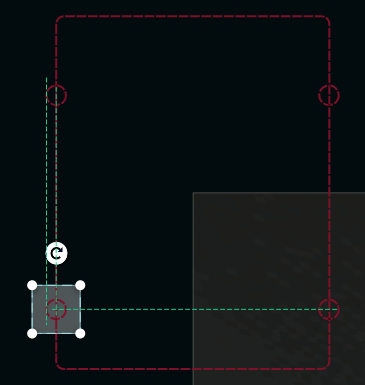
- Select a circle. Using the Reposition and Resize Selected artwork tool to move the rectangle to X = width/2 and Y = height/2. This will position it right at the corner of the rectangle.

- Tweak the Y number until the circle is positioned where you want it.
- Now, select another circle. Move it to X=width/2 and Y= negative the number you found in the previous step.
- Use the snap lines to position the other two circles on the opposite side of the rectangle.
- Group the rectangle and four circles.
- Move the group back over by where the puzzle is.
Create the lid of the tray by copy and pasting the bottom of the tray.
Add the notches to the puzzle frame by making another copy of the tray, centering it over the puzzle, ungrouping the copy, and deleting the big rectangle.
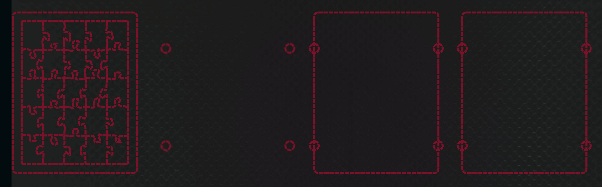
Then move the puzzle frame back into position over the circles. Use the snap lines to guide you.
Group the puzzle and the circles together.
The purpose of this is to ensure that the notches in each layer are perfectly aligned.
¶ Load and Identify Material
Make sure that the Glowforge is connected to the computer by checking the upper right corner of app.glowforge.com. It will say Ready next to the Print button if the Glowforge is ready to go.
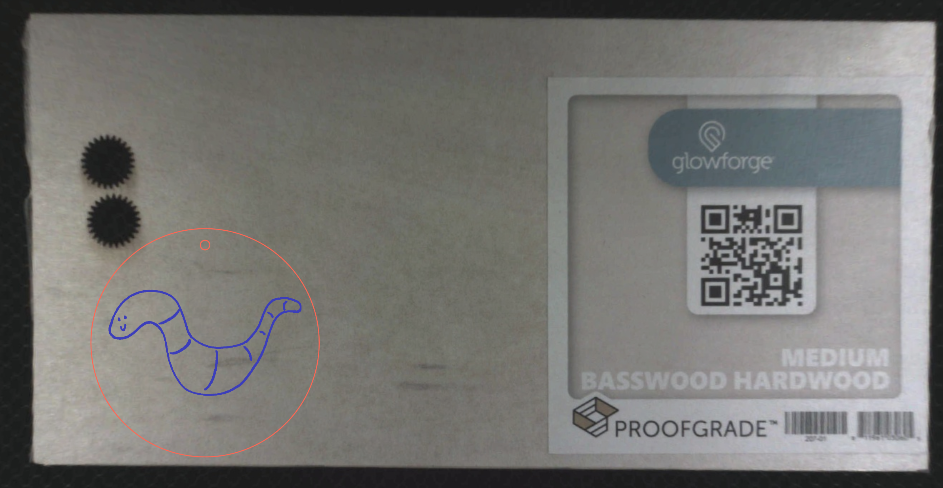
Place a piece of Proofgrade material on the bed of the Glowforge with the QR code facing upwards. The QR code tells the Glowforge what the material is. Close the lid and let the Glowforge scan the QR code.
It is important to set the right material because each material uses different motor speed and laser power settings to produce the best results. If the Glowforge doesn’t know what material it is working with, it can do a poor job.
Tip: if the Glowforge cannot identify the material AND there is a lot of light or glare coming onto the Glowforge, try reducing the amount of light/glare and letting the Glowforge try to identify the material again. If that doesn’t work, you can always manually set the material type.
Tip: if the Glowforge cannot identify the material, select it from the library. In the upper left of app.glowforge.com is a button that says something like “Unknown Material”. Click that to get to the library.
The Glowforge will show a picture of the material on the bed. Once that image has come up, select your design and place it within the boundary of the material. If material has been used before, be mindful to keep it off of the used areas.
Tip: Conserve material by starting in the corner away from the QR code and working your way across the material. Also, it can cut through the QR code and labels.
¶ Set Process Types and Order of Operations
The process type, or operation type, is what the machine does to the workpiece as it moves. If you were drawing a line, the process type would be if you were using a pen or pencil or marker or some other tool to create the line.
Check the process tiles in the left sidebar to ensure each type for each part of the design is correct:
- Outline of the puzzle = Cut
- Outline of the backing piece = Cut
- Image on puzzle = Engrave
- Other shapes as appropriate
If the process type is not correct, click on the process tile and select the process that you want used.
Then set the order of operations. The recommended order of operations is:
- Engrave and score operations first
- Inner cut operations
- Outer cut operations
Use the two lines at the bottom of each process tile to click+drag each tile into the correct order.
¶ Cut the Design
Make sure the filter box ventilation system is running before starting the job.
- Click “Print” button in app.glowforge.com
- Once the button on Glowforge is flashing, press it to start the job.
- Allow Glowforge to perform all operations.
Tip: stay with it to monitor for problems!
- Allow 1 minute of cool down/exhaust time before opening the lid and removing the pieces.
- Remove your design.
Wait 10 minutes before turning off the filter box to allow adequate time for fume extraction.
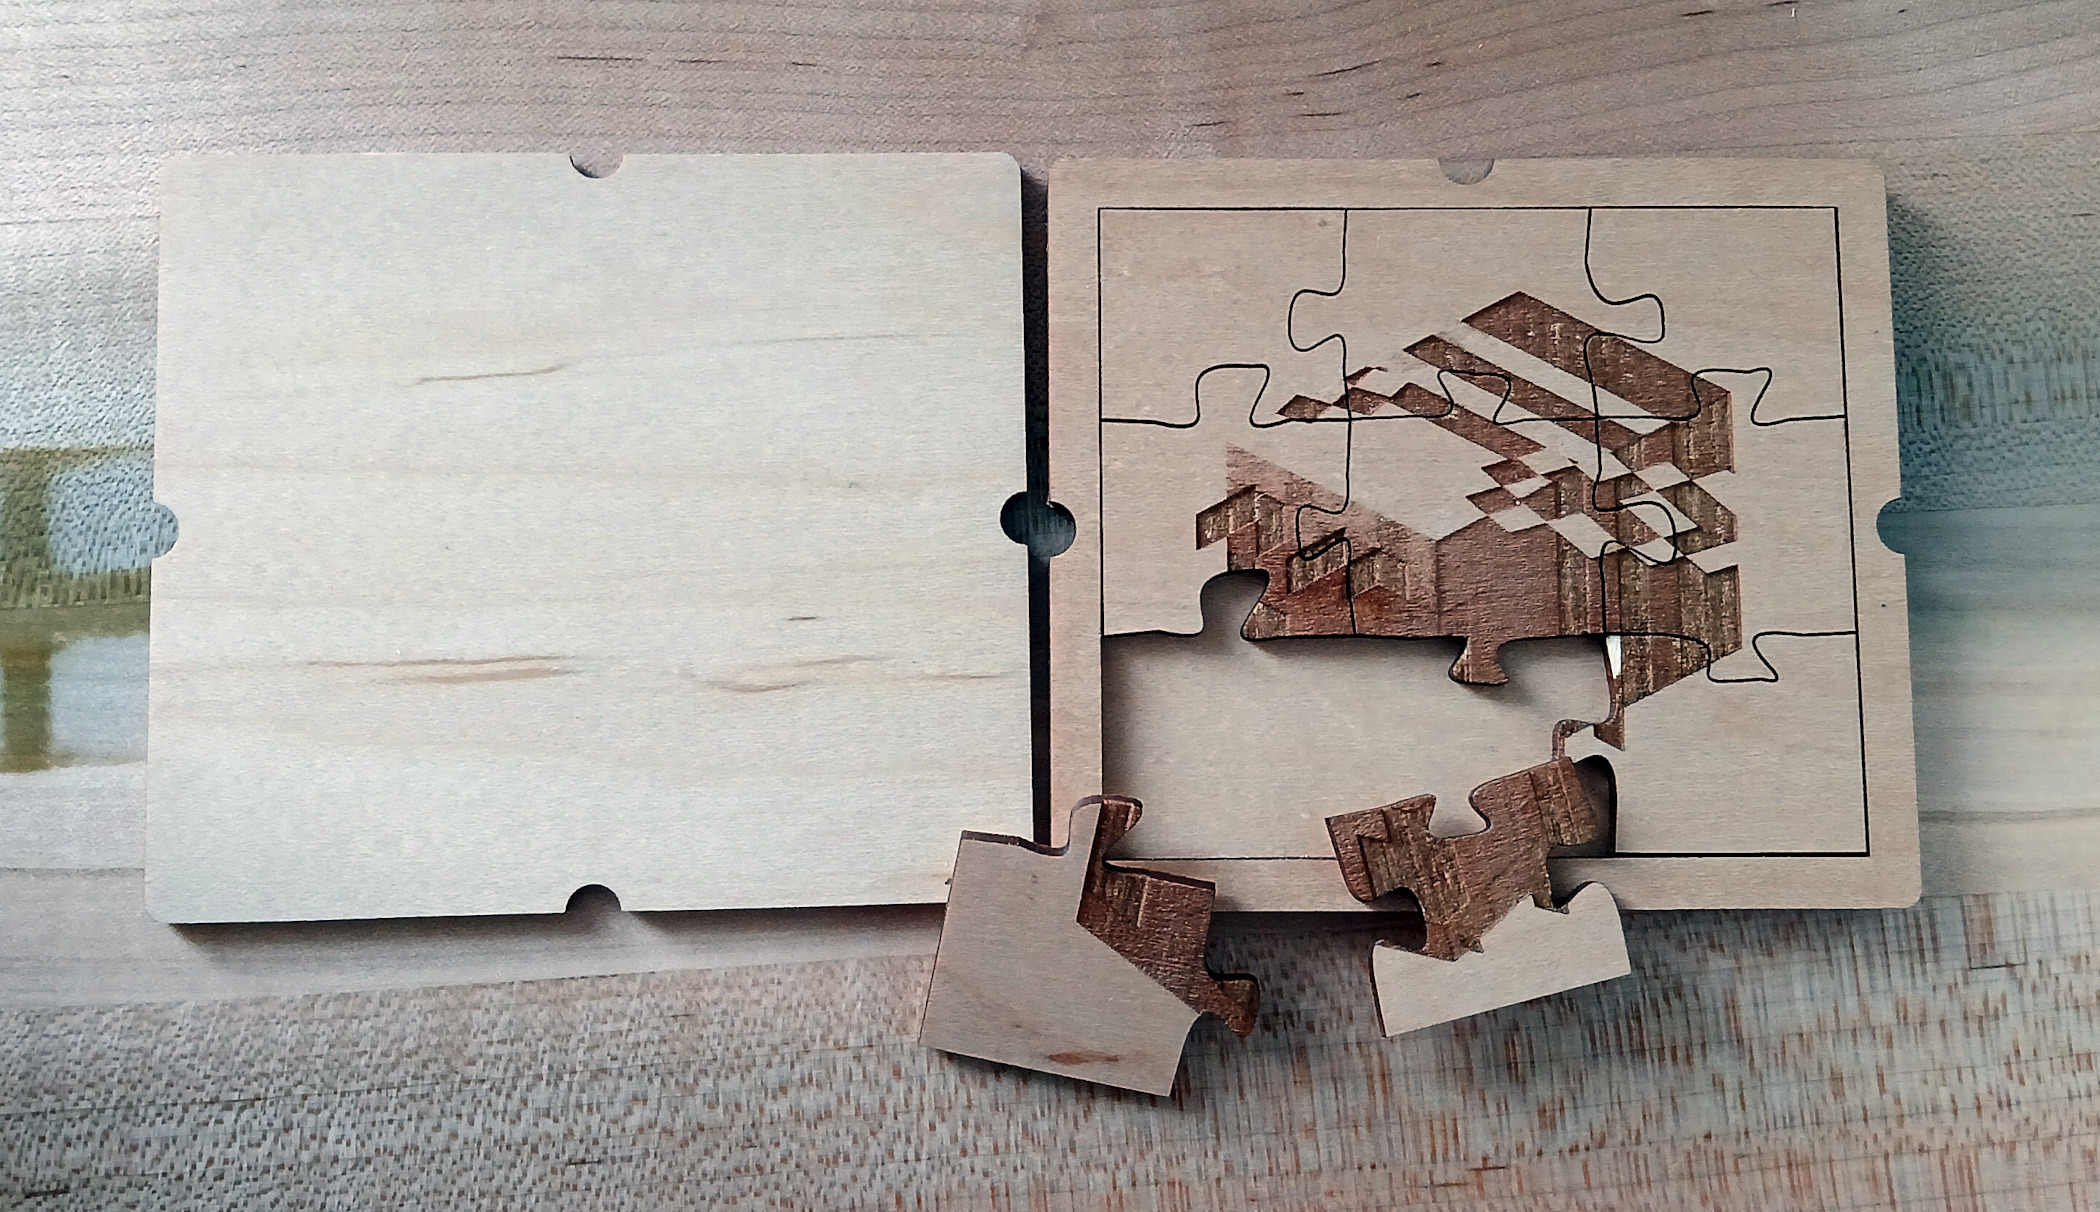
¶ Assembly
Remove the film from the tray parts, frame, and puzzle pieces.
Do a ‘dry fit’ of the frame and the bottom of the tray by aligning the pieces and making sure that the edges and notches line up neatly. Test placing a rubber band around the pieces.
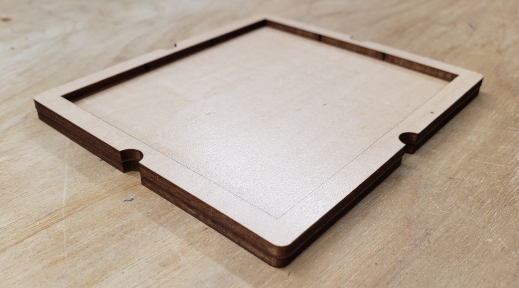
Separate the pieces, making sure to keep track of which side of the frame goes against the bottom of the tray. Put a line of glue around the frame on that side. Press the two pieces together, making sure that they’re aligned. Hold for a moment to give the glue a chance to set, then put the rubber band in place to hold the pieces securely while the glue finishes drying.
Once the glue is cured, you can do the puzzle and put the lid on! The rubber band is there to help keep the lid on.
¶ Before you go
The Glowforge is a shared tool in a shared space. It is important to clean up in order to keep the space and tools functioning their best and to make sure everyone gets the best results possible.
- Remove everything from the Glowforge, including scrap pieces.
- Empty the crumb tray and replace it in the machine.
- Clean up your workspace on the table. Put tools back where they came from. Wipe up any spills.
If you’ll want to make it again (or just keep the design for later!), save the design to a personal USB drive or cloud storage account.
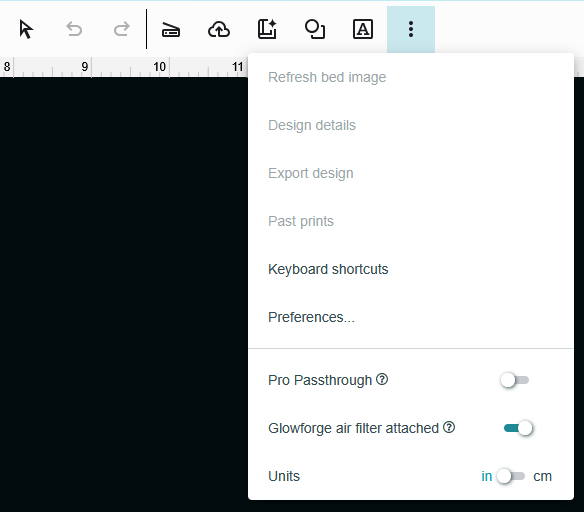
- Go to the center toolbar
- Click the three dots at the end
- Click export design
- The computer will download the design or it will ask you where to save it to.
- Open Works computers are frequently refreshed, meaning that files are deleted from them, and so they are not a good place to store files. Move the downloaded file to a USB key or to a cloud storage account such as Google Drive.