¶ Description
In this project you will use the shape library and a drawing of your own to create a keychain or luggage tag and send it to the Glowforge.
¶ Materials and Tools
Proofgrade Acrylic or Plywood sheet
¶ Prepare the Design
Open app.glowforge.com and choose “Create a new design” → “Create a Blank Design”
¶ Outline and Keychain Ring Hole
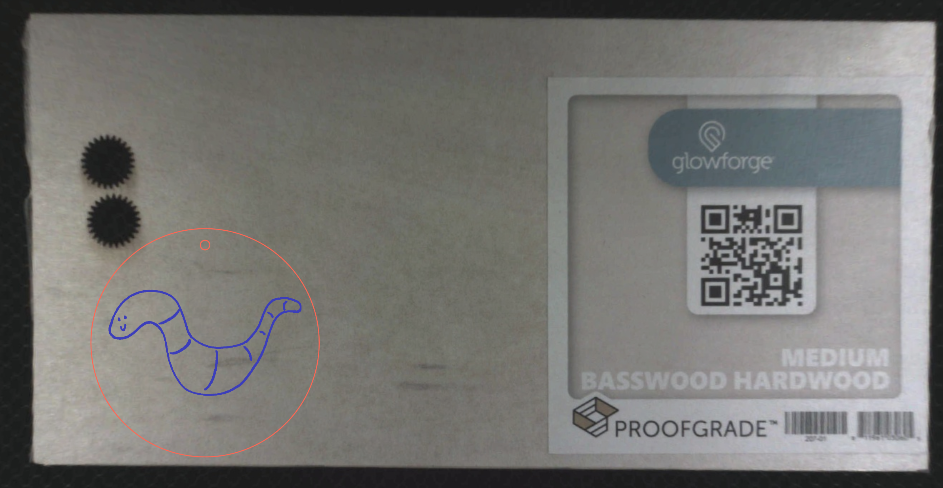
Use the shape library to create the outline of your keychain and the holes for the keychain ring or elastic band.
- Recommended outline size: 1.75” x 3”, not more than 3” on any one side
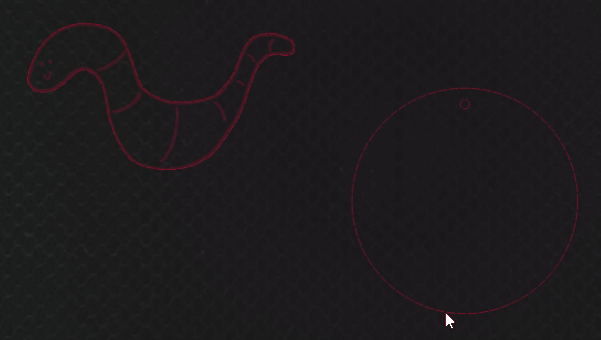
- Keychain ring hole size: 0.125” diameter (1/8th inch)
Tip: To center the hole for the keychain ring, click-and-drag the 0.125” diameter circle over the outline. A green line will briefly appear and the small circle will briefly ‘stick’ to it. That green line indicates the center of the outline and the small circle will stick to it with either the edge or the center. Release the mouse when the small circle is where you want it.
Tip: That green line is called a snap line and it will appear whenever you drag a shape over the midpoint of another shape. Snap lines exist to help you precisely align things without having to measure.
¶ Use onboard camera to scan drawing into the design
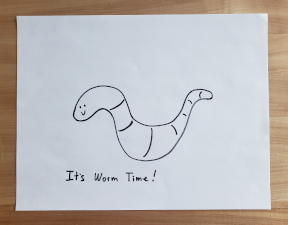
Draw your design on paper. Make sure there is high contrast between the drawing and the paper. This will help the Glowforge see your drawing. For example, use a black marker on white paper.
When done, place your drawing on the bed of the Glowforge. The drawing should be facing upwards. app.glowforge.com will provide a view of the drawing.
Then use the Capture from Camera button in the top menu. After a moment it will show your drawing again and provide instructions for what you need to do.

It will ask you to draw a box around the artwork that you want to trace. Click-and-drag to draw a box around the part of the drawing that you want to use in your design. You don’t have to select everything you drew if you don’t want to use all of it.
Then it will ask you to click on the white areas that you want to cut away. This means that if you want to cut out a shape, click outside the outline of the shape. If you want to make an object with a hole in the middle, click the area inside the hole. You can click multiple areas.
Then click the Place Artwork button in the upper right corner.
app.glowforge.com will add the artwork to the design. It will also add process tiles to the left sidebar with recommended processes (cut or engrave). You can change the process types if you like, and we will go over process types more later. You can move the artwork around, resize it, and so on.
Once the artwork is placed, remove the drawing from inside the Glowforge.
Move your drawn element to inside the border of the keychain. Resize it to make it fit. Make sure it is not sticking out over the edge or overlapping the key ring hole. Try using the green snap lines to get it centered.
Tip: your drawn element may have a cut operation and an engrave operation applied to it. In order to prevent the drawing from being cut out, the cut operation needs to be removed. You can either set the process type to Ignore, or remove the cut operation entirely. To remove it entirely, select the drawn element, then ungroup it by right clicking and selecting Ungroup. Now you can select and delete just the cut operation.
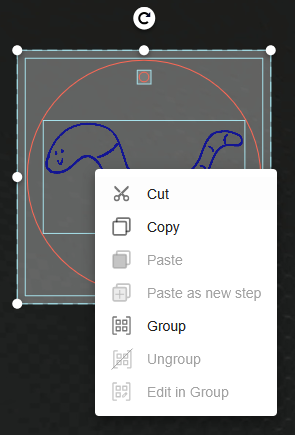
Tip: if you’re making a lot of these tags, you will want to group all of the parts of the design together in order to prevent Smartfit (or you!) from changing the alignment. Select all of the parts of the design, then use Ctrl+g or Right click on the selection and then select Group. Now all of the elements will move together.
¶ Load and Identify Material
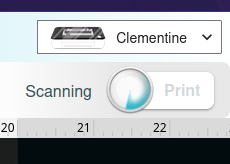
Make sure that the Glowforge is connected to the computer by checking the upper right corner of app.glowforge.com. It will say Ready next to the Print button if the Glowforge is ready to go.

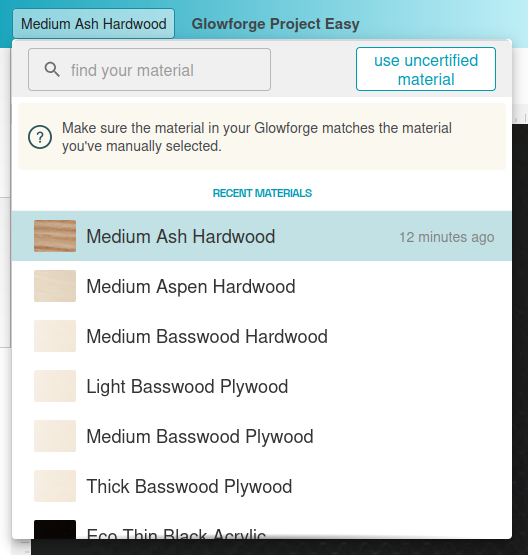
Place a piece of Proofgrade material on the bed of the Glowforge with the QR code facing upwards. The QR code tells the Glowforge what the material is. Close the lid and let the Glowforge scan the QR code.
It is important to set the right material because each material uses different motor speeds and laser power settings to produce the best results. If the Glowforge doesn’t know what material it is working with, it can do a poor job.
Tip: if the Glowforge cannot identify the material AND there is a lot of light or glare coming onto the Glowforge, try reducing the amount of light/glare and letting the Glowforge try to identify the material again. If that doesn’t work, you can always manually set the material type.
Tip: if the Glowforge cannot identify the material, select it from the library. In the upper left of app.glowforge.com is a button that says something like “Unknown Material”. Click that to get to the library.
The Glowforge will show a picture of the material on the bed. Once that image has come up, select your design and place it within the boundary of the material. If material has been used before, be mindful to keep it off of the used areas.
Tip: Conserve material by starting in the corner away from the QR code and working your way across the material. Also, it can cut through the QR code and labels.
¶ Set Process Types
The process type, or operation type, is what the machine does to the workpiece as it moves. If you were drawing a line, the process type would be if you were using a pen or pencil or marker or some other tool to create the line.
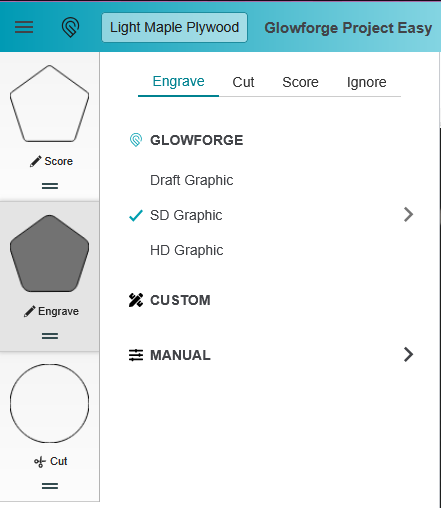
The process types are set using the sidebar on the left. Each tile in the sidebar represents the shape and process type.
- Click on the tile. More options will appear.
- Select the process type from Engrave, Cut, Score, or Ignore.
Check the process tiles in the left sidebar to ensure each type for each part of the design is correct:
- Small Circle (keyring/luggage tag) = Cut
- Hand drawn element = Engrave
- Keychain/Tag Border = Cut
If the process type is not correct, click on the process tile and select the process that you want used.
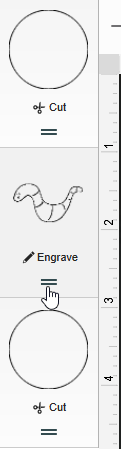
¶ Setting Order of Operations
Setting the order of operations is an important part of finalizing your design. The order is important because cut operations create kerf, space caused by burning away material, which can cause the workpiece to move when additional operations are applied.
The recommended order of operations is:
- Engrave and score operations first
- Inner cut operations
- Outer cut operations
This order leaves the workpiece as intact as possible for as long as possible in order to reduce the chances of pieces moving around. This order applies even when cutting multiples of the same piece; do all of the engraving first and cut all of the pieces out last.
The order of operations is set using the sidebar on the left.
- Each tile represents the shape and process type.
- Operations at the top of the list will be done first and operations at the bottom will be done last.
- The two lines underneath the process type are used to move the tile around.
- Click-and-drag the two lines to move the tile. Drag up or down. Release the click when the tile is in the desired position relative to the other tiles.
¶ Cut the Design
Make sure the filter box ventilation system is running before starting the job.
- Click “Print” button in app.glowforge.com .
- Once the button on Glowforge is blinking, press it to start the job.
- Allow Glowforge to perform all operations.
Tip: stay with it to monitor for problems!
- Allow 1 minute of cool down/exhaust time before opening the lid and removing the pieces.
- Remove your design.
Wait 10 minutes before turning off the filter box to allow adequate time for fume extraction.
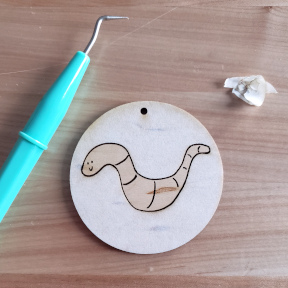
¶ Assembly
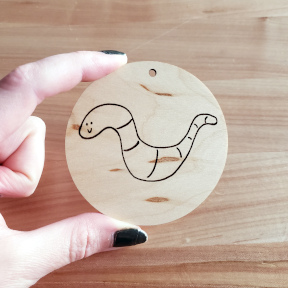
As this is a one piece project there’s not much to assemble. However, the Proofgrade materials have a protective film on the surface which should now be peeled off. Use a weeding tool from the vinyl cutting supplies if needed to pick up the edge of the film. After the film has been removed from both sides of the material, open the keychain ring and put the tag on it.
¶ Before you go
The Glowforge is a shared tool in a shared space. It is important to clean up in order to keep the space and tools functioning their best and to make sure everyone gets the best results possible.
- Remove everything from the Glowforge, including scrap pieces.
- Empty the crumb tray and replace it in the machine.
- Clean up your workspace on the table. Put tools back where they came from. Wipe up any spills.
If you’ll want to make it again (or just keep the design for later!), save the design to a personal USB drive or cloud storage account.
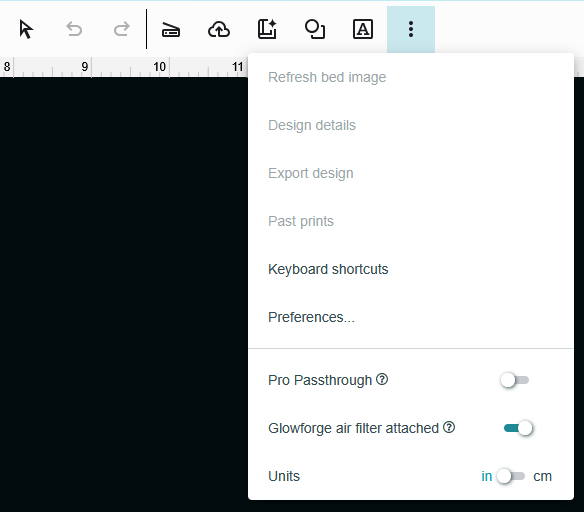
- Go to the center toolbar
- Click the three dots at the end
- Click export design
- The computer will download the design or it will ask you where to save it to.
- Open Works computers are frequently refreshed, meaning that files are deleted from them, and so they are not a good place to store files. Move the downloaded file to a USB key or to a cloud storage account such as Google Drive.