¶ Description
Dye-sub or Dye Sublimation is a multi-step printing process that uses heat to bond dye into a substrate. A dye-sub printer uses a special type of ink that bonds especially well with synthetic fibers when heated.
In this project, you will use a pre-printed image and transfer it to a koozie, getting hands on experience with the heat press and the transfer process.
- Materials and Tools
- Dye sublimation printer
- Dye sublimation transfer paper
- Heat press and heat-safe surface, and a timer if the press is not equipped with one
- An image to print, about 3.5” x 4”. If raster, 300 dpi.
- A koozie or other substrate made with synthetic fibers.
¶ Preparing the Image
Using an image editing software, check and set some properties on your image.
The dye-sub printer cannot print white. The color of the substrate will change how the color of the dye appears. Adjust the colors in your image accordingly.
Raster images (.png, .bmp, .jpg, etc) need to have a resolution of 300 dpi (dots per inch) and dimensions of 3.5” x 4” or smaller. Scale your image appropriately. This will help create a crisp final image.
For more information on the differences between vector and raster image types, check out our guide here.
¶ Printing
The dye-sub printer can use a variety of paper shapes, but is generally set up to use a roll of paper. There are some print settings to check before printing.
- Paper size: to print from the roll, use the 24x4 setting. Otherwise set it up to match the paper you’ve provided.
- Make sure that the scale is set to 100%. It may try to fill the page with your image instead of using the image size.
- Copies per page: if you’re making a bunch of them, use this setting to efficiently use the width of the roll of paper.
- Pages per sheet: keep this set to 1.
- It knows to mirror the image on its own.
Once you have the page set up and the settings double-checked, click Print.
After it prints, it will slice the paper off of the roll for you. Give the ink a minute or two to dry before handling it. The ink could smear or transfer to your hands.
Cut out the printed area so that it is easy to handle during the transferring process.
¶ Transferring the Image
The dye-sub process uses heat and pressure to bond the ink to the fibers of the substrate. When working with heat presses, irons, and other hot tools, be careful to not burn yourself or your worksurface.
- First, set up your work area with a pressing mat or other heat safe surface.
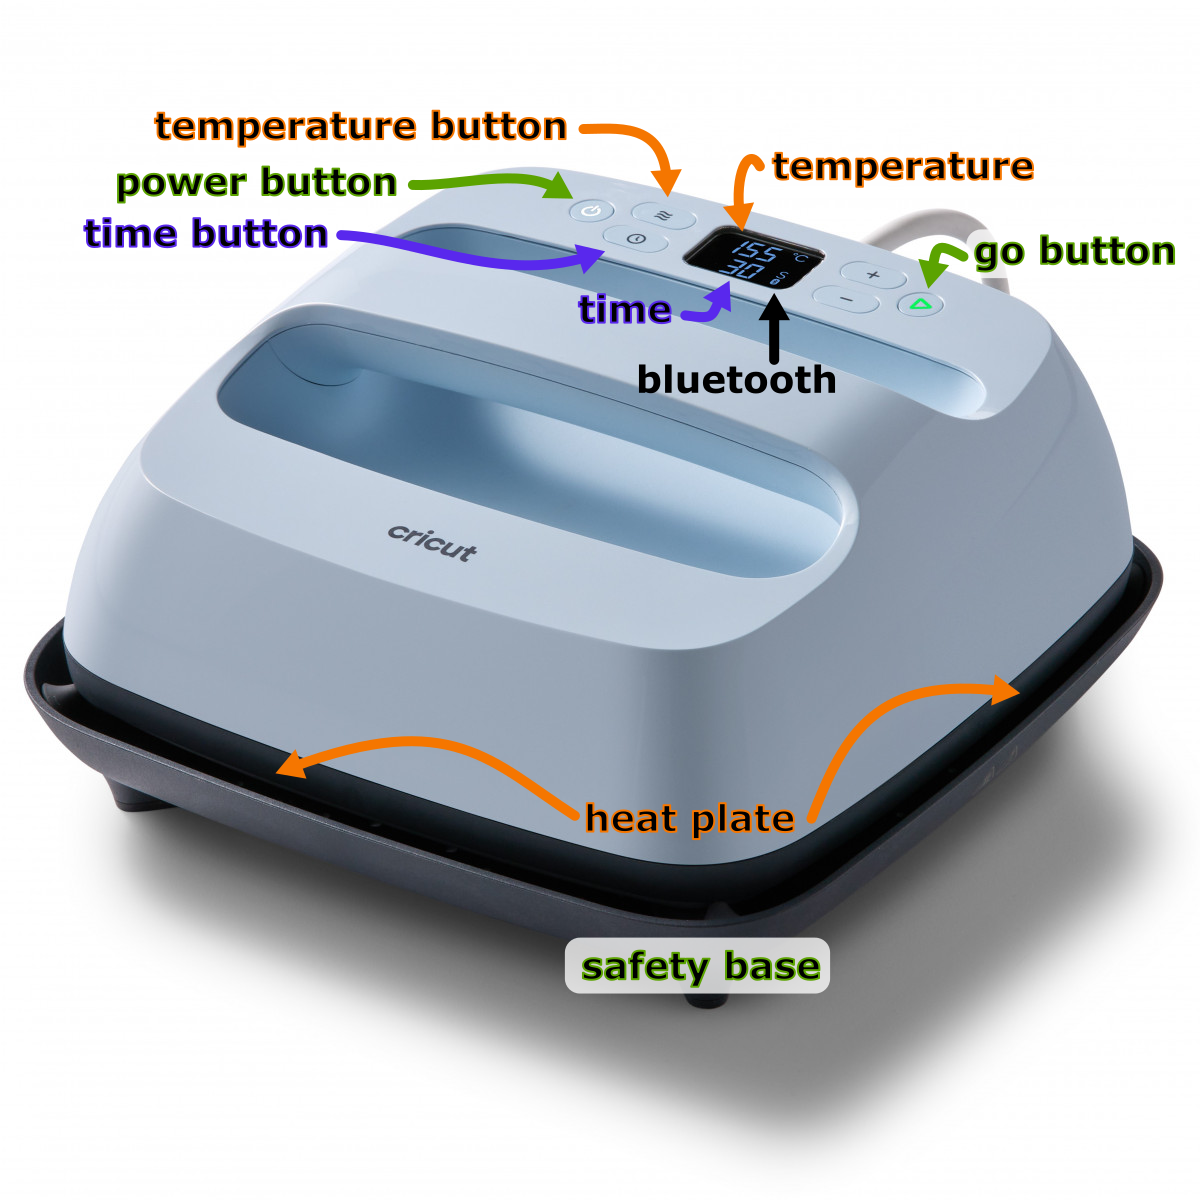
- Get the heat press or iron warming up by setting the temperature. Make sure that the heat press or iron is on a safe surface while it is warming up. If the heat press has a timer, set the timer.
Settings to use for the koozie: 410°F for 45 seconds.
- Place the koozie or other substrate on the pressing mat.
- Place the transfer paper in position on the substrate. The ink side should be down, against the substrate. Look for the ghost of the printing through the paper in order to help you align it.
- When the heat press is ready, move it to the koozie. Place it straight down and avoid wiggling it back and forth in order to produce a clear image. Start the timer.
- When the timer is done, return the heat press to its safe surface. Turn it off if you’re done.
- Discard the transfer paper. Give the substrate a minute to cool so that you don’t burn yourself!
You’re done!